Thank you for taking part in the NotSlot journey!
We invite you to join us in our next chapter:
Unity Pixel Perfect
When we create a Pixel Art game, we want our games’ visuals to remain crisp and sharp at all times. For that, Unity has the Pixel Perfect package.
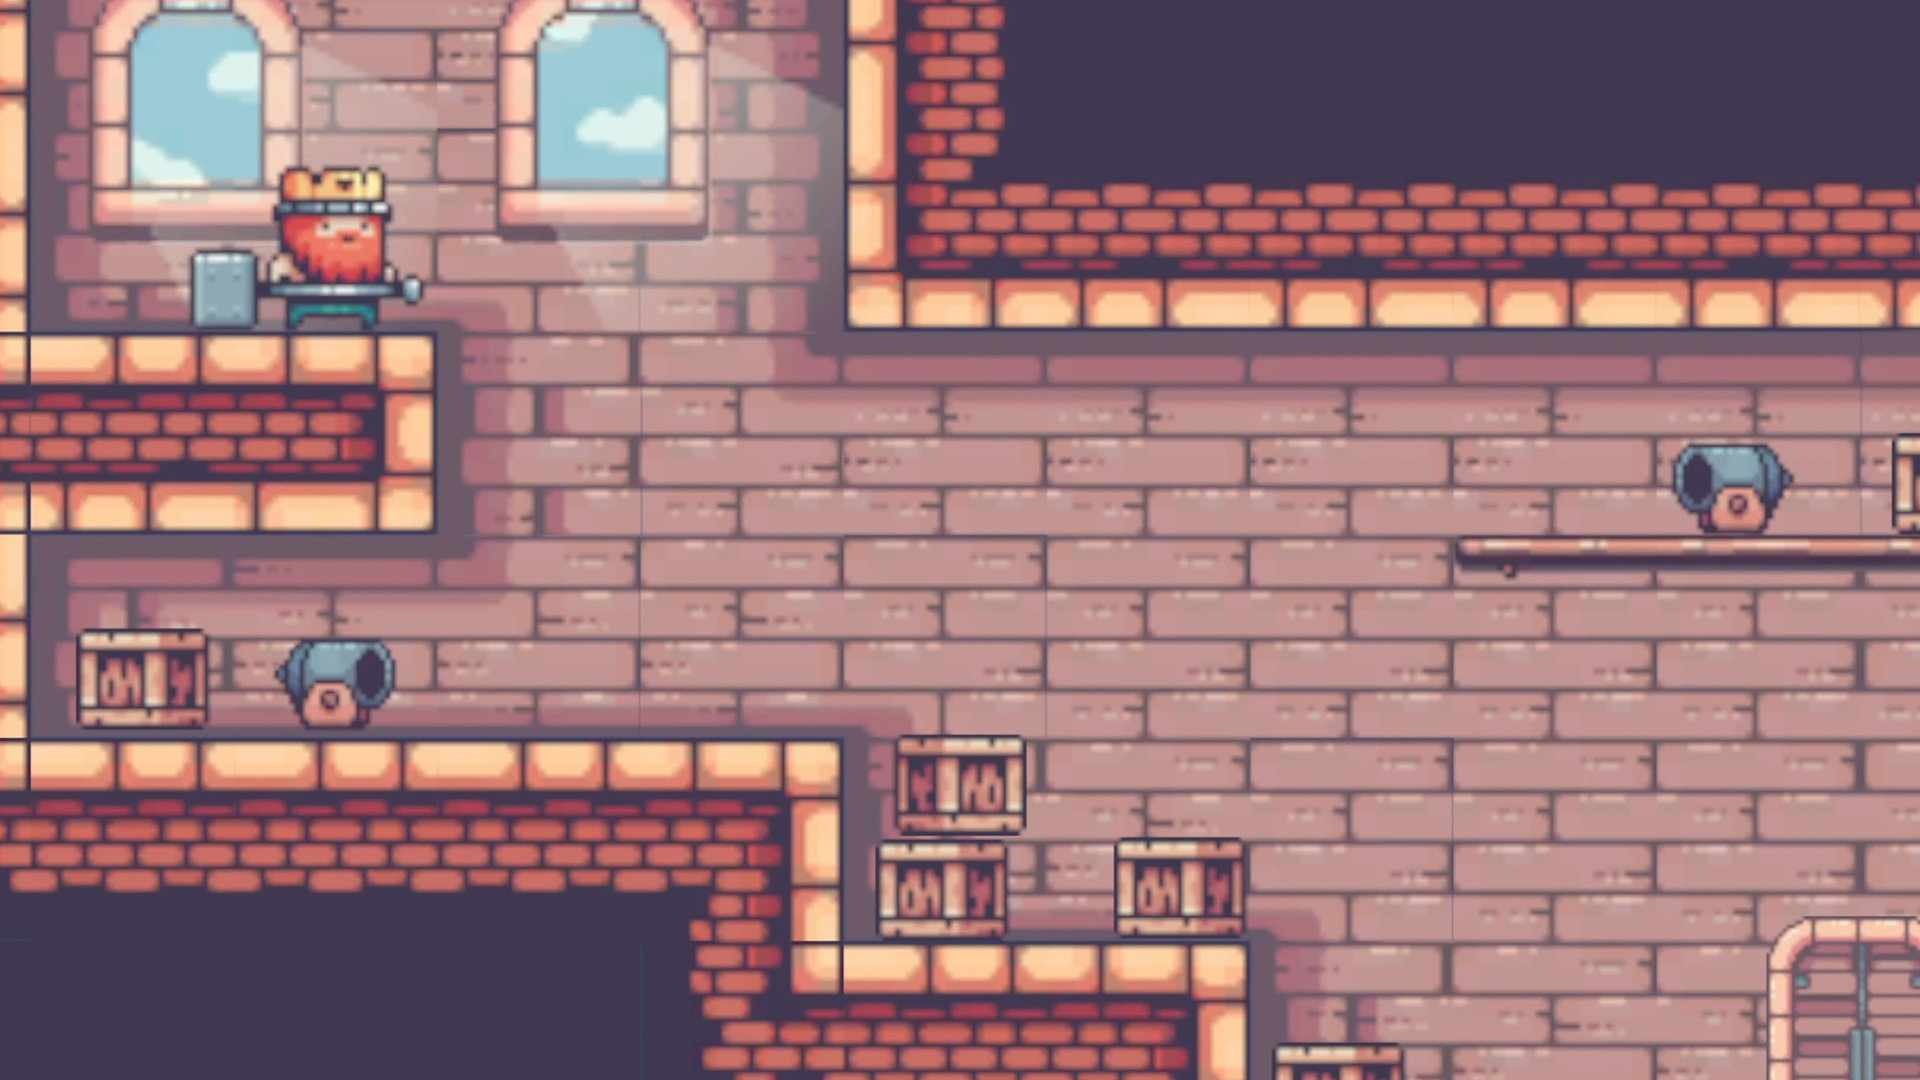
Let’s take a look below at this pixel-art-styled platformer game.
We can notice it has some issues we should tackle, mainly blurry sprites and misalignment with the grid. The solutions are straightforward, but there are a few secrets we must nail to achieve our desired style.
Texture Settings
We start with 3 modifications to the texture assets to ensure precise rendering.
- All textures should share the same Pixels Per Unit value; it determines how many pixels fit inside a single grid unit.
- We also set the Filter Mode to Point, making our texture crisp at any scale.
- Finally, we disable the Compression since we want to maintain color accuracy.
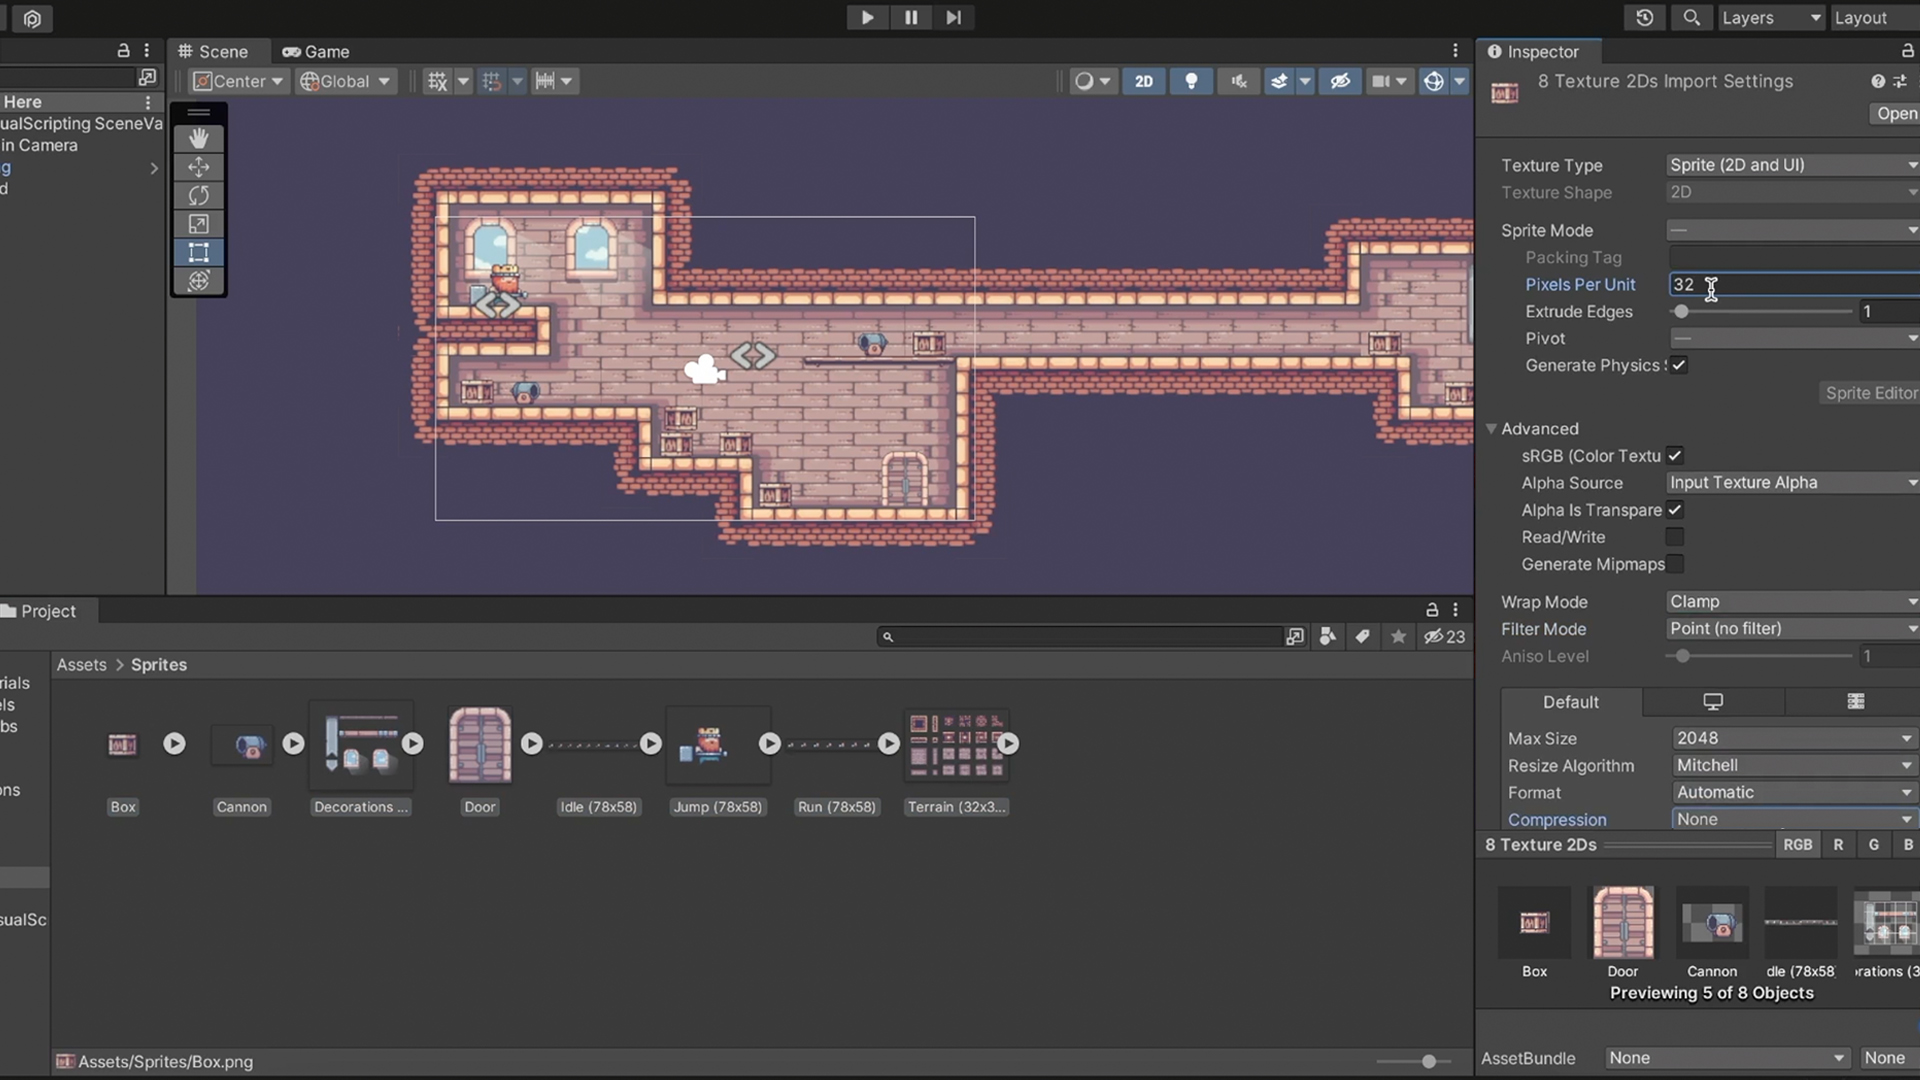
The textures in the project are smaller than 2048 pixels. If you have larger textures, you need to set the Max Size to 4096 or greater to prevent blurry downscaling.
It’s a fantastic time to thank Pixel Frog for the beautiful art.
Pixel Perfect Camera
Once we have finished adjusting the objects, let’s make sure our assets remain stable during motion and stay sharp in different resolutions.
We add to our camera the Pixel Perfect Camera component. If you can’t find it, ensure the 2D Pixel Perfect package is installed.
First, we match the Assets Pixels Per Unit to our textures’ Pixel Per Unit. We also activate Run In Edit Mode to immediately see the component effect without running the game.
At the Reference Resolution, set the resolution the assets are designed for. For a retro look, it’s probably a tiny resolution.
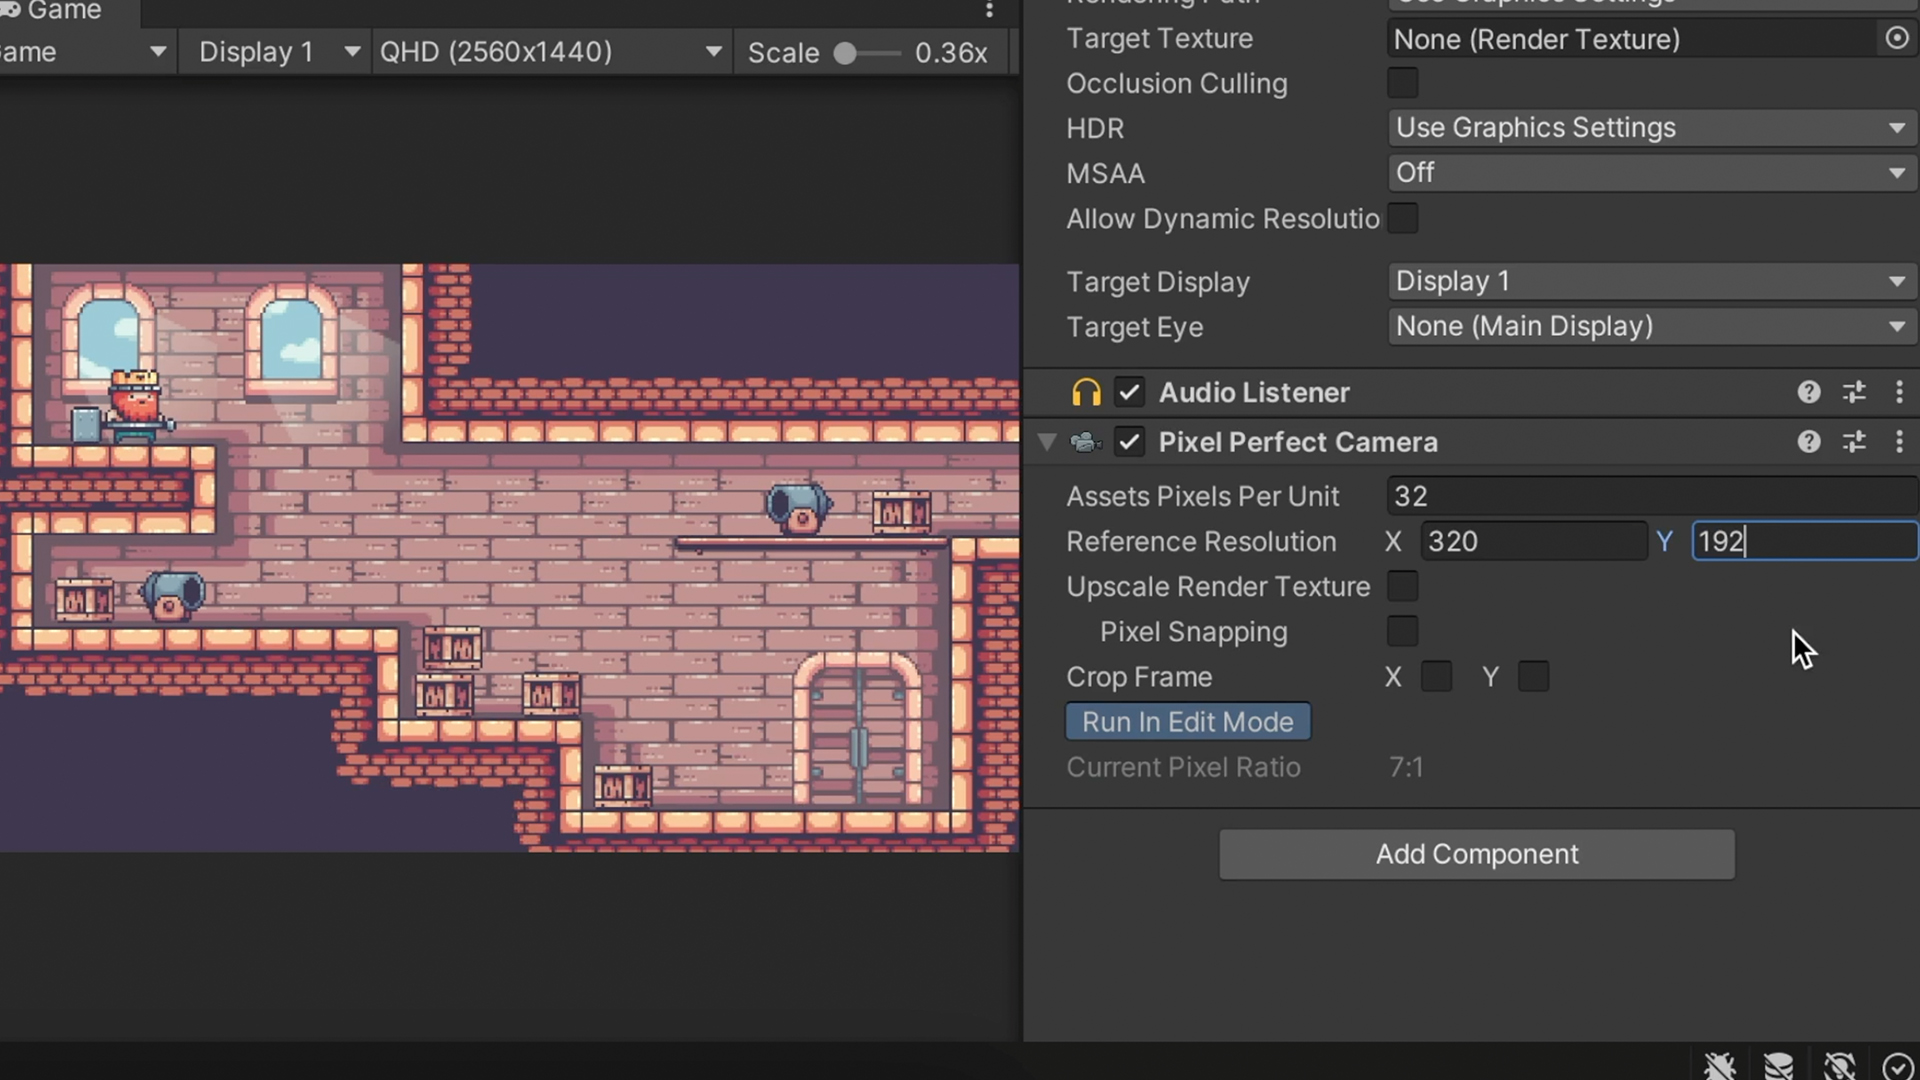
When it comes to the Upscale Render Texture, we have two paths to choose from:
- Without this configuration, Unity will render the scene in a larger resolution near our screen’s resolution.
- If we enable upscaling, Unity will first render the scene at the small Reference Resolution, and only then it will upscale it.
In practice, it determines whether or not lines should adhere to the smaller reference grid or the larger screen’s grid.
When we prefer to not use the Upscale Render Texture, we can still maintain integrity between all sprites and the pixel grid by enabling Pixel Snapping. While the objects themself will move in the world smoothly, the sprites will be rendered precisely with the grid.
Both Pixel Snapping and Upscale Render Texture depends on your game’s style requirements. For example, Celeste’s character snaps to the grid.
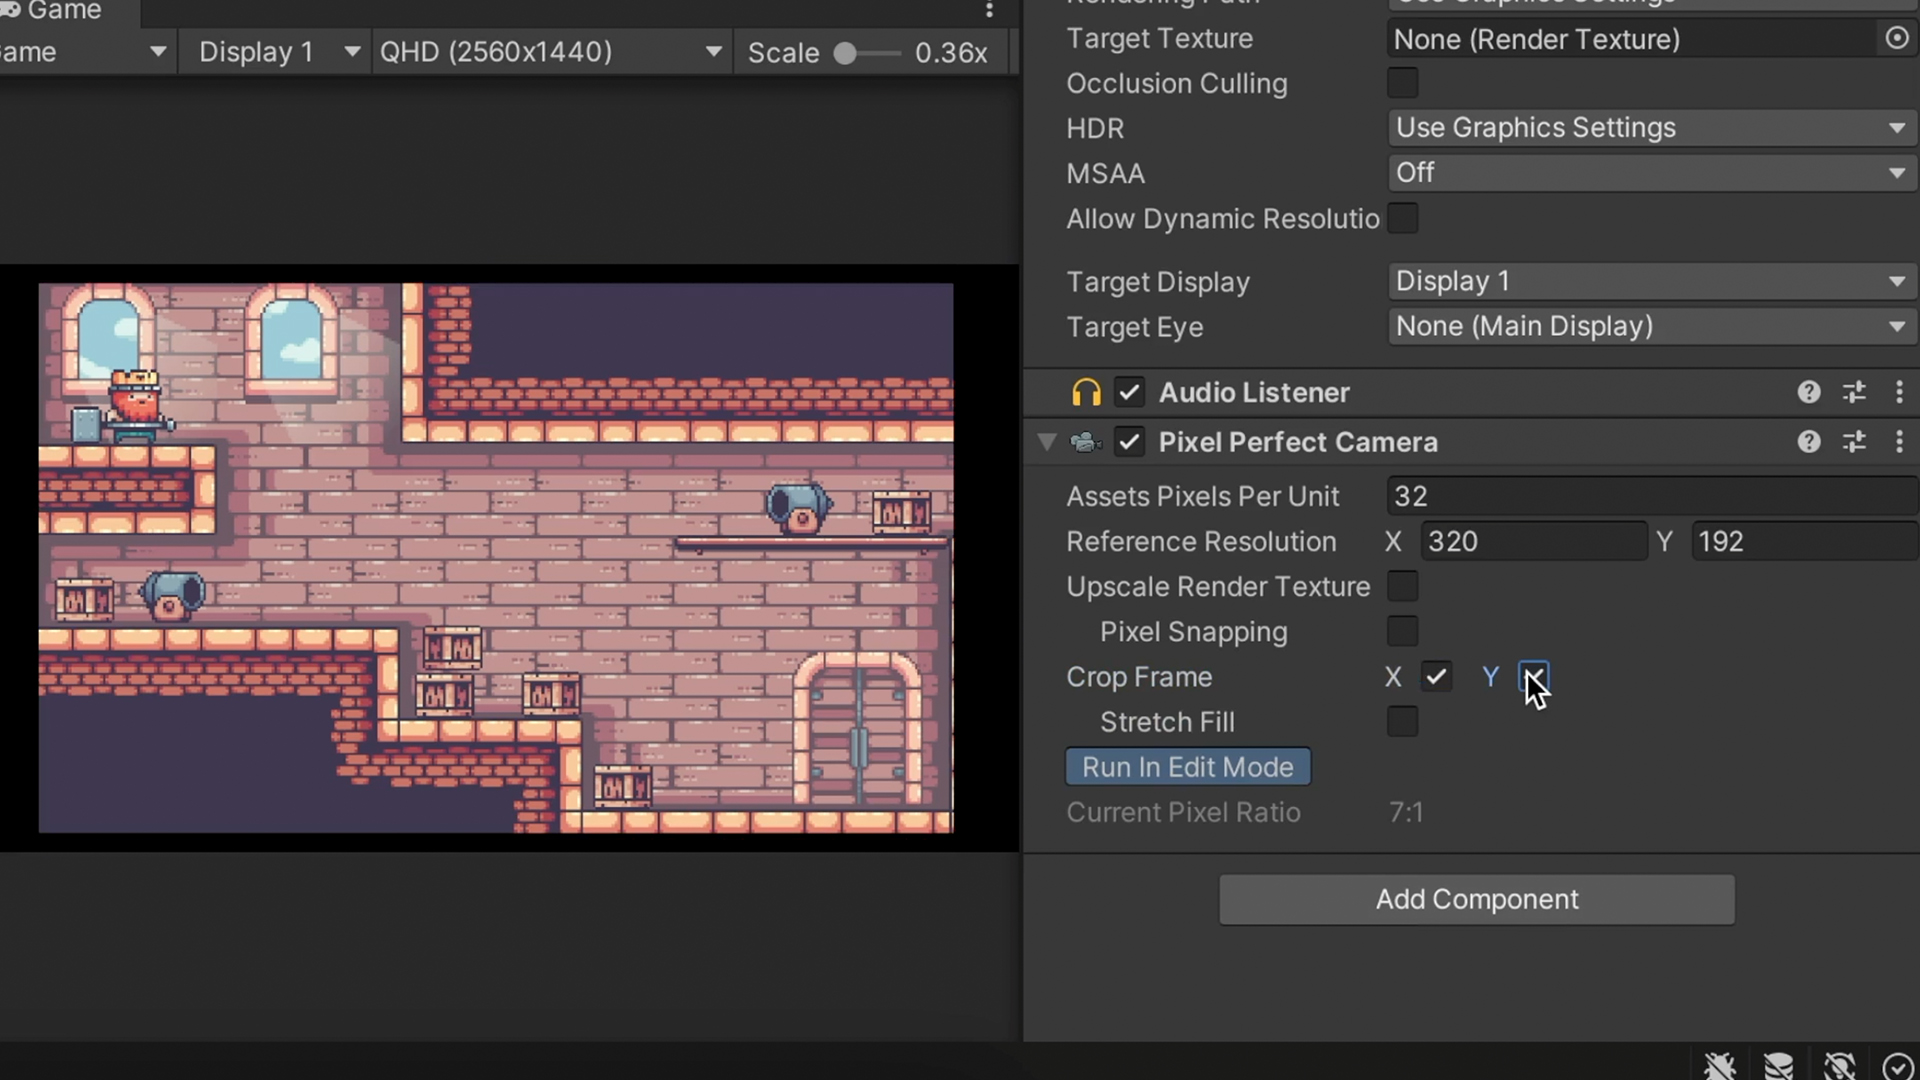
We can also use Crop Frame – it will hide parts of the screen to match the Reference Resolution.
Cinemachine Integration
We can add Cinemachine to this level, but when using the Cinemachine package, its Camera Brain and the Pixel Perfect components fight over controlling the camera’s orthographic size.
Using retro-style visuals doesn’t mean we need to give up on Cinemachine. By adding a CinemachinePixelPerfect extension to the Virtual Camera component, we can still enjoy the benefits of both.
Grid Snapping
Lastly, we have some rebellious objects we should align with the grid. We can try to align them manually, but if we want the pixels to be on the spot, we will need to use Grid Snapping.
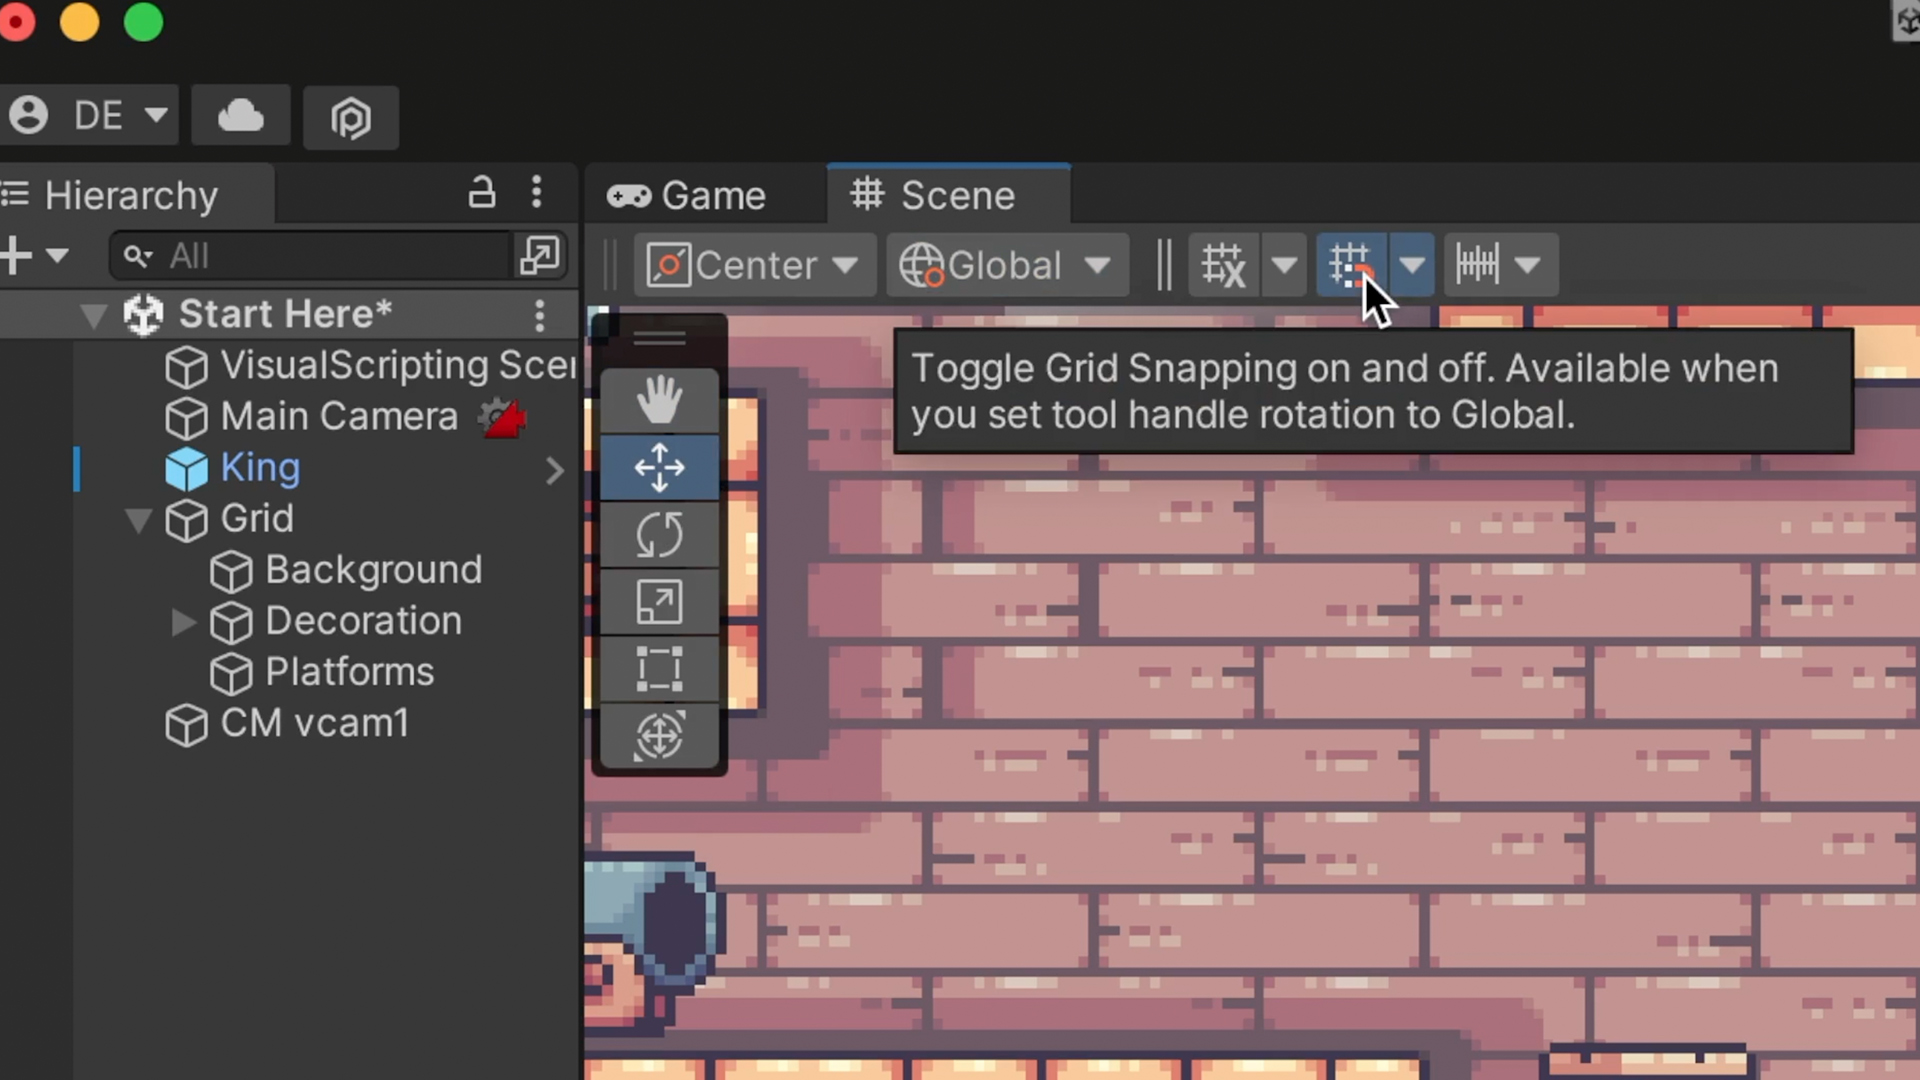
To activate auto-snapping, we use the Move tool, set the Tool Settings overlay to Global, and click on the grid snapping icon.
The object snaps incorrectly, so we will need to change its pivot position.
Pivot Point
In the Sprite Editor window, we set the pivot position to Bottom Center and set the Pivot Unit Mode to Pixels. This will set the Pivot position in pixels and snap it to the pixel corners.
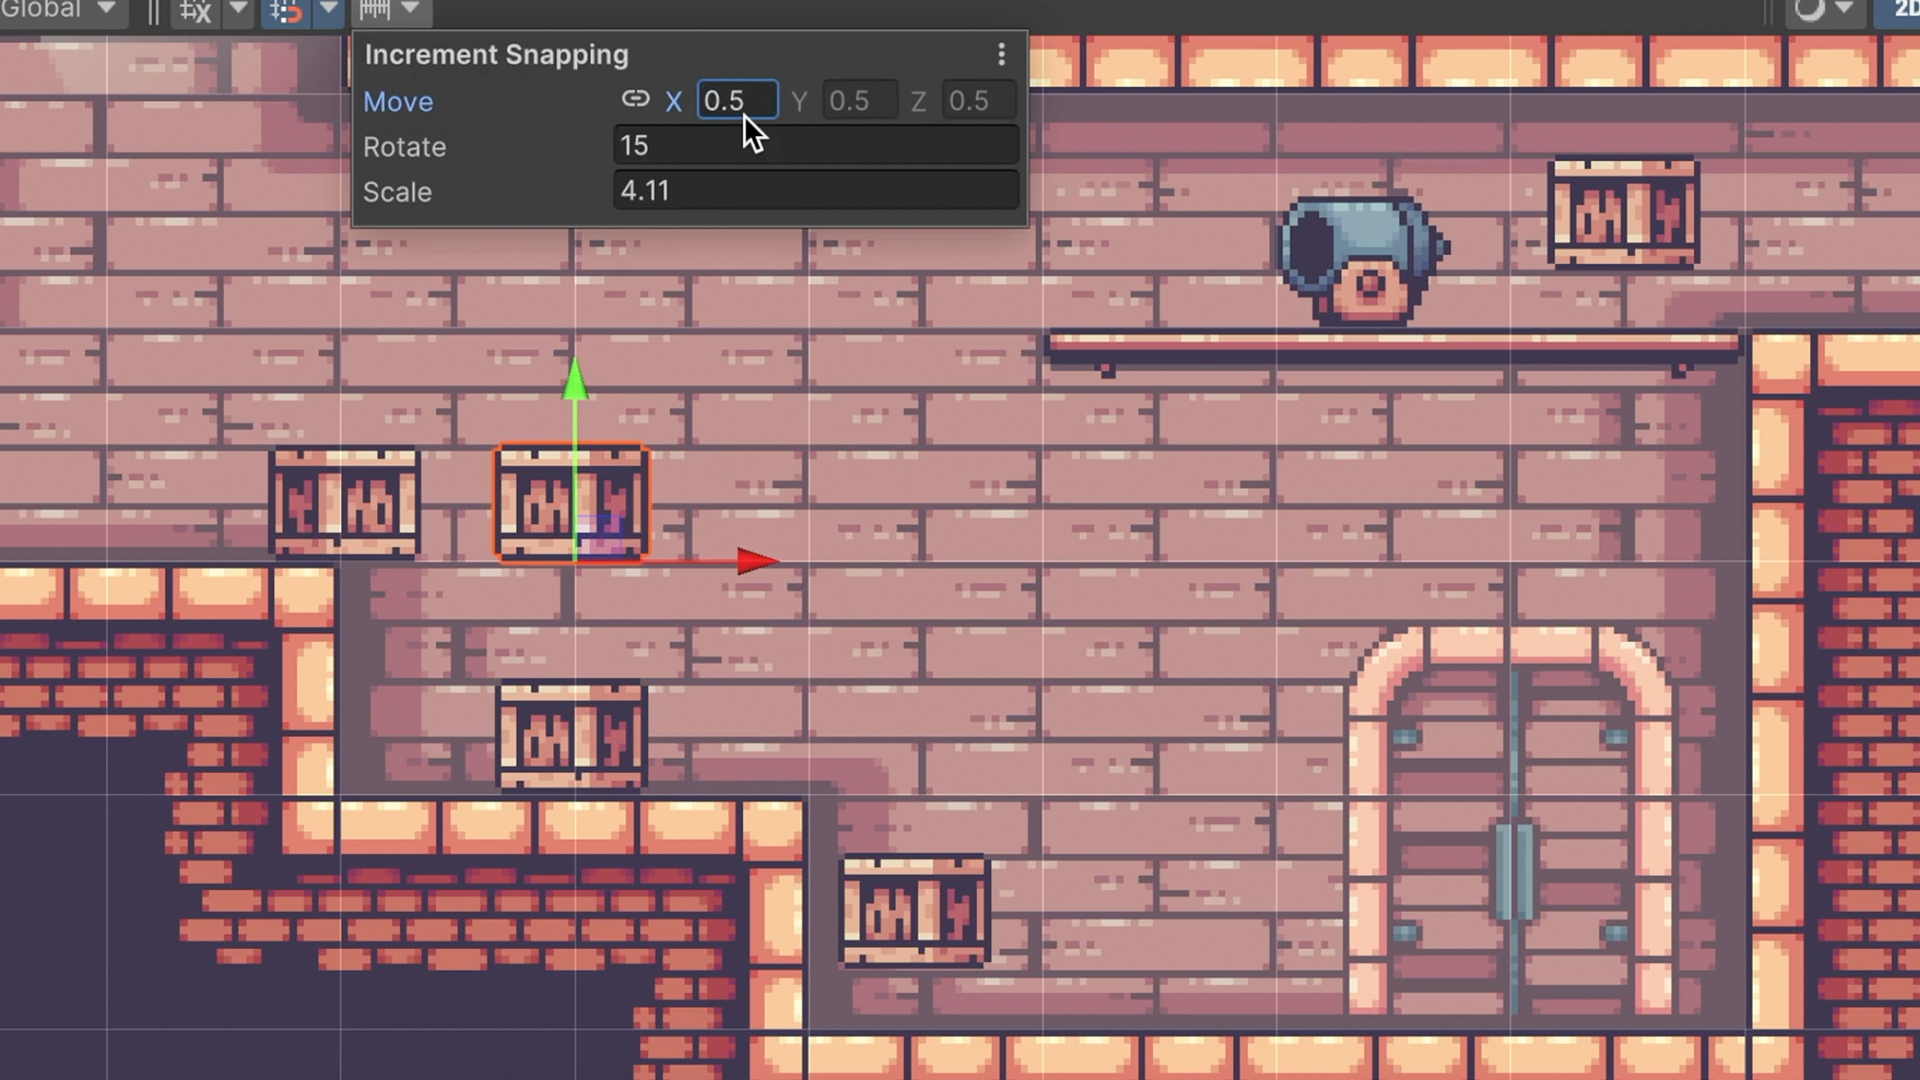
At the scene, we set the Tool Settings overlay to Pivot, and now it snaps perfectly. We can even take it further by setting the Grid Size to 0.5.
