Thank you for taking part in the NotSlot journey!
We invite you to join us in our next chapter:


Unity Tilemap
Tilemap is an all-time classic for creating 2D games.
By the end of this article, you'll assemble a rich 2D Tilemap grid built from dynamic tiles and obstacles; while learning many Unity 2D Tilemap topics such as auto tiling, collision, animated tiles, tile detection, prefab brushes, and more...
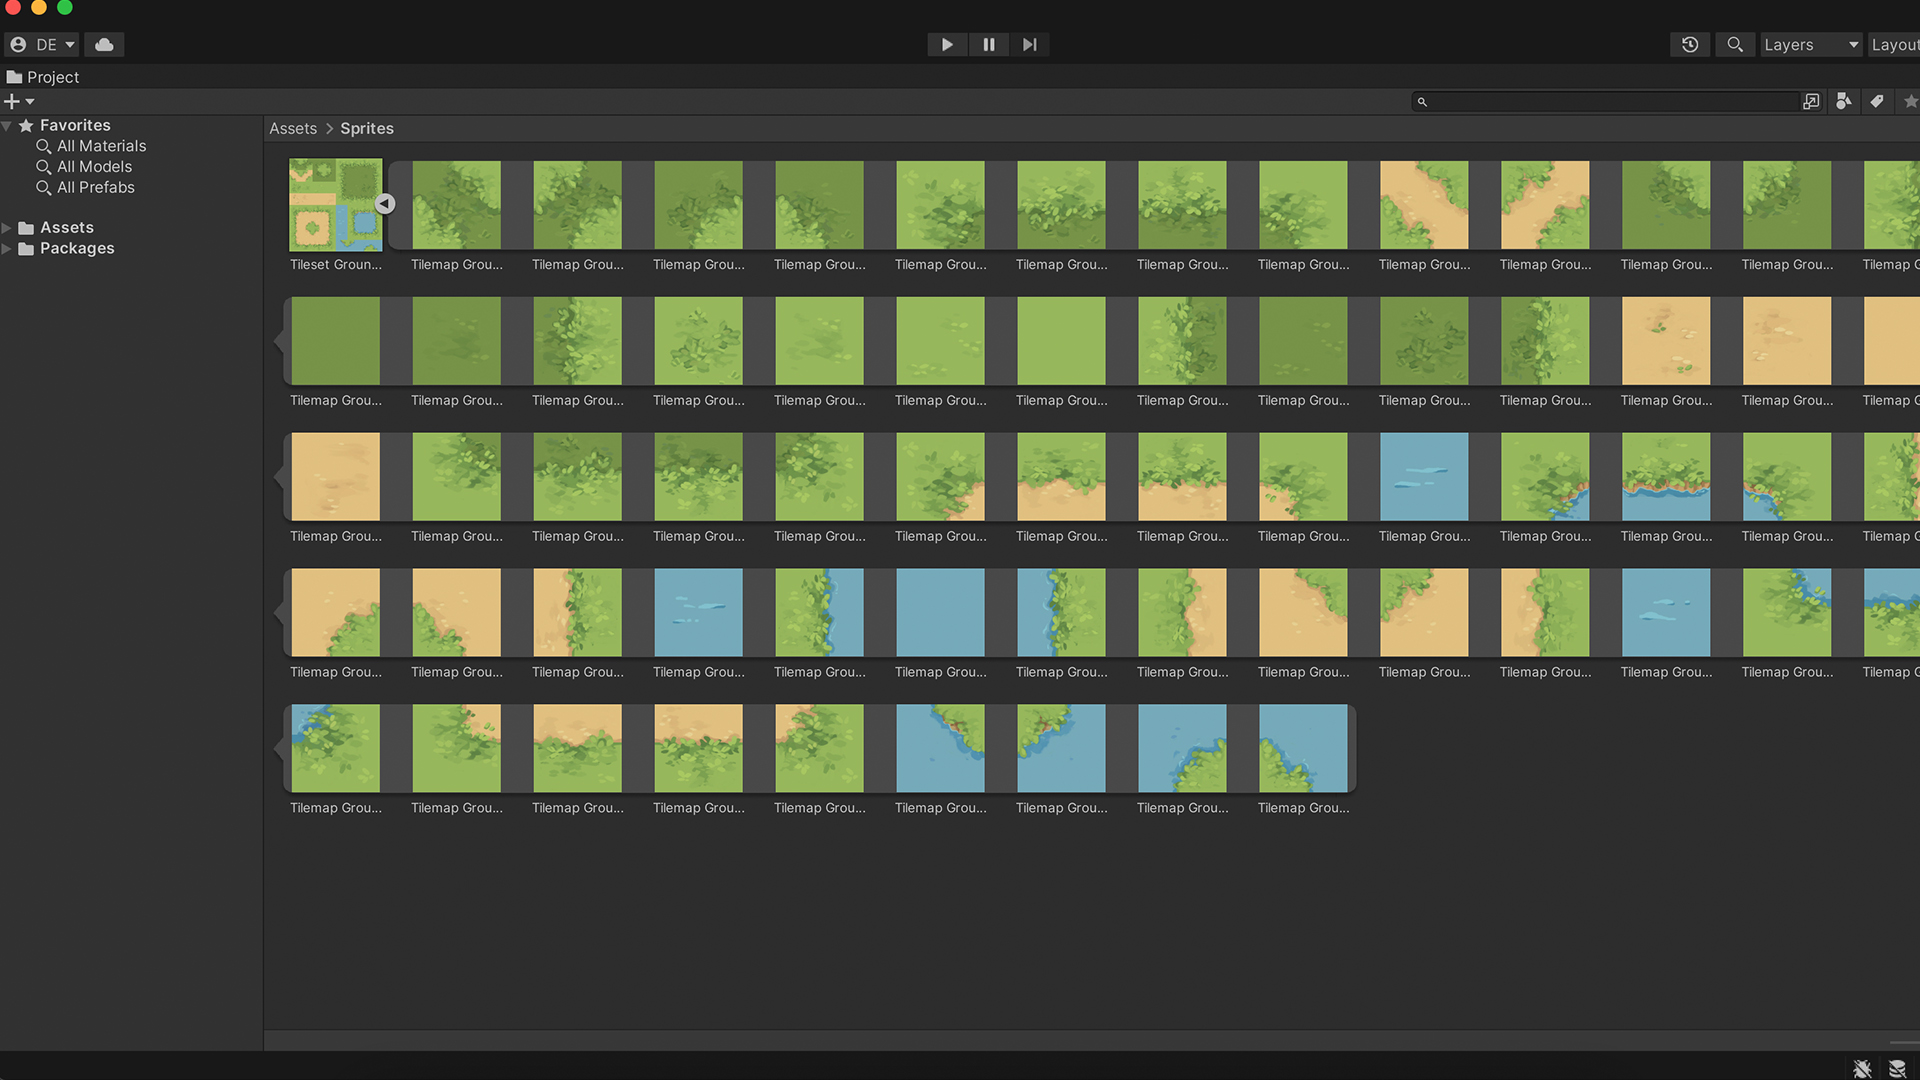
Tilemap Spritesheet
2D Top-Down games are an excellent starting point, so how about we use Tilemaps to design one?
We’ll use a ground tile Spritesheet to create the ground.
Once we extract the tiles from the Spritesheet, we can create a Tilemap.
Creating Tilemaps
Ensure the 2D Tilemap Editor and the 2D Tilemap Extras packages are installed to use Tilemaps.
Tilemap is a GameObject on which we place tiles.
We can choose different layouts; in our case, the Rectangular Tilemap will match our Sprites.
We now have a Grid object with an attached Grid component, and under it, a Tilemap object is attached to Tilemap and Tilemap Renderer components.
Tile Assets
To draw tiles on the Tilemap, we will need to convert these Sprites into tile assets.
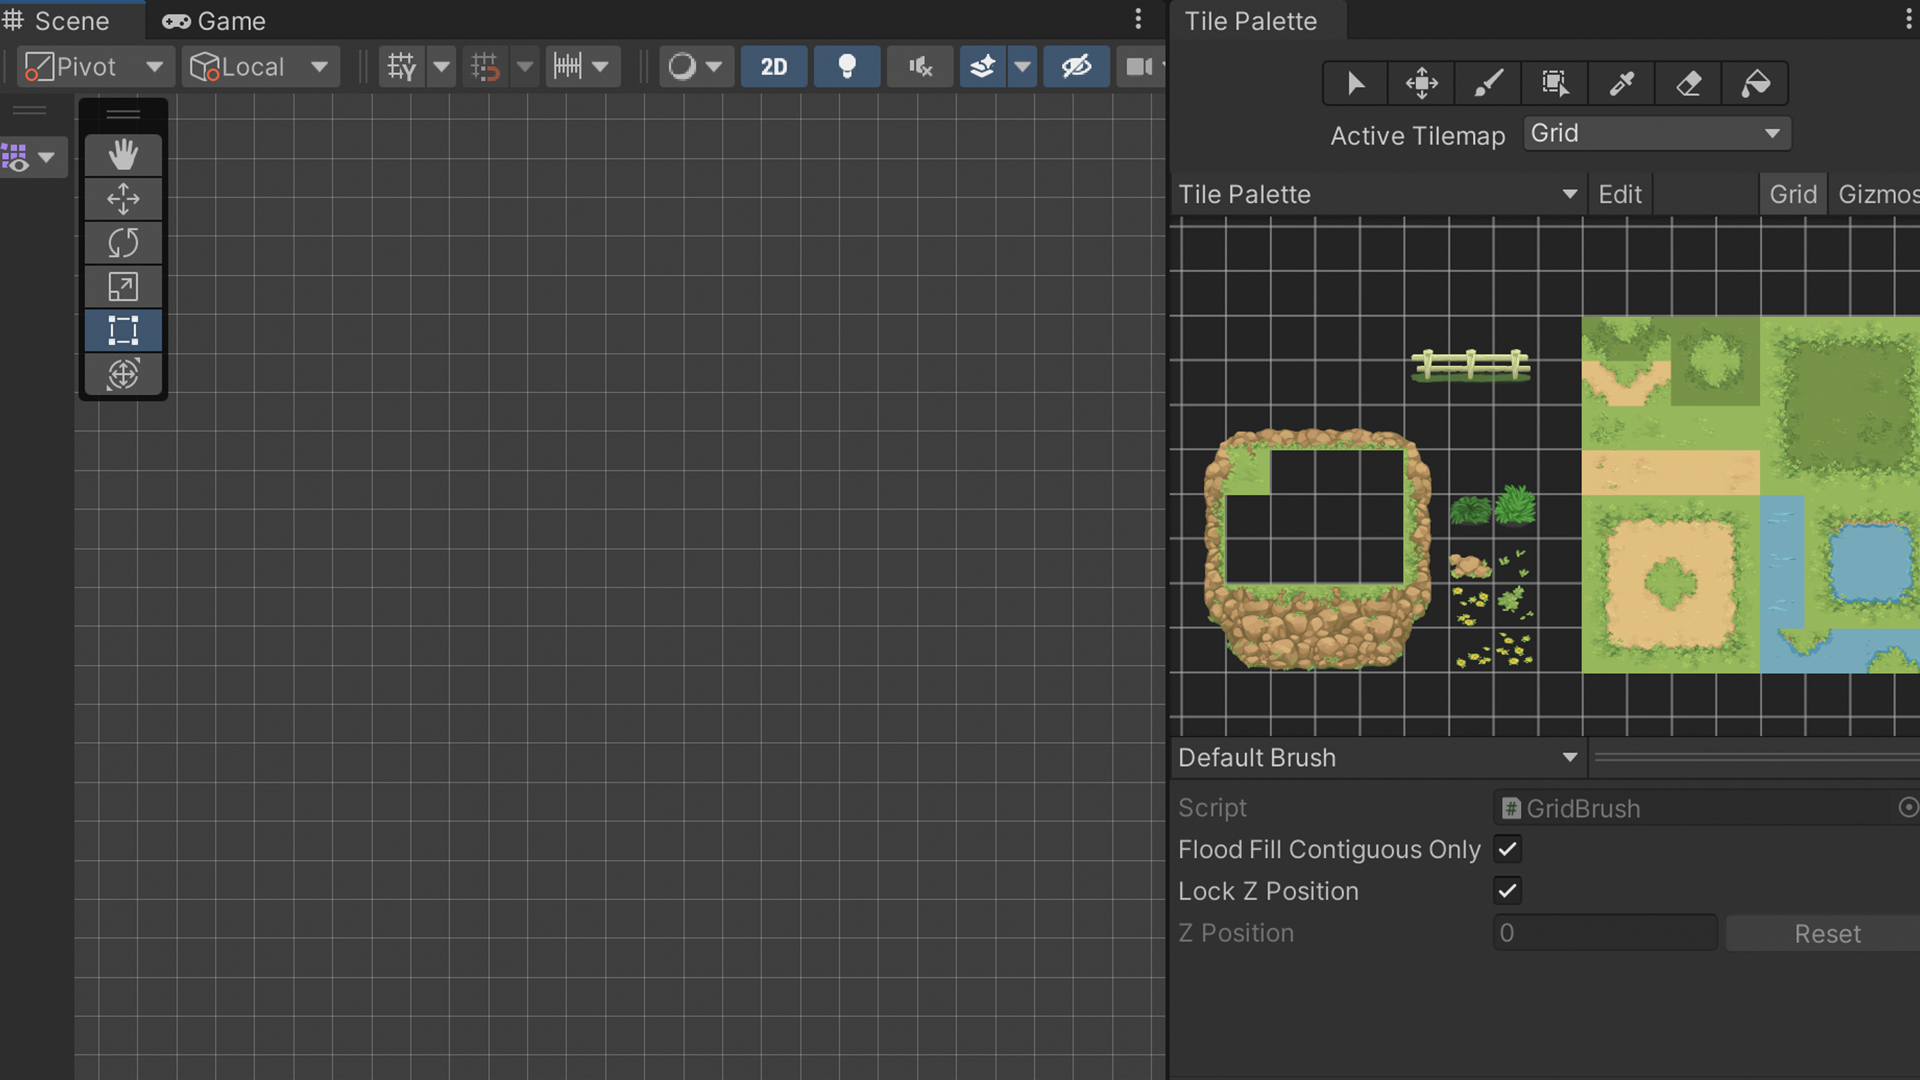
We open the Tile Palette window, and up here, create a New Palette.
We can now drag our Spritesheet into it. This will automatically create tile assets, which I recommend saving in a new folder.
Painting on Tilemaps
We can draw a tile on the scene by selecting it and using the Paintbrush Tool.
Our tiles size is off, so we select the Spritesheet and adjust its Pixel Per Unit to the Pixel cell size number we set previously.
We can simplify the drawing processes by using the Box Fill Tool or dragging over multiple tiles to paint a bunch at once.
We can also use the Picker Tool to sample a tile at the scene.
But, even with all these options, our quickest and more effortless way to paint tiles is to use Auto Tilling.
Auto Tilling
Tile Rules
Ensure the 2D Tilemap Extras package is installed to use Tile Rules.
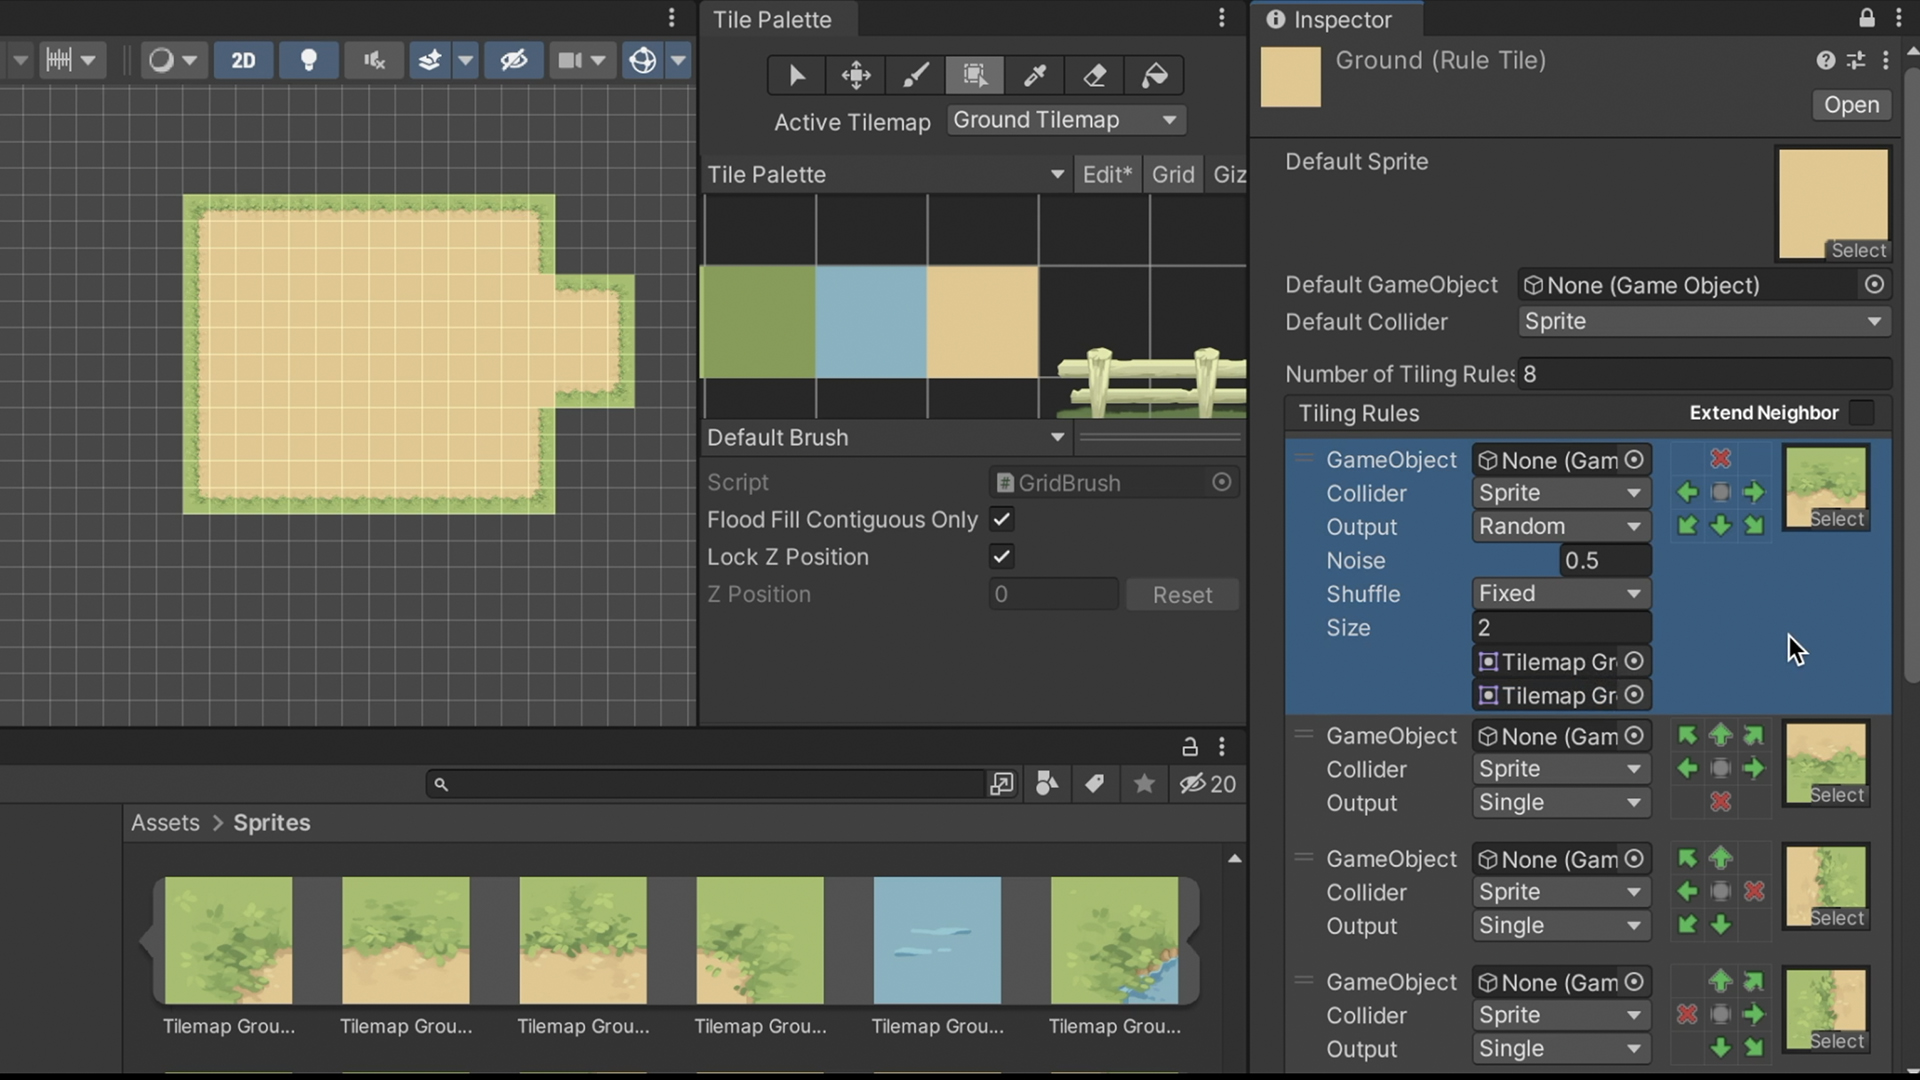
To use Auto Tilling, we need to create in our Project a new Tile Rule asset.
To it, we add all the different Sprites we want to be defined in the rule. I recommend setting its Default Sprite so it will have a visual for the Tile Rule asset when we drag it into the Pallete.
To set the rules, we click inside the grid sections, one click for green arrows – meaning the tile is continuous, two clicks for red X – marking the tile's edge.
Random Sprites
We can take it even further by changing some of the outputs to Random and giving the tiles option to choose between different Sprites randomly, making our Tilemap look less boring.
Fixing Gaps Between Tiles
A common problem when using Tilemaps is the gaps shown between the tiles.
To fix it, we create a Sprite Atlas to drag the Spritesheet into.
Collisions
Currently, the player can move freely in the scene, and it is time to change that.
We will create the tiles we want to have a Collider on a different Tilemap. Be sure to create the new Tilemap under the Grid object; there is no need to create two Grid objects.
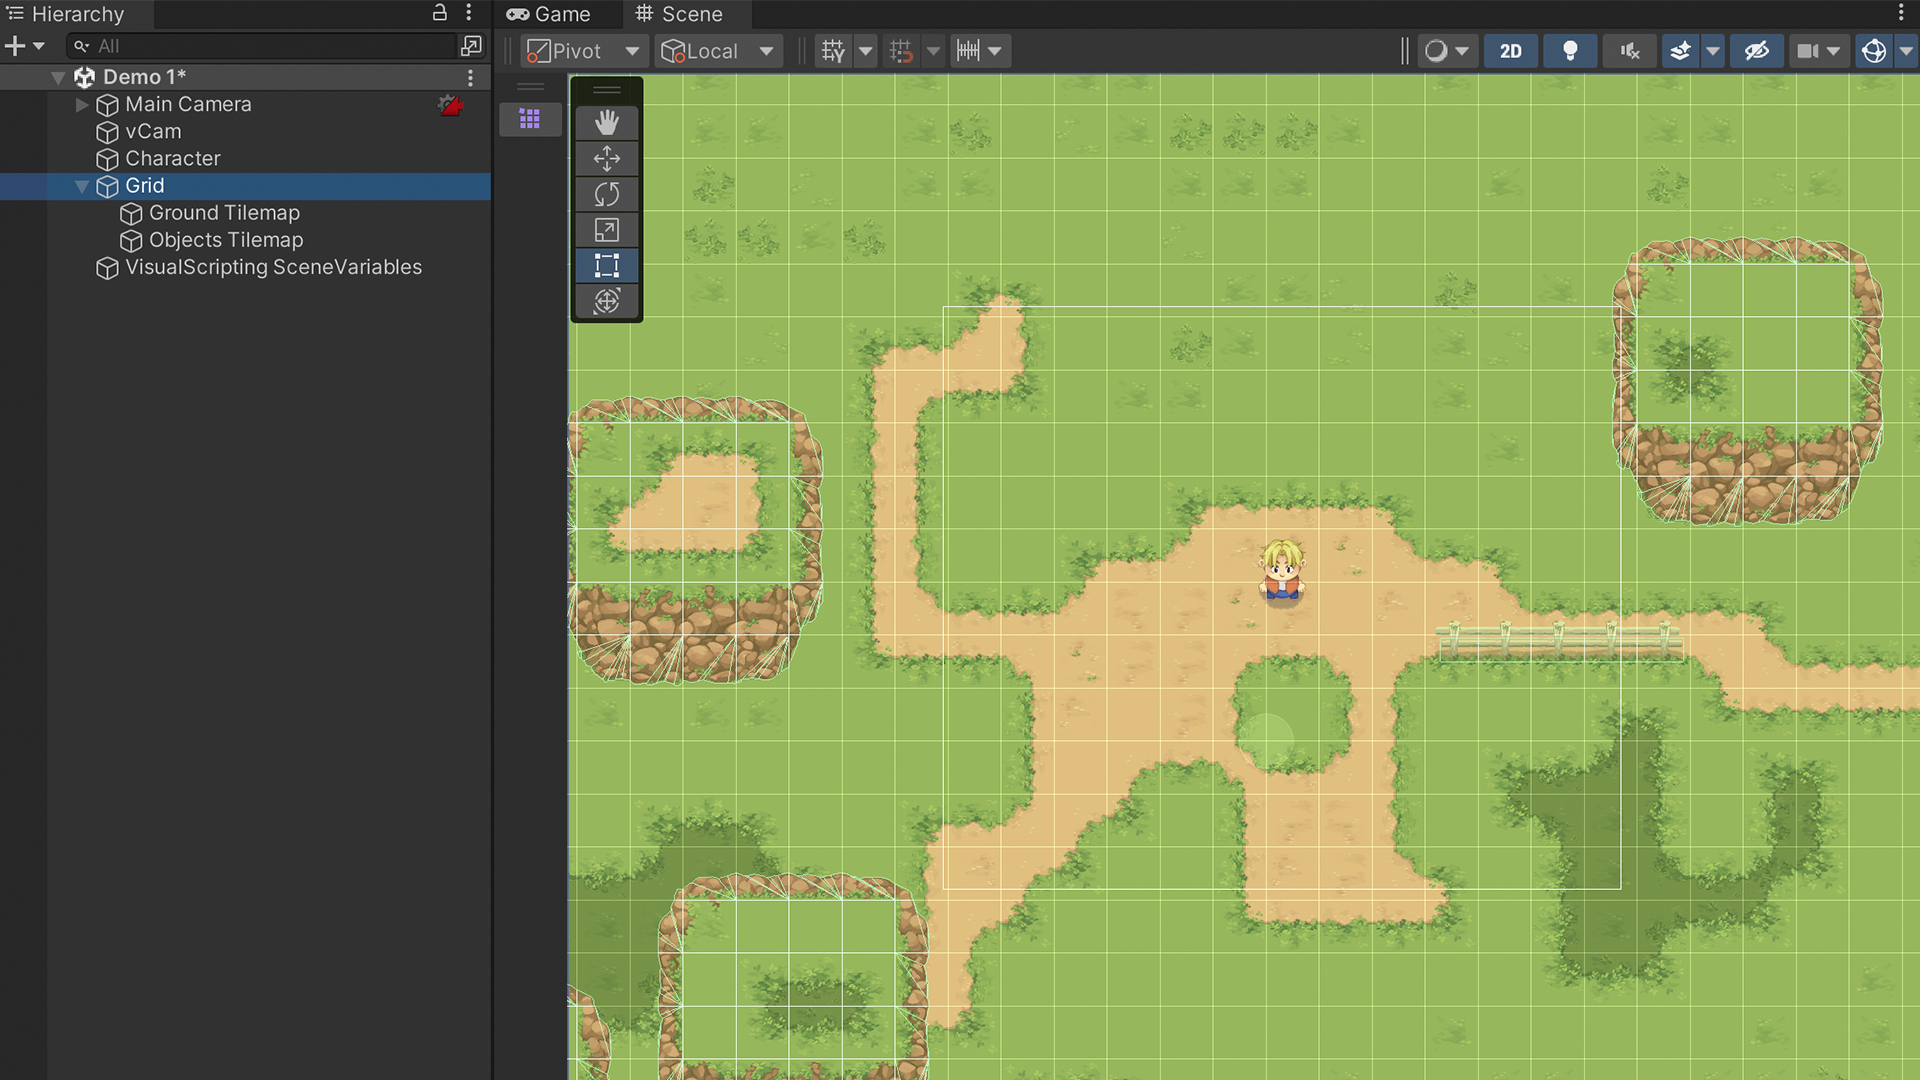
Before you paint the obstacle tiles, be sure to paint them on the right Tilemap. We can easily switch between them using the Active Tilemap tab.
Sorting Order
We will also need to set for the Tilemap a new Sorting Order, so its tiles will be rendered above.
To our two Tilemaps, I will add a third one dedicated to the level's water. I just find it more manageable working that way...
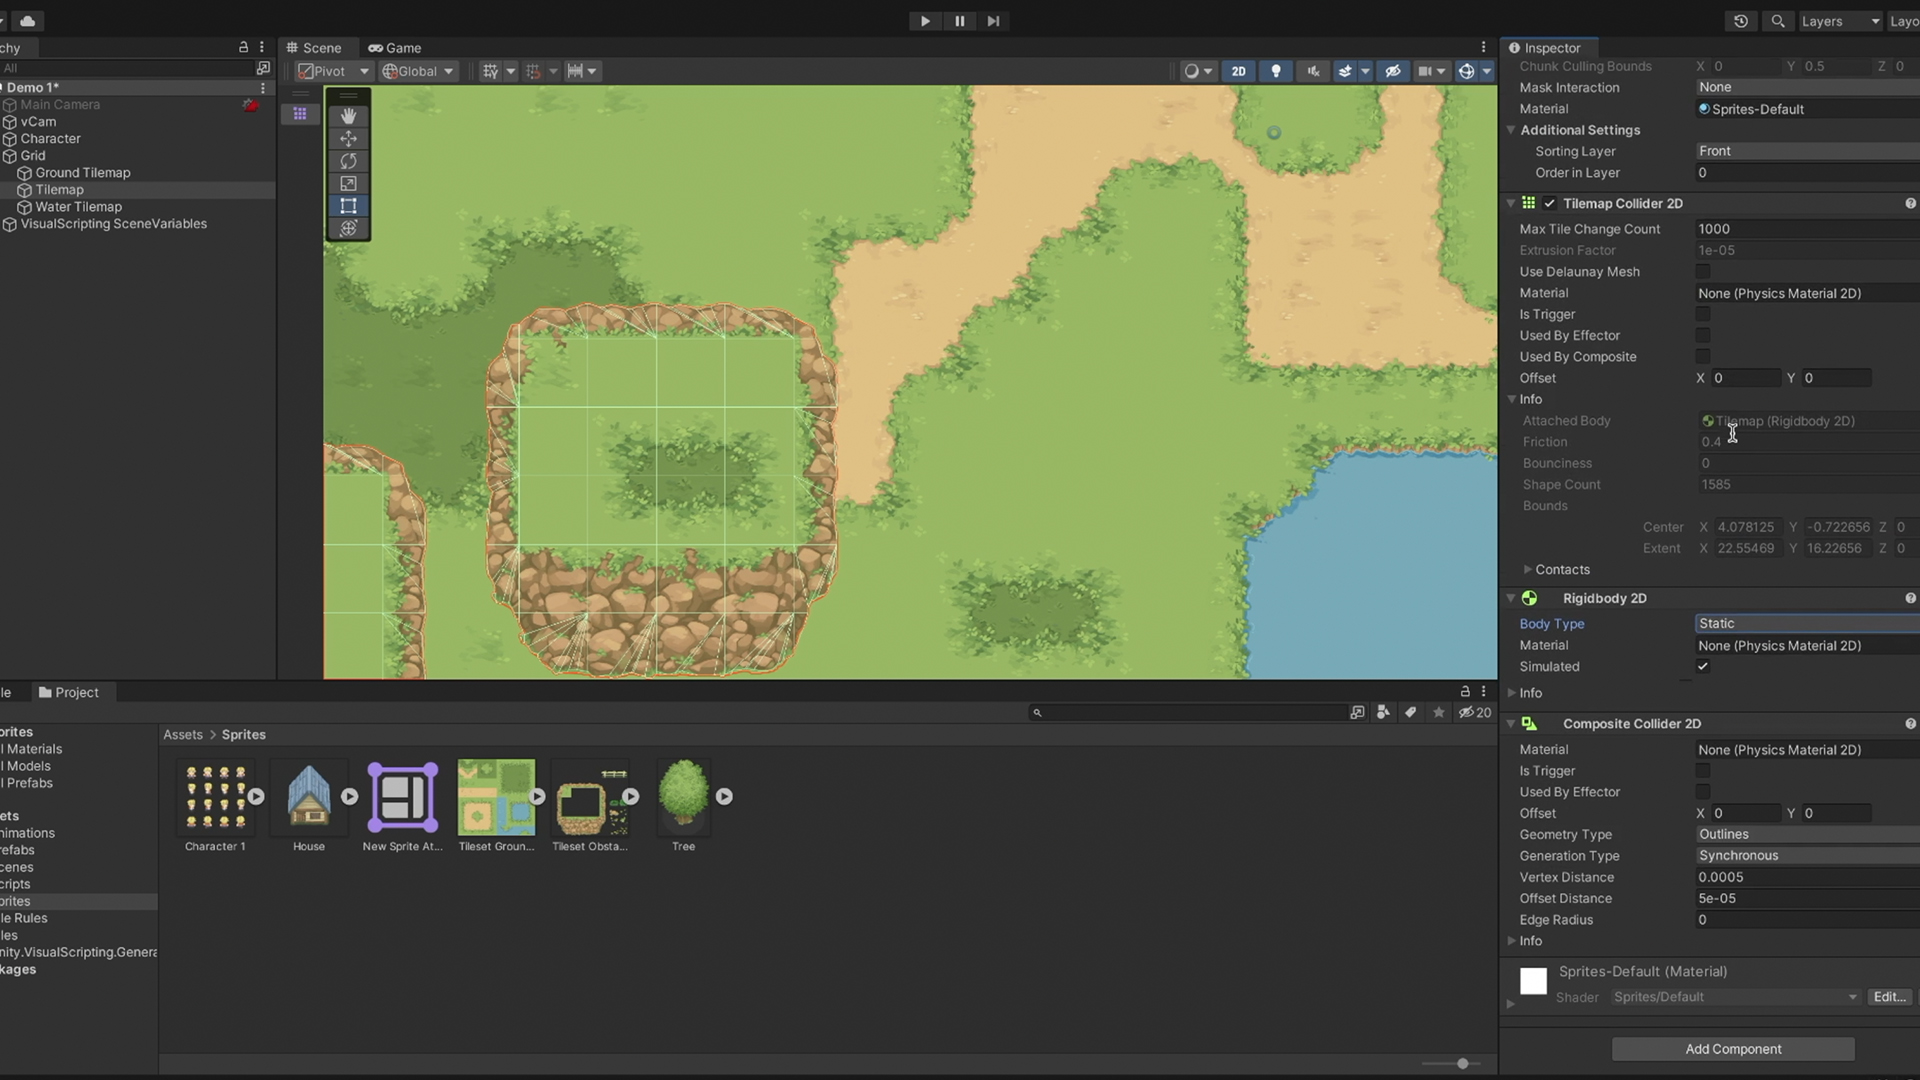
Colliders
We use the Tilemap Collider 2D component to add Colliders to all the tiles on the selected Tilemap.
If we add or remove tiles, the Collider will update its shape. Though, you can see each tile has its own Collider shape.
Performance-wise, we should add the Composite Collider 2D component to combine the shapes of neighboring tiles. Be sure to set the added Rigidbody 2D component to Static and check the Collider's Used By Composite box.
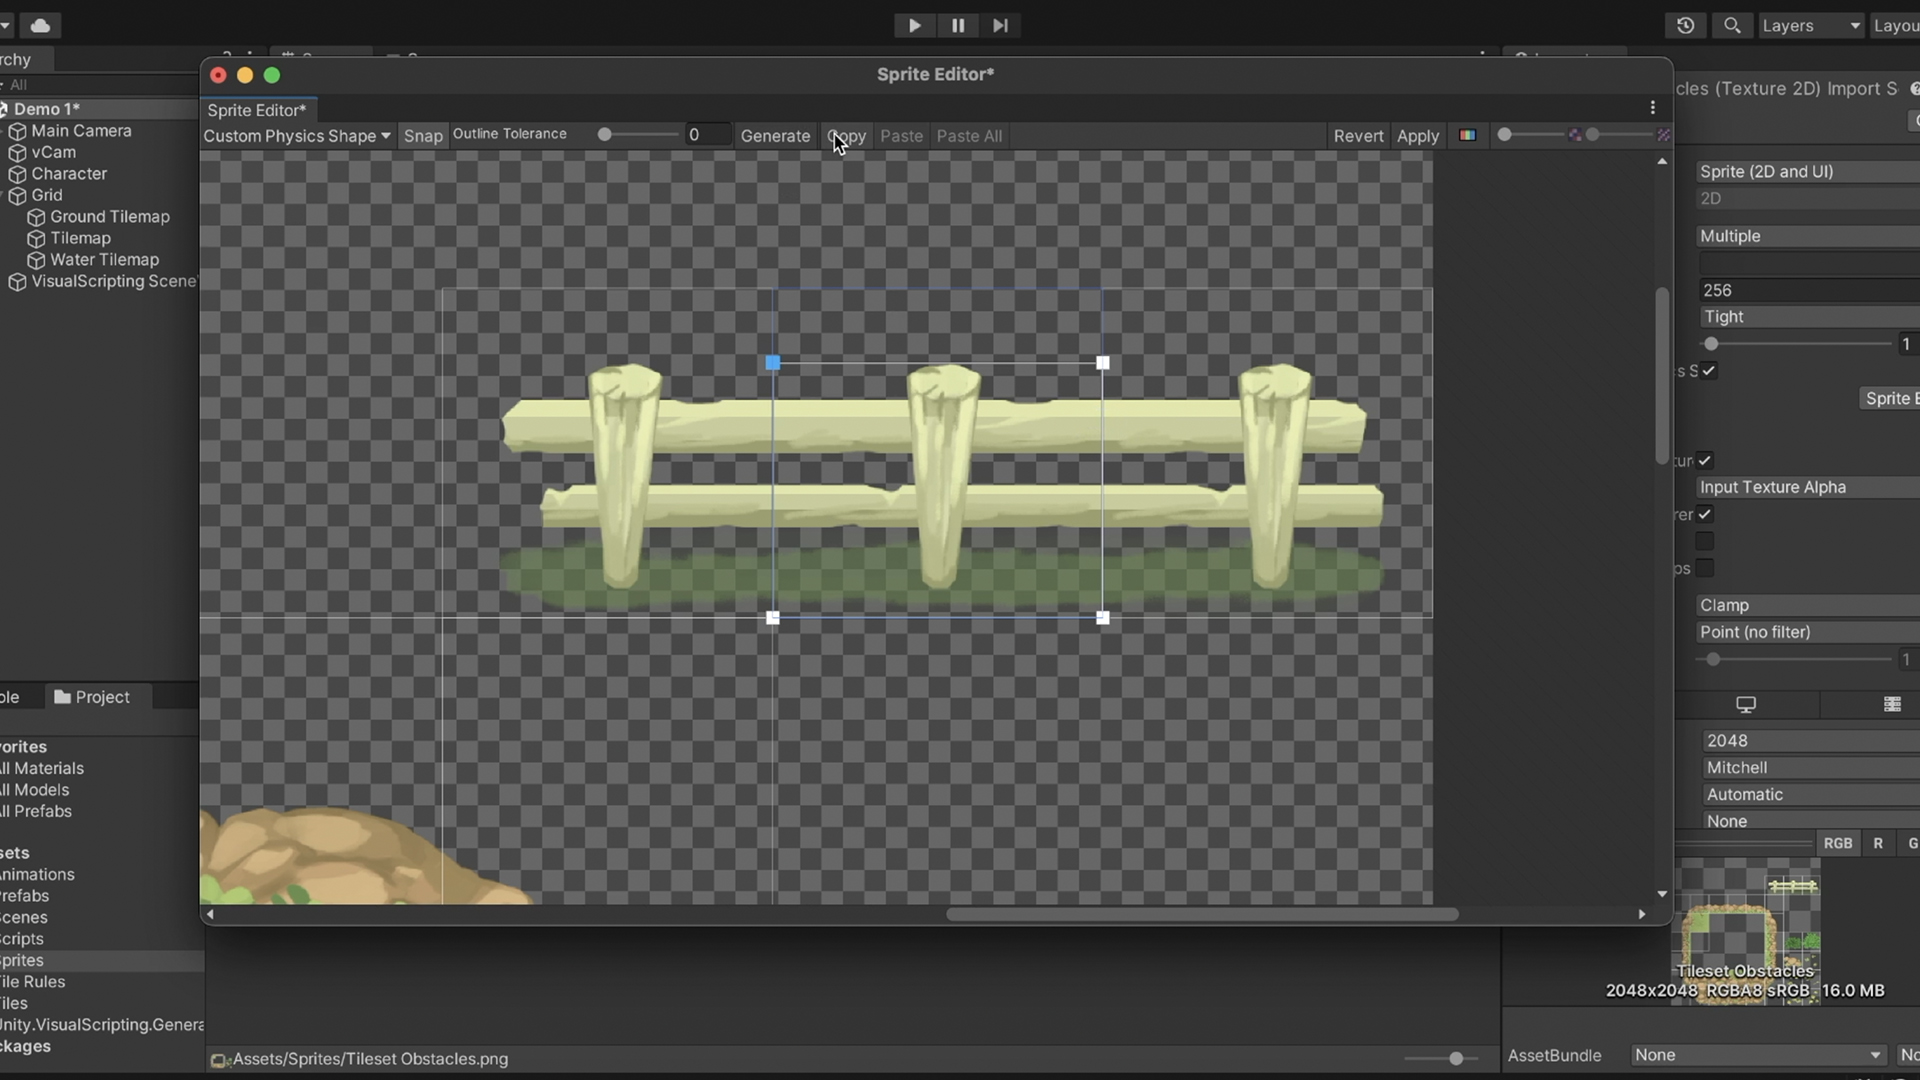
Custom Physics Shape
Unity created the Colliders based on the shape of the tile. We don't have a problem with some of the transparent tiles, but we will need to modify the physics shape of these water tiles.
So, up we go to the texture's Custom Physics Shape Editor and edit these tile's physics shapes. We can use the Copy-Paste option to speed things up.
On the way, we should give the character a smaller Collider and place it in the same Sorting Order as the obstacles.
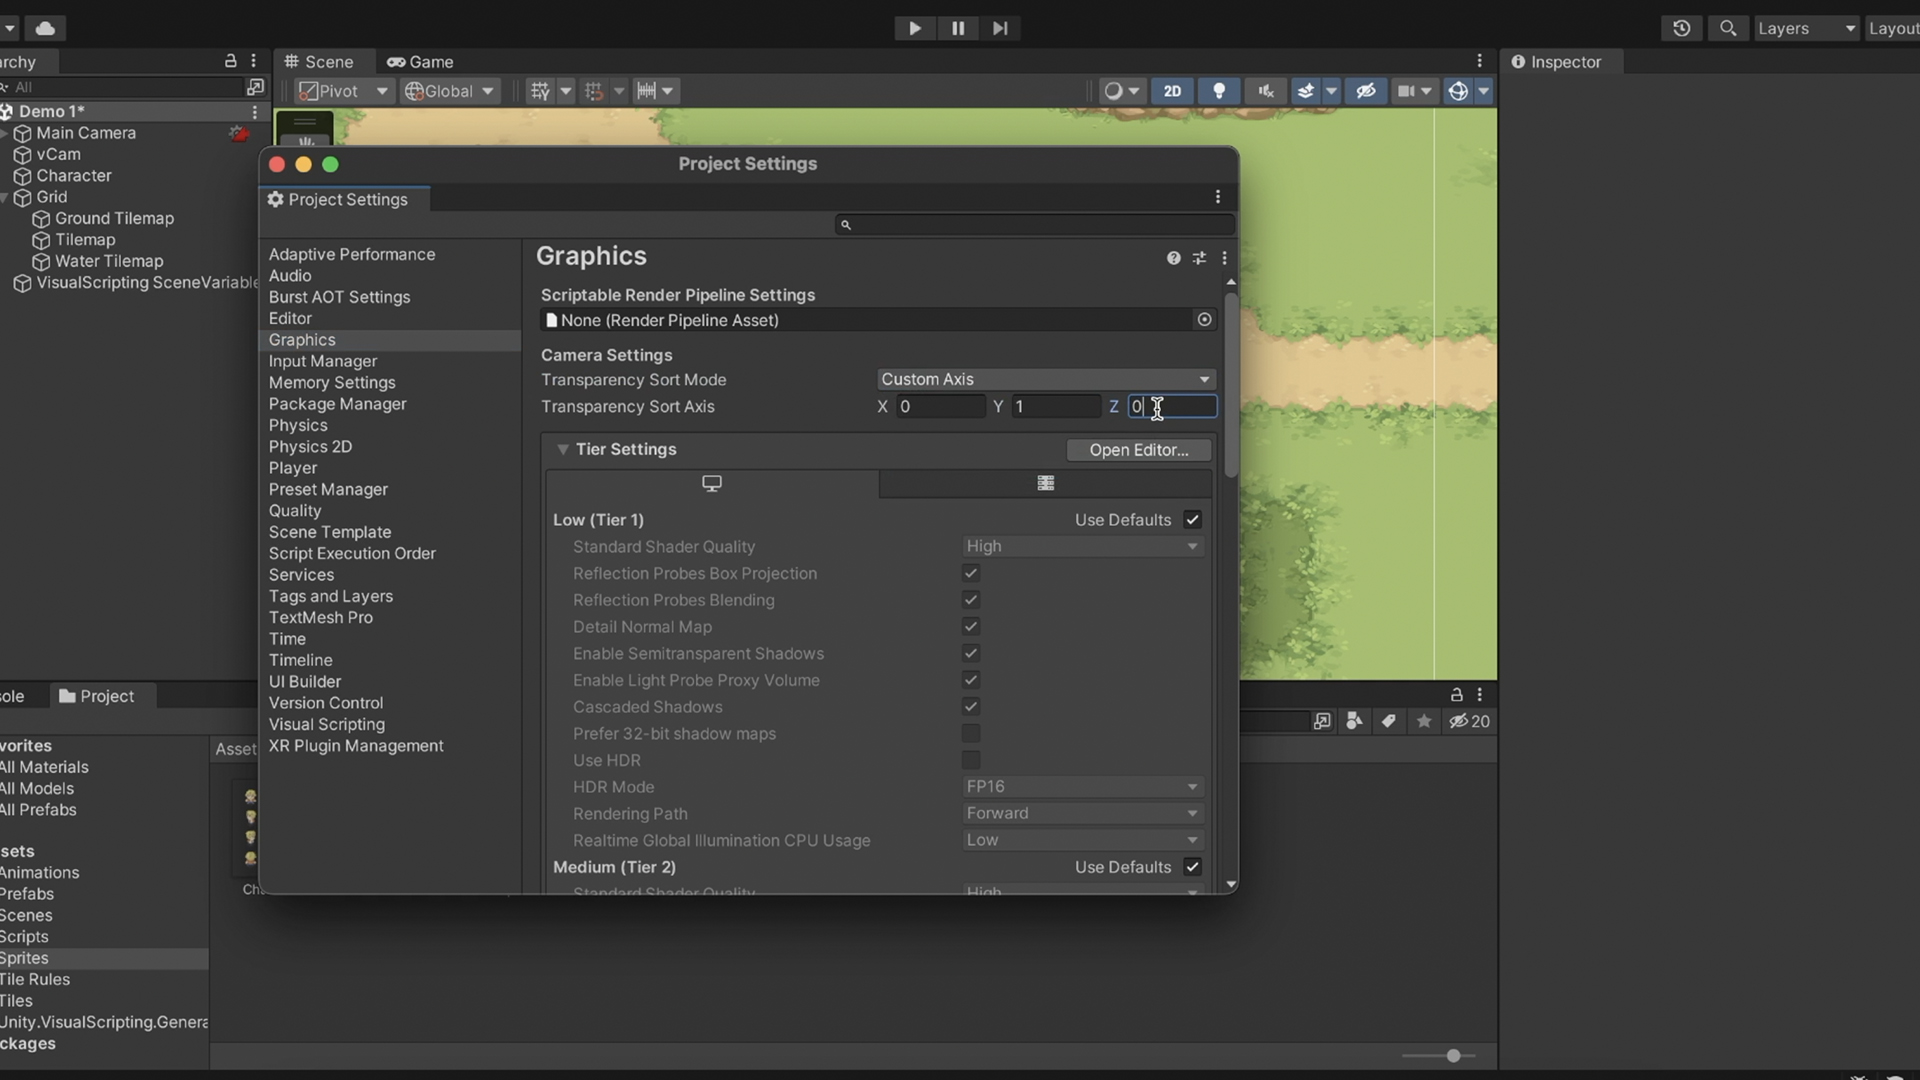
Custom Sorting Axis
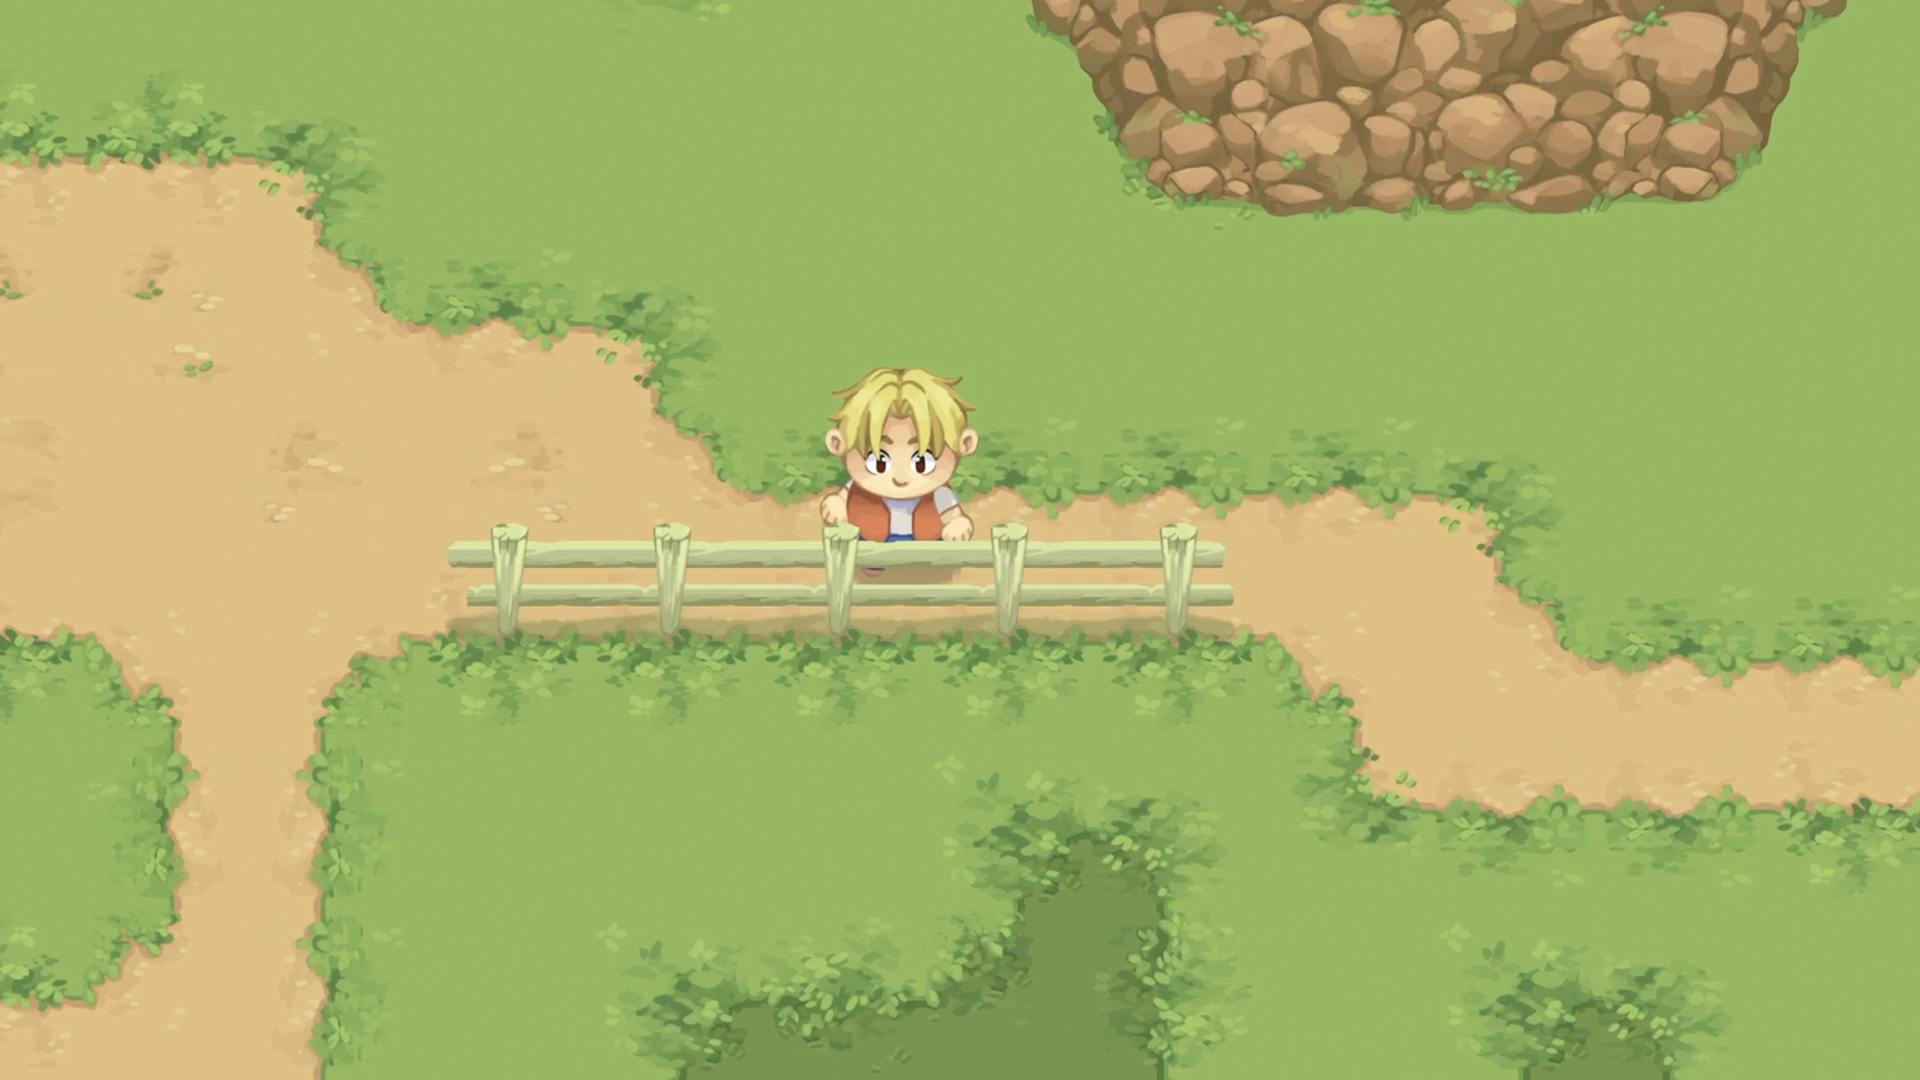
While now we can stand in front of the fence, we would like the option to stand behind it to give the illusion of depth.
For that, we will use sorting by Y-axis instead of Z.
This way, the higher the assets on the screen, the farthest behind it will render.
Depending on your Render Pipeline, open its rendering preferences. Set the Transparency Sort Mode to Custom Axis and switch the Z and Y values.
At the obsticales Tilemap Renderer:
- Set the Mode to Individual.
The Chunk mode is better performance-wise, as it batches the tiles' Sprites together when rendering, but the Individual mode will render each tile individually.
We can keep tweaking the fence Custom Physics shape and adjust its pivots to bottom for a better look.
Pivot Sort Point
To make it even more accurate, we can change the character's Pivot position and set its Sprite Sort Point at the Sprite Renderer to Pivot.
This may set off the character's Collider, so update it if necessary.
Big Obstacles
What about big obstacles? like a house?
Well, in this case, I will recommend using a regular sprite instead.
GameObject Brush
To paint the Sprite to align with the grid, we will first create a Prefab from it with a nice Collider and change the tile Pallete's brush to a GameObject Brush.
We open up this section and add the Prefab.
On the way, we can add a few tree Prefabs to this scene.

Once we are done, we will need to remember to change the brush back to Default if we want to paint with the other tiles.
Transparent Tiles
To make our level prettier, we can add flora tiles.
Adding transparent flora tile to the Background Tilemap replaces the ground tile.
If we wanted to add them to the Objects Tilemap, we will first need to disable their colliders, by going to each tile asset at the Project and setting its Collider Type to none.
With this, the Tilemap Collider 2D component won't generate from them a Collider.

Unforntaly placing them at the Objects Tilemaps render them individually, so, we should stick with the new Decoration Tilemap.
Tile Animation
Let's juice the level up by adding Animated Tiles.
We create a new Animated Tile asset at the Project window, and we can drag these Frame By Frame animation Sprites into it.
We need to add the new asset to the Tile Palette to paint it in the scene.
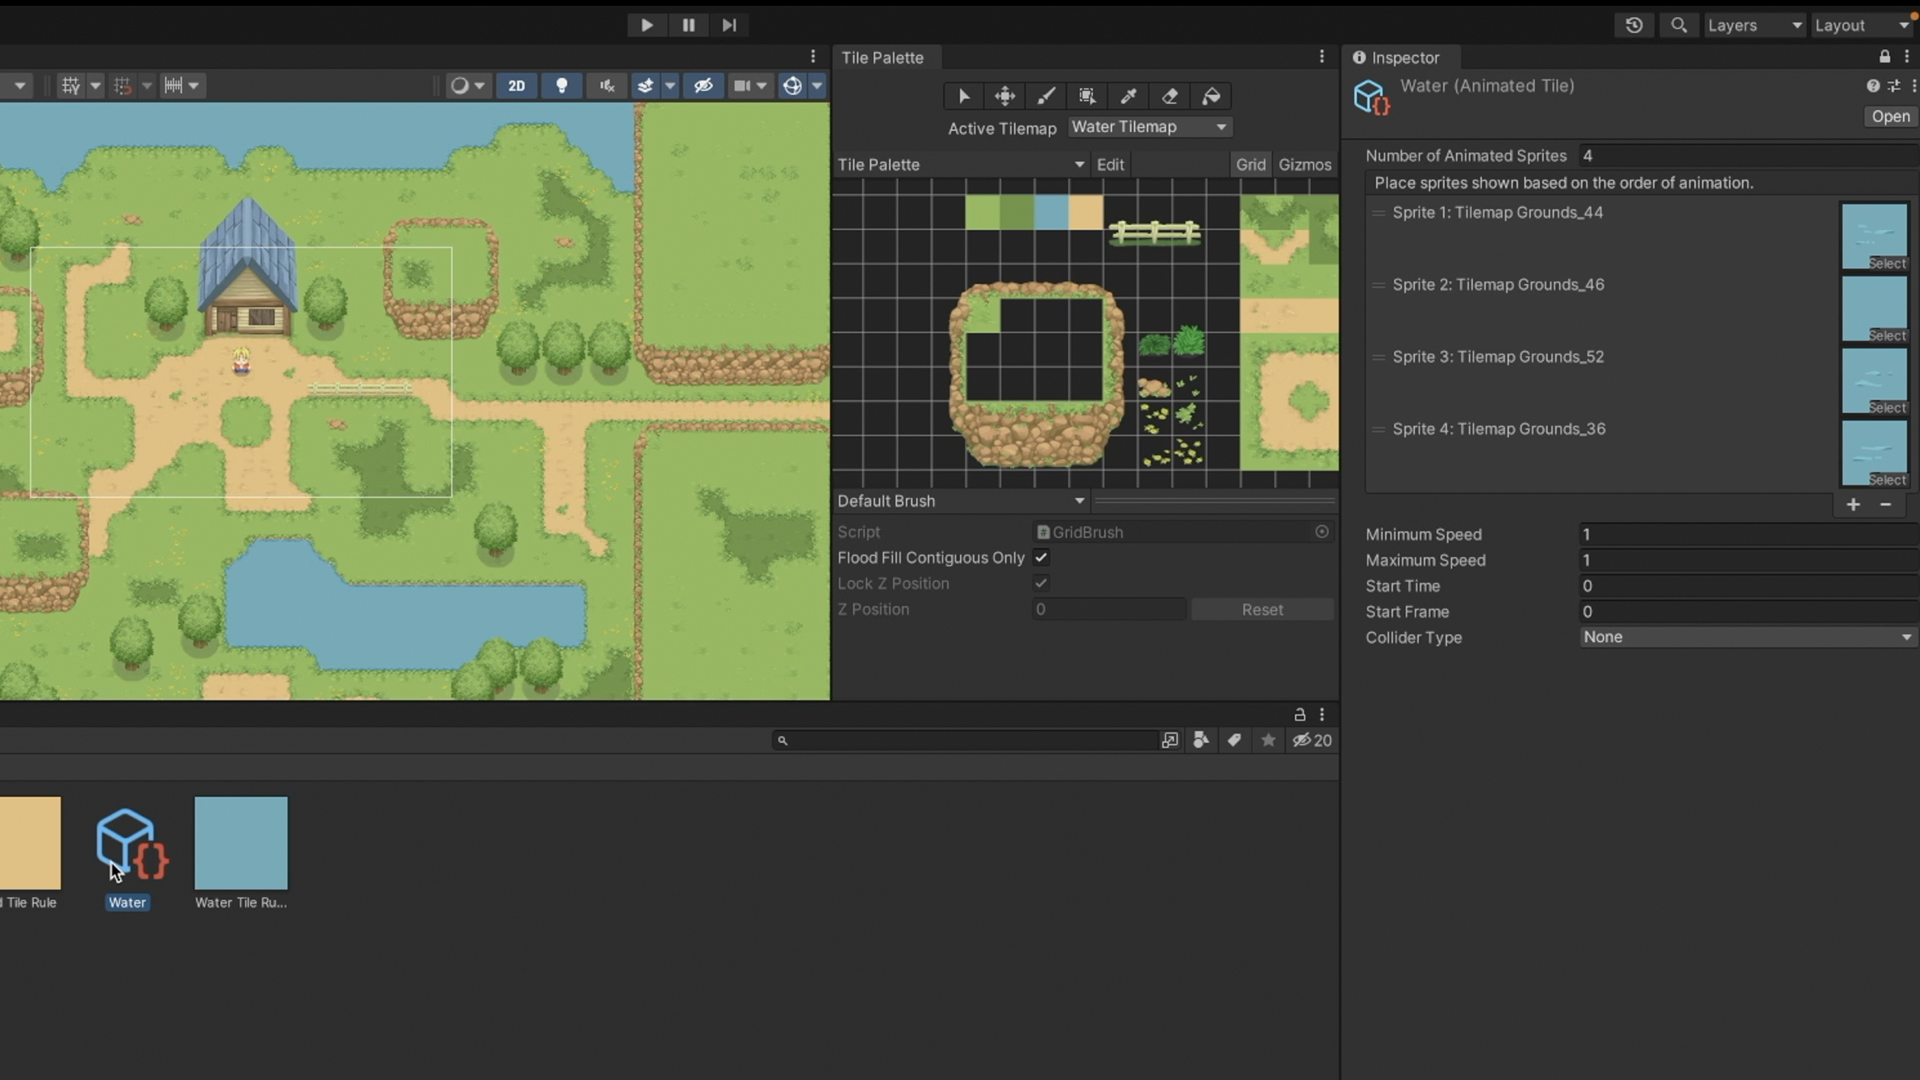
If you find the animation too slow, we can return to the Animated Tile asset and change the Minimum Speed.
Note that we can also animate tiles part of a Tile Rule by changing the Output to Animation.
Scripting
Our final addition will be adding some bushes to stomp.
We can add the tile bush to a separate Tilemap and give it a tag while going to our script and using the CompareTag method.
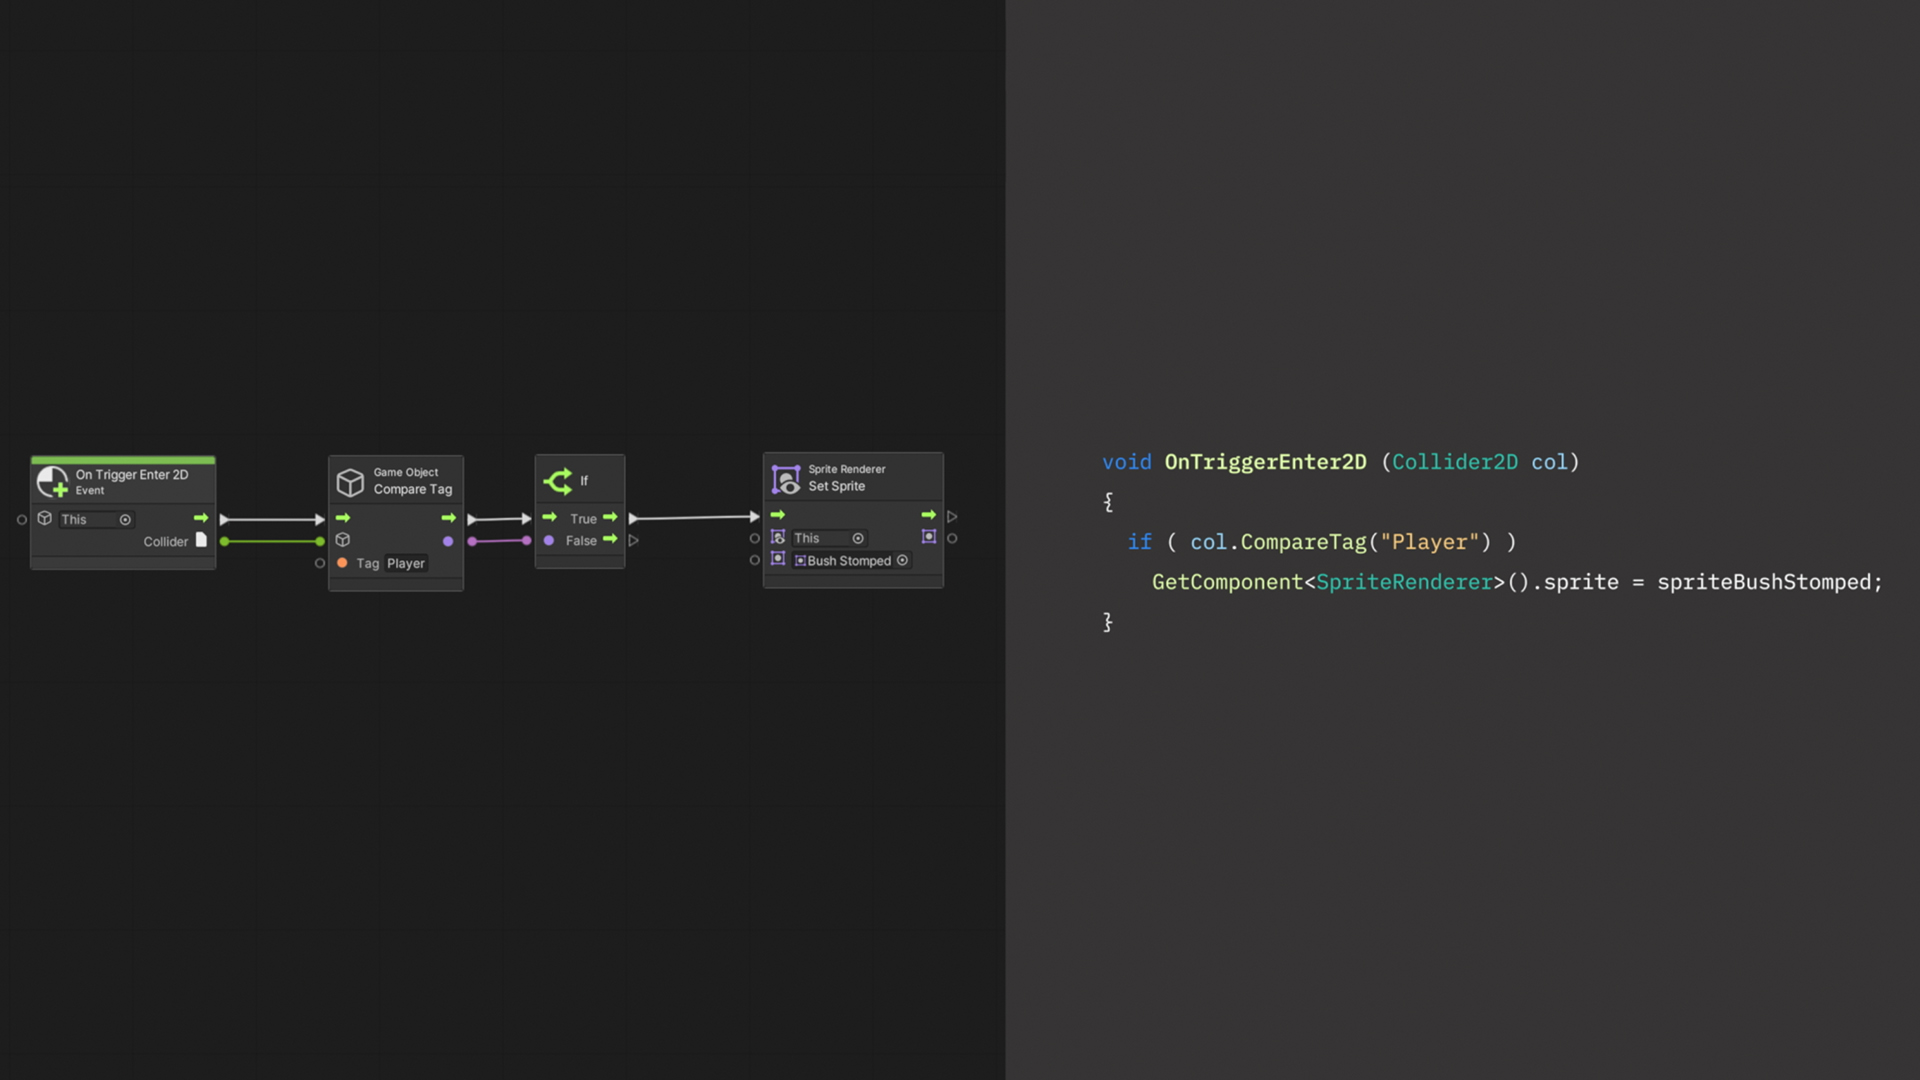
But, just like with the big obstacles, I recommend using the prefab brush instead. It's easy to use and gives us more options with less work.
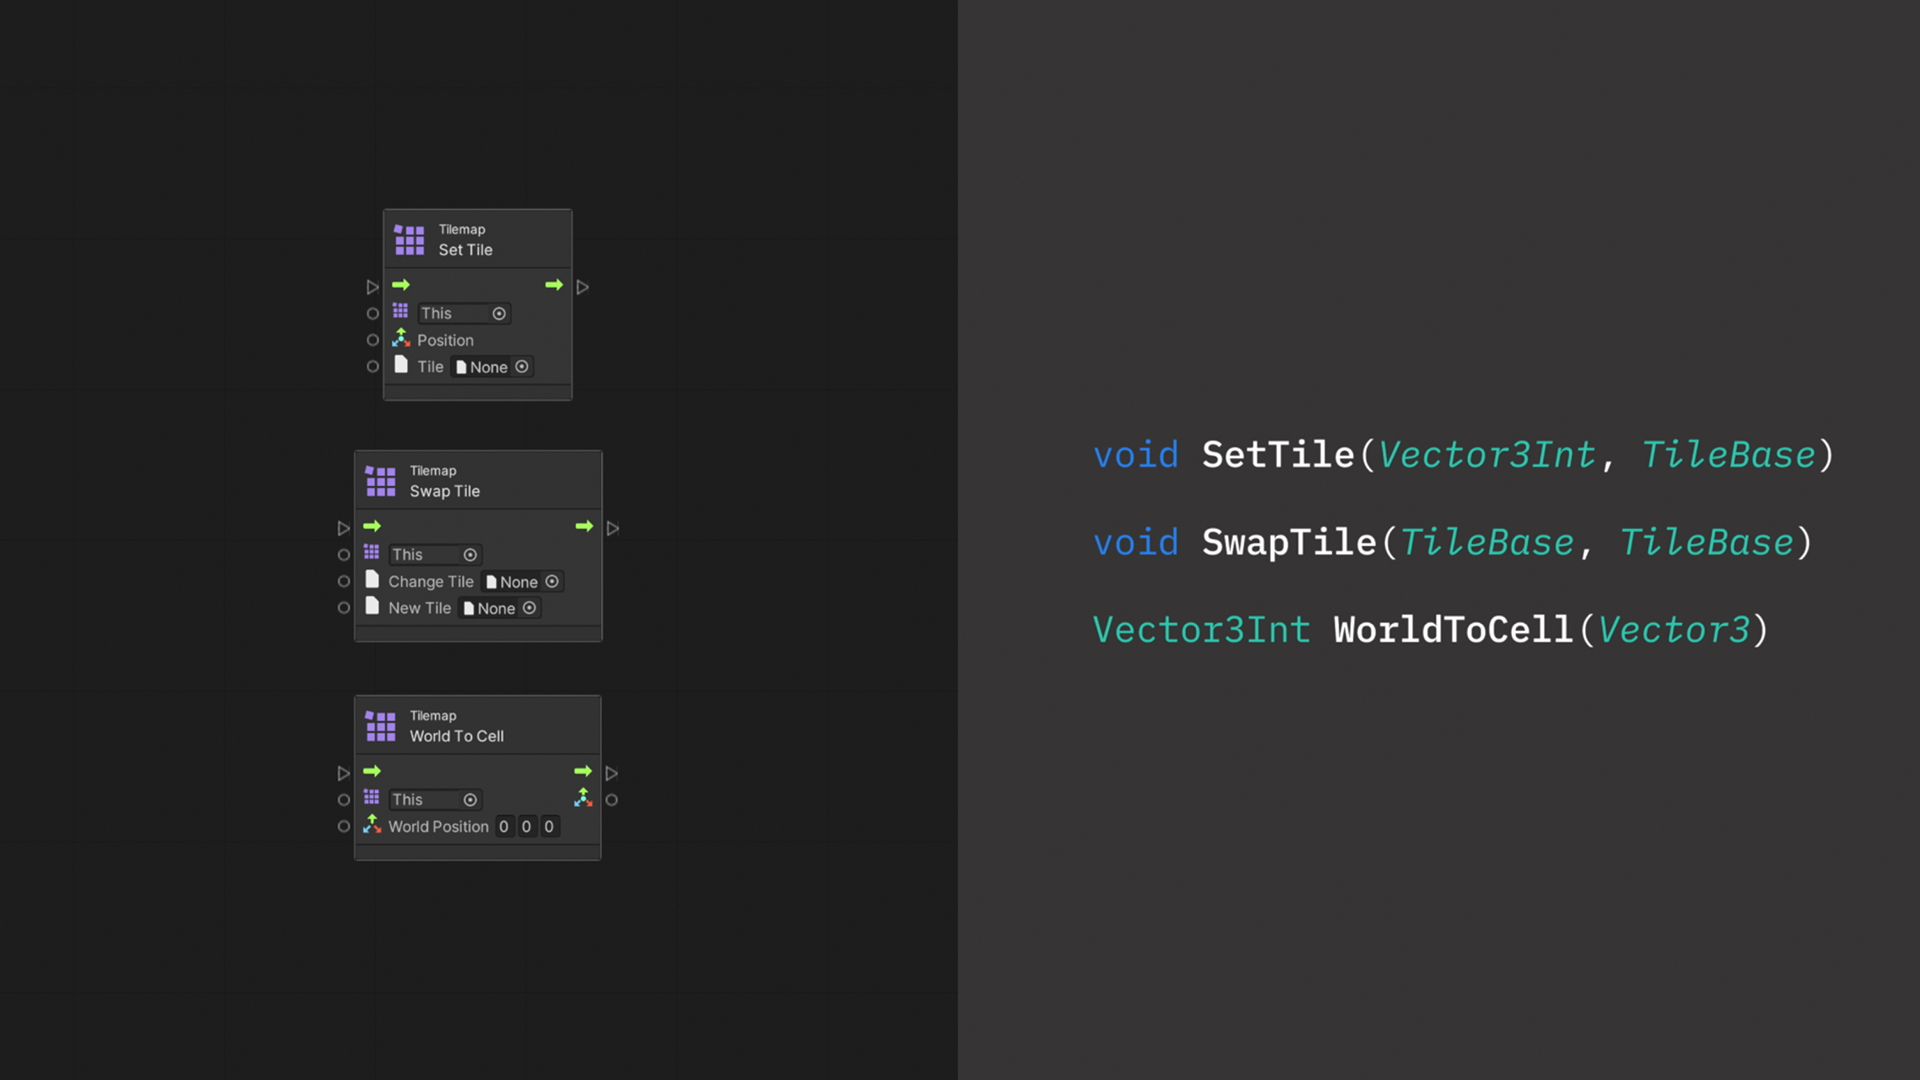
Let's also cover some good-to-know Tilemap methods – such as the SetTile method. With it, we can place a tile at a specific Tilemap and position.
Do not confuse it with the SwapTile method, which we use for replacing all tiles of one type with another.
Last, we got the WorldToCell method to translate a position in the game to a grid cell position.