Thank you for taking part in the NotSlot journey!
We invite you to join us in our next chapter:

Spine 8 Direction Character Part 1: Photoshop Preperation
In this Spine 2D tutorial series, we will go through the process of creating a character in 8 directions. Perfect for top-down and third-person games.
We will cover the full workflow: Photoshop, rigging, animation, and Unity integration. The character will have an idle and walk cycle, and also and attack animation.
In this part, we will create our character in Photoshop, facing all the different directions, and organize our file for easy export to Spine.
5 Directions
There is one trick you can use to reduce the number of animations you have to make, which is to mirror the Right animation to get the Left one. It works best with symmetric characters, as implying this shortcut on unsymmetric characters, tends to break the illusion.
We start by creating our base directions: Down, Up, and Right.
We place the body parts in different layers during the drawing process. It will save us time and effort for creating the other directions.
We can duplicate and mirror both legs and arms in Spine, so we create only one side of limbs.
Once we got the Down direction, we can duplicate it to create the Up direction. The face parts we can either delete or place under the head layer. We only need minor edits, and we got the Up direction.
To create the Right direction, we can reuse parts like the ears and body.
For creating the 45 degrees, we can shift the shapes of the existing parts of the Down and Up directions. With some adjustments, we can get a satisfying result.
PhothoshopToSpine Export Script
We are using the PhothoshopToSpine script to export the PSD to Spine.
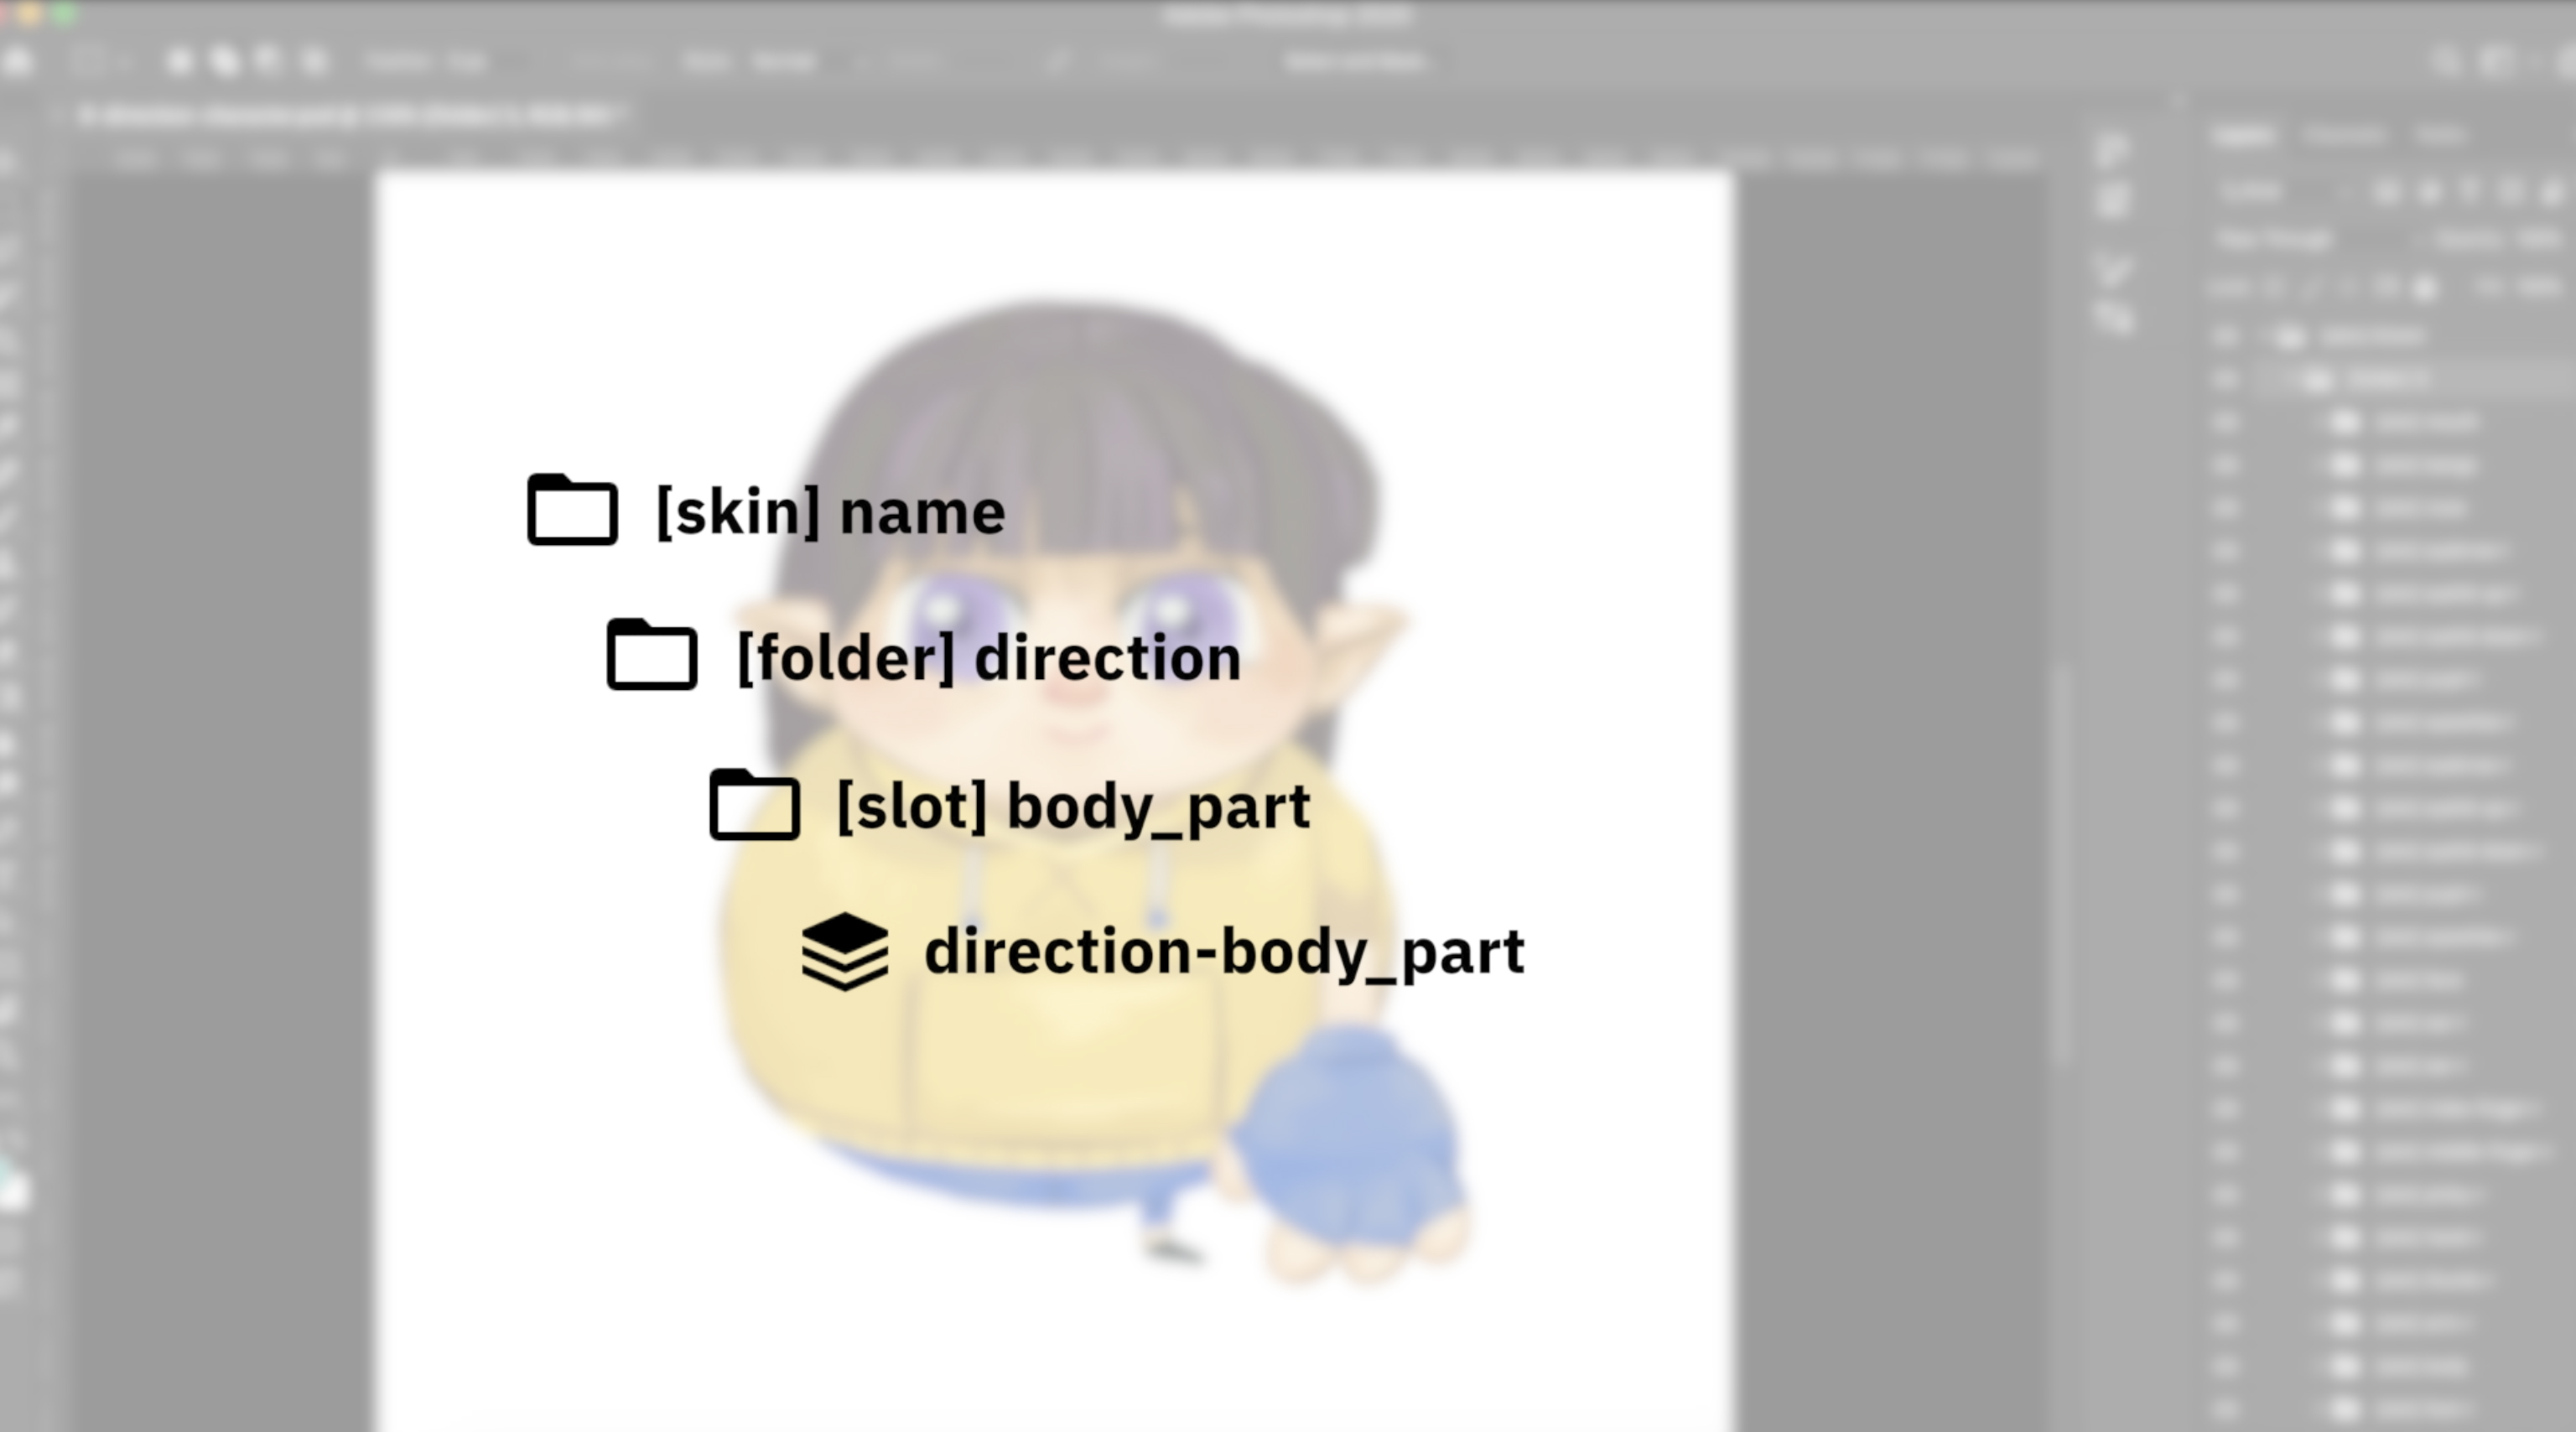
We communicate our intentions for the script by using tags. A tag is a keyword at the beginning of the name of a layer or folder, surrounded by square brackets.
We will give the root folders the tag of [folder] and the name of its direction. When exporting to Spine, the tag will place all the layers under the folder in a subfolder.
Inside each root folder, we will place all body parts under a folder, tagged with the [slot] tag and the name of a body part. When exporting, this tag will put the layers as attachments under Slots in our Spine projects.
Under the Slot folder, we place a single layer with the art. Its name will contain its relevant direction and the name of the Slot folder it is placed under.
If we need multiple layers, we can create a wrapping folder for them prefixed by the [merge] tag that will merge into a single attachment after export.
👉 All folders and layers must have the same names.
It is crucial in order to get an accurate Spine file after exporting. After exporting, we will have different slots in our Spine project, each filled with the relevant attachments of all five directions.
Horizontal Guideline
After we export the PSD, we will want the character to be above the horizontal guideline in Spine.
It is essential for walkable characters, as the horizontal guideline represents the ground. This way, we can be sure the character won't walk in the air, or its legs get cut by the ground.
To control the root pivot point of the character within the Photoshop file, we click on the ruler corner, and while holding the mouse down, drag the cursor to a position of your choice.
If you can't see the rulers, Ctrl+R on Windows or ⌘R on Mac will show and hide them.
Now we have a PSD file ready to export.
Feel free to check it out and explore the folders hierarchy by yourself.
In the next part, we will export the character to Spine and rig it.