Thank you for taking part in the NotSlot journey!
We invite you to join us in our next chapter:

2.5D Games in Unity Part 5: Cinemachine Control Zones
In this part, we will combine various camera design methods using Cinemachine.
First, we will create a basic camera the follows our character. Next, we will create control zones that change camera properties like zoom when the character is inside it. After that, we will add a track and a dolly camera. And last, we will configure the camera to follow two or more characters.
Cinemachine Package
Let’s start by downloading the Cinemachine package – it’s an excellent extension for Unity that provides us with outstanding AAA like camera controls.
In the menu bar, go to Window > Package Manager. Wait a few moments for the list to update, find Cinemachine, and click the install button.
After the installation, we have a new menu with predefined Cinemachine objects.
- Select the Main Camera object, and add the CinemachineBrain component to it.
With Cinemachine, we only use one Camera, and instead of modifying its state directly, we use multiple virtual cameras and transition between them.
Virtual Camera
- Go to the Cinemachine menu, and select Create Virtual Camera.
- Name the new object
vcam Main. - Drag the Character from the Hierarchy Window to the Follow field – this will set the camera to follow our character.
- Set Body to Framing Transposer.
- Set Aim to Do Nothing.
- Set distance to 13.
- Make sure the virtual camera’s rotation is set to
45degrees in the X-axis and0for the rest.
We can now play the game and have the camera follow after a character. But we can leverage Cinemachine to have a smoother feeling movement:
- When the camera zooms in and out, we want it to have a bit of more damping, so increase the Y and Z damping to 2.
- Since we generally want the character in the center of the screen, we will set the soft zone to 0.4.
- We can also set the dead zone to 0.2, so the camera won’t move if the characters only move by a bit.
Let’s run the game to see the changes we made in action.
There is one thing we need to do before we start coding the script. Go to the Character object and set its tag to Player – we will use it in the script soon.
CamZone Script
Next, let’s create our camera control zones. These are zones that while the character is inside them, transition to another virtual camera that better suites the zone’s environment or gameplay purpose.
Create a new MonoBehaviour script and call it CamZone.
using Cinemachine;
using UnityEngine;

[RequireComponent(typeof(Collider))]
public class CamZone : MonoBehaviour
{
  #region Inspector

  [SerializeField]
  private CinemachineVirtualCamera virtualCamera = null;

  #endregion


  #region MonoBehaviour

  private void Start ()
  {
    virtualCamera.enabled = false;
  }

  private void OnTriggerEnter (Collider other)
  {
    if ( other.CompareTag("Player") )
      virtualCamera.enabled = true;
  }

  private void OnTriggerExit (Collider other)
  {
    if ( other.CompareTag("Player") )
      virtualCamera.enabled = false;
  }

  private void OnValidate ()
  {
    GetComponent<Collider>().isTrigger = true;
  }

  #endregion
}
-
We want disable the virtual camera until its needed.
-
Only when the colliding object has the tag Player we enable the camera. We disable it whrn the player gets out.
-
We validate the script has access to a collider and ensure it is a trigger.
The script is ready, we can now create Camera Control Zones with it.
Control Zones
- Create an object, name it
CamZone Gate. - Add a collider of your choice, mark it as a trigger.
- Add the CamZone component to it.
- Duplicate the vcam Main object, and name it
vcam Gate.
The gate camera will activate as the character goes near the gate, we still want it to track the character, but it should zoom in.
- Change the virtual camera distance from 13 to 8.
- Select the Gate Zone object, and drag vcam Gate into its camera field.
We can now run the game and see how the camera transitions between the virtual cameras as we approach the gate and move away from it.
Notice that we still have a single camera, it’s just the active virtual camera that changes – we can see in the scene view how it works behind the scenes.
One thing we can change before we move on is the transition duration between the virtual cameras. Select the Main Camera GameObject, and in the Inspector, go to the CinemachineBrain component. Change the default blend to 1.2 seconds.
Let’s add a zoom out zone:
- Duplicate the objects CamZone Gate and vcam Gate.
- Name the zone object
CamZone Finaland the virtual camera objectvcam Final. - Move the zone to its proper position and change its camera property to vcam Final.
- Set the zoom out, change the virtual camera’s distance from 8 to 16.
We can run the game and see that when we reach the end, the camera zooms out.
Now, let’s do something else.
Instead of changing the camera’s distance, let’s set a zone where the camera is static and doesn’t follow the character.
- Once again, duplicate the CamZone Gate and vcam Gate objects.
- Name the zone object
CamZone Startand the virtual camera objectvcam Start. - In the virtual camera, change the Body from Framing Transposer into Do Nothing.
Position the camera as you wish and run the game. Now, when we start the game, we will have a static camera that only starts following the character once we exit the CamZone we created.
Dolly
To create a dolly cam, first, duplicate one of the cam zones, and name it CamZone Dolly. Adjust the trigger to contain the whole dolly zone.
- Go to the Cinemachine menu, and select Create Dolly Camera with Track.
- Name the camera object
vcam Dolly, and the track should be calledtrack Dolly. - Drag the new virtual camera to the CamZone we have created.
Now let’s configure the camera:
- Set Follow to follow our character.
- Make sure the Body is set to Tracked Dolly.
- Add some damping.
Open the Auto Dolly settings:
- Tick the Enabled checkbox
- Set Position Offset to 5
- Set Search Resolution to 10
Last for the camera, make sure Aim is set to Do Nothing.
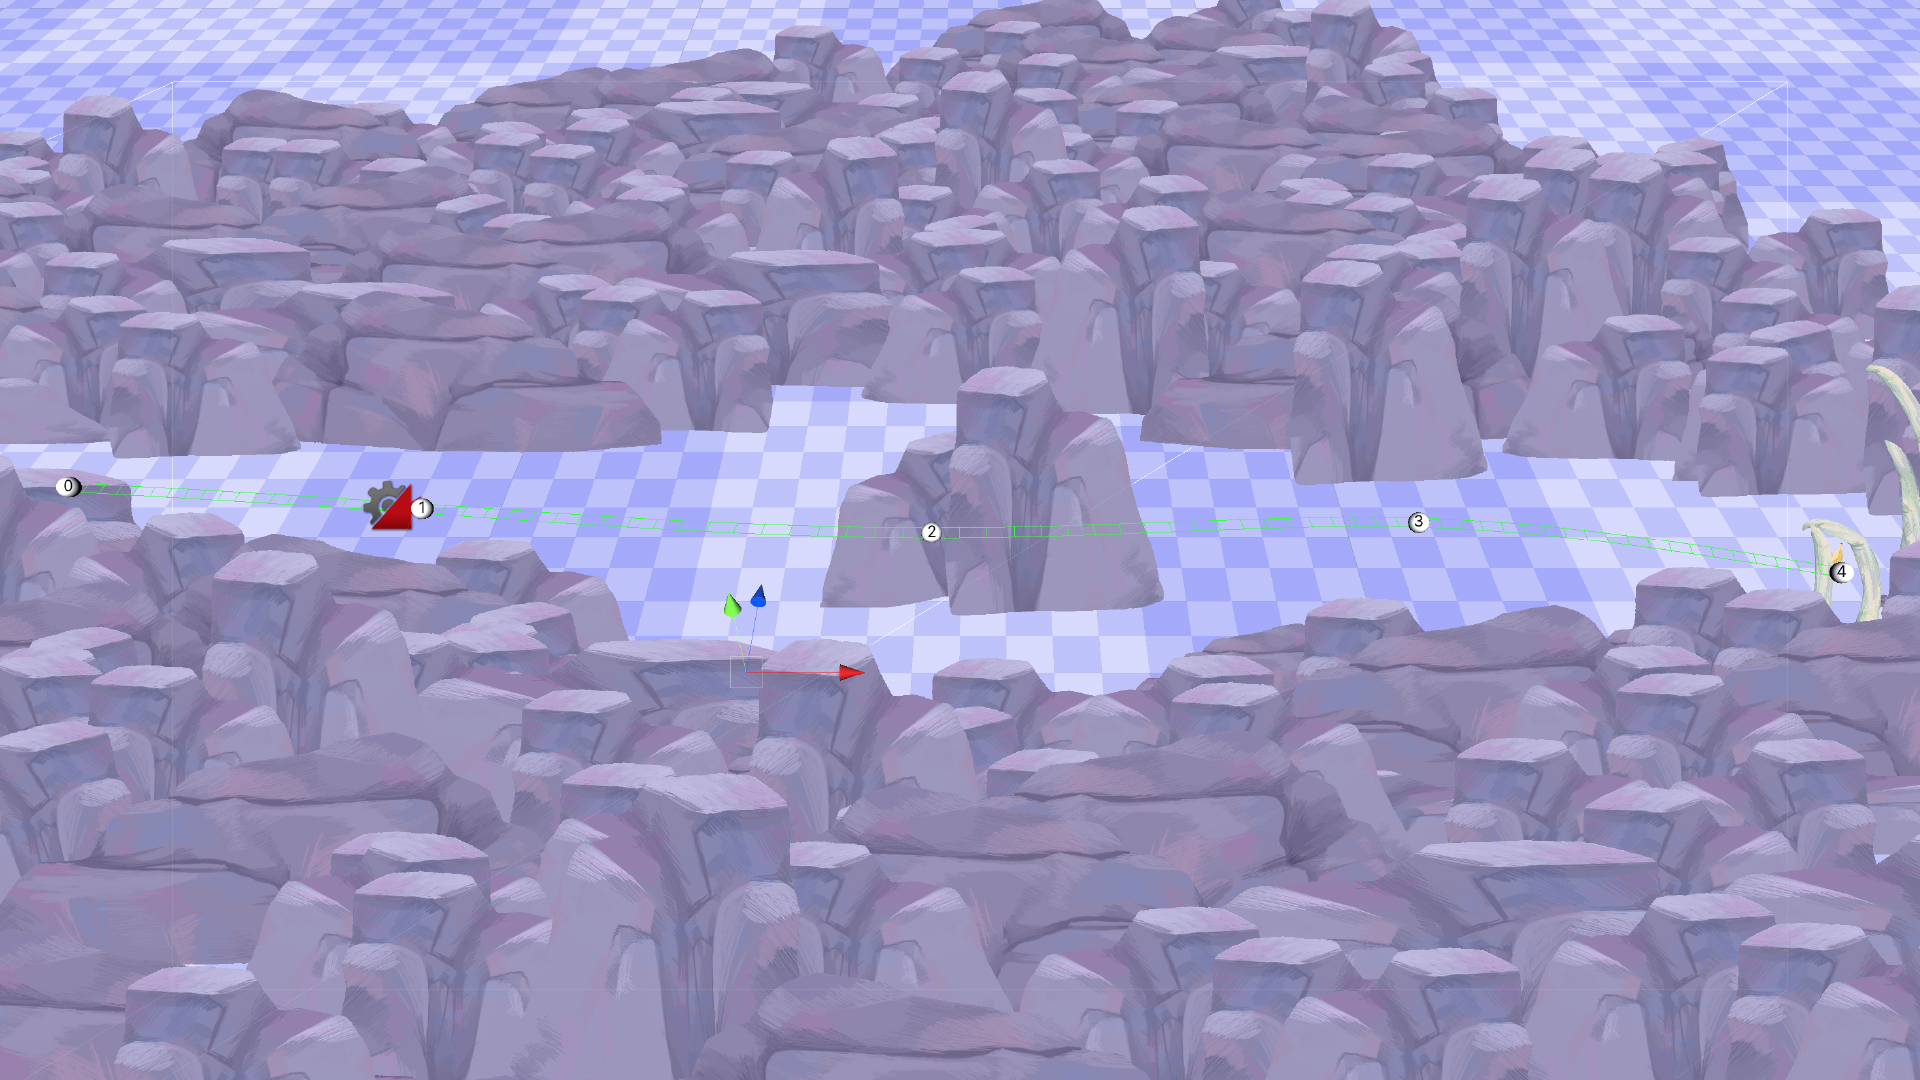
Go to the track object, and set the path you desire, you can add as many waypoints you need. Run the game, we now have a dolly following our character. The advantage we have with a dolly is that we can control some near-camera objects for a parallax effect that works great with this style.
Multiplayer
Tracking multiple players instead of one is not much different then what we have done until this point. It requires a target group to follow and a distance range instead of a static distance. To add a target group, go to the Cinemachine menu, and select Create Target Group Camera. In the targets, drag all the characters and set an appropriate radius depending on the size of the characters. The virtual camera is already set with the target group as the Follow Target. A difference to note is that we no longer have a static distance, we instead define a distance range for the camera.