Thank you for taking part in the NotSlot journey!
We invite you to join us in our next chapter:

Unity 2D Animation Part 1: Bones & Rig
This tutorial is about getting started with 2D Skeletal Animations in Unity. By the end of it, we will have a fully rigged character – ready and prepared for animation.
Project Setting
Before we can start rigging, we would need to add two packages to our unity project.
Go to Window -> Package Manager and install the 2D animation package and the 2D PSD importer.
Sprite–Sheet Formats
We can use two different formats for the character’s sprite: a PNG sprite–sheet or a PSB file.
When using the PNG format, we must separate the body parts and make sure no part covers another.
The second format we can use is the PSB file.
The PSB file is a large document format that supports all of the Photoshop features, including layers, effects, and filters. We create our character with the PSB file without separating the body parts as we would need if we worked with a PNG file. The PSB file contains each body part at a different layer.
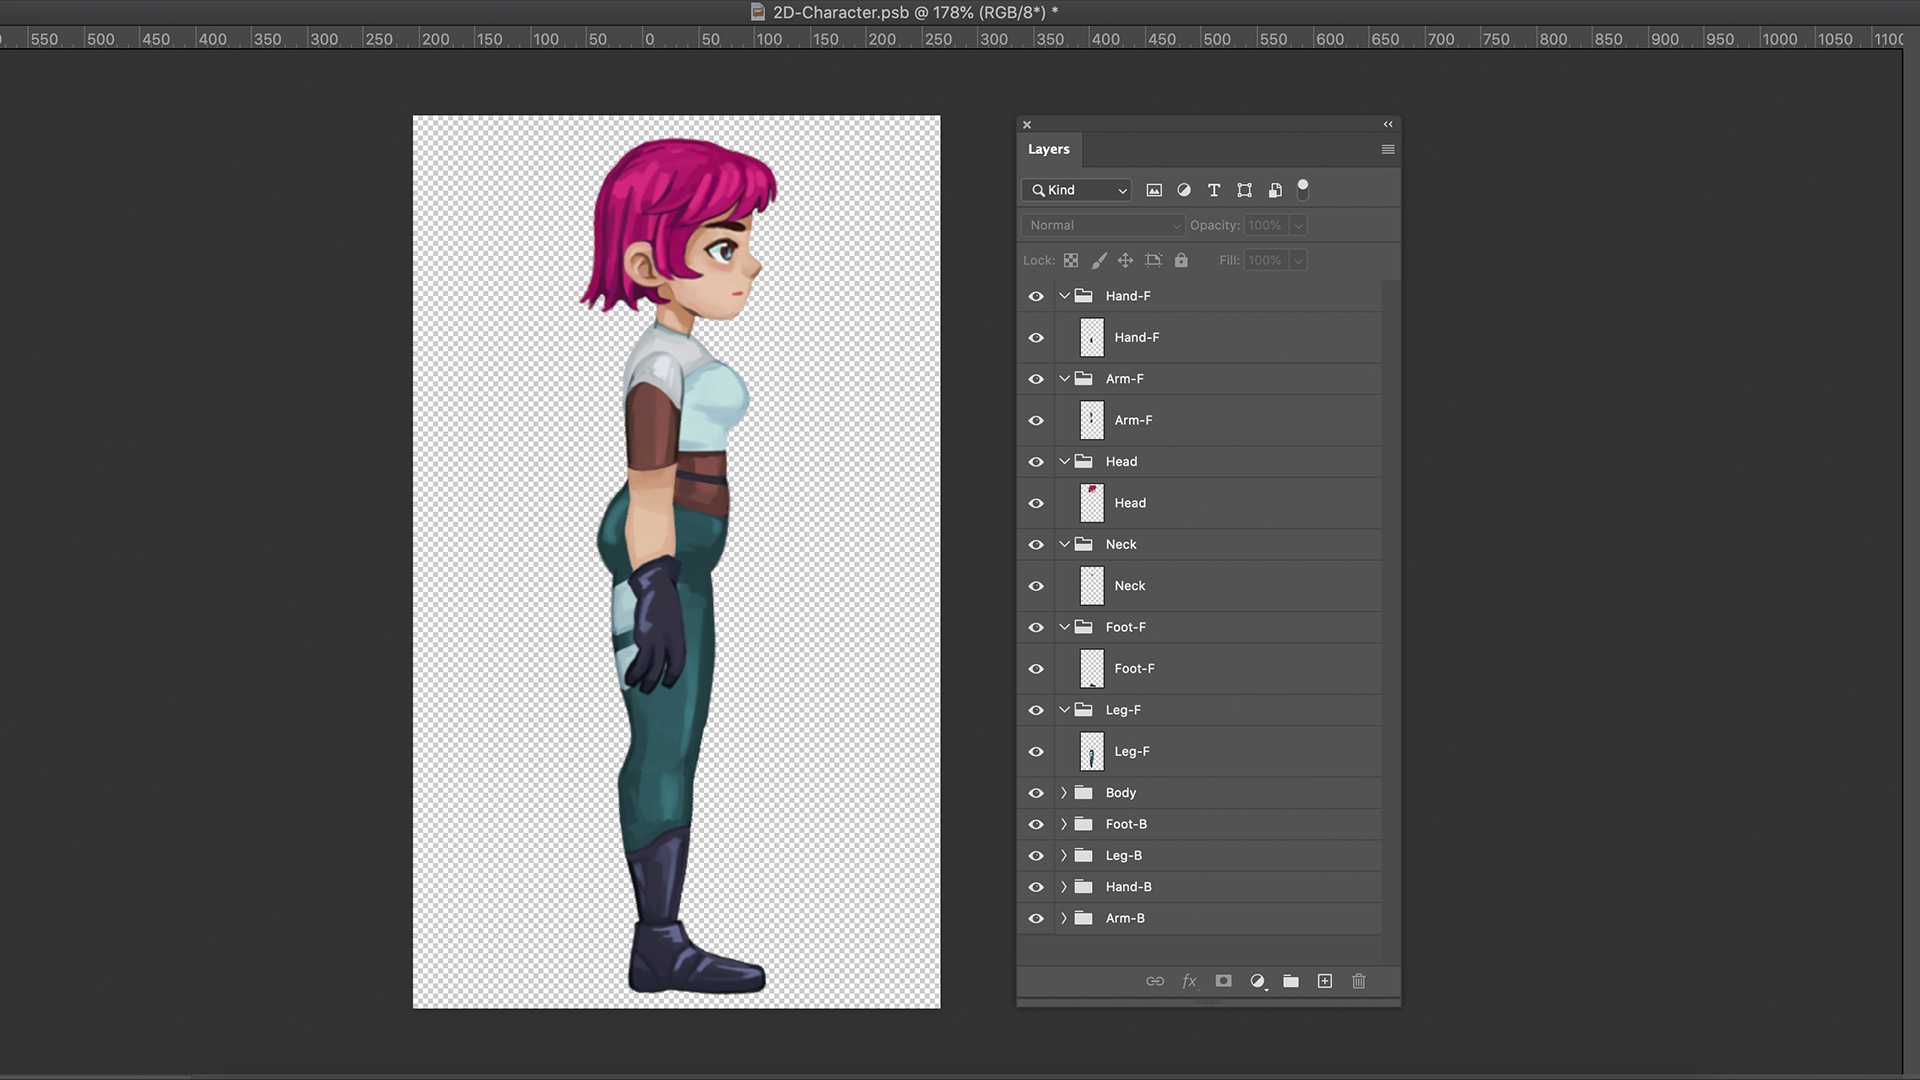
You can create this file using Adobe Photoshop, going to save as and selecting the PSB format. The process of creating bones is similar for both methods. In this tutorial, I will work with the PSB format.
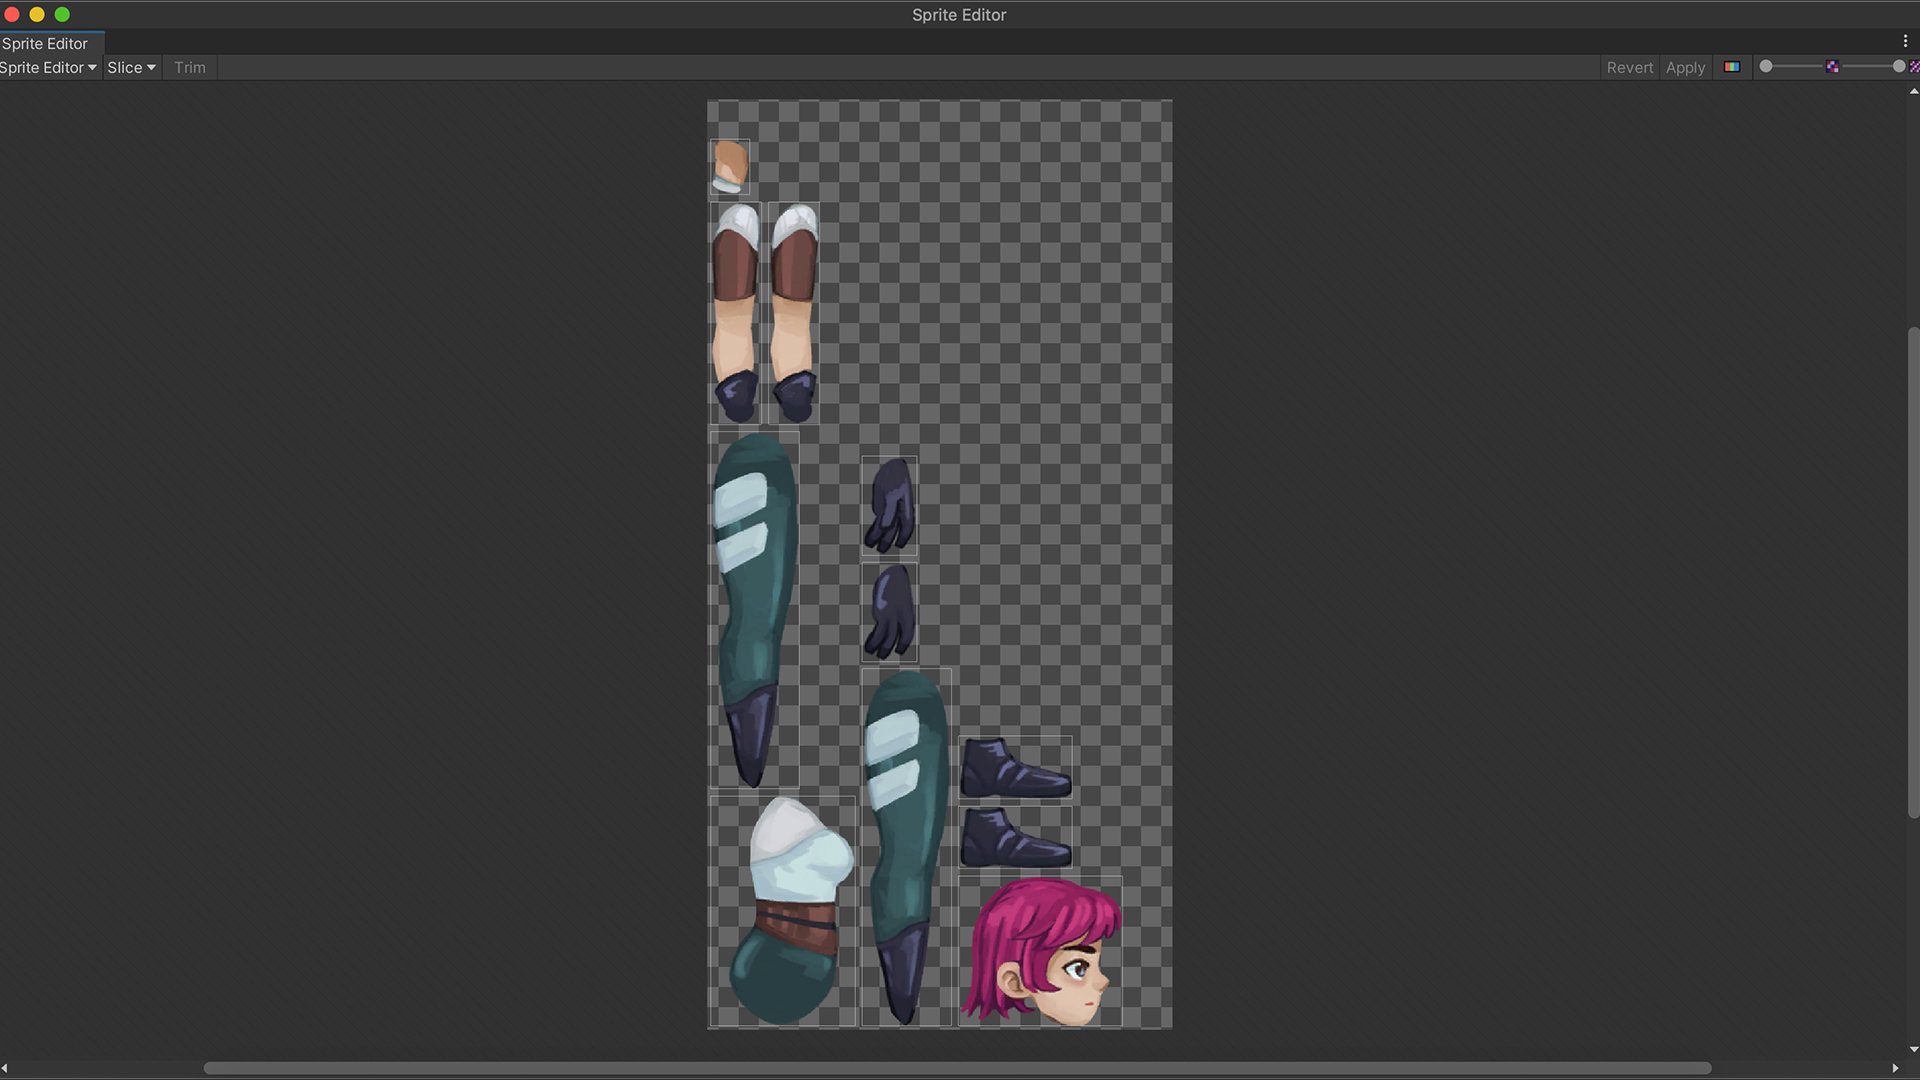
Once we place our file in the project, you can see how it automatically separates the layers and creates a sprite sheet.
Rigging
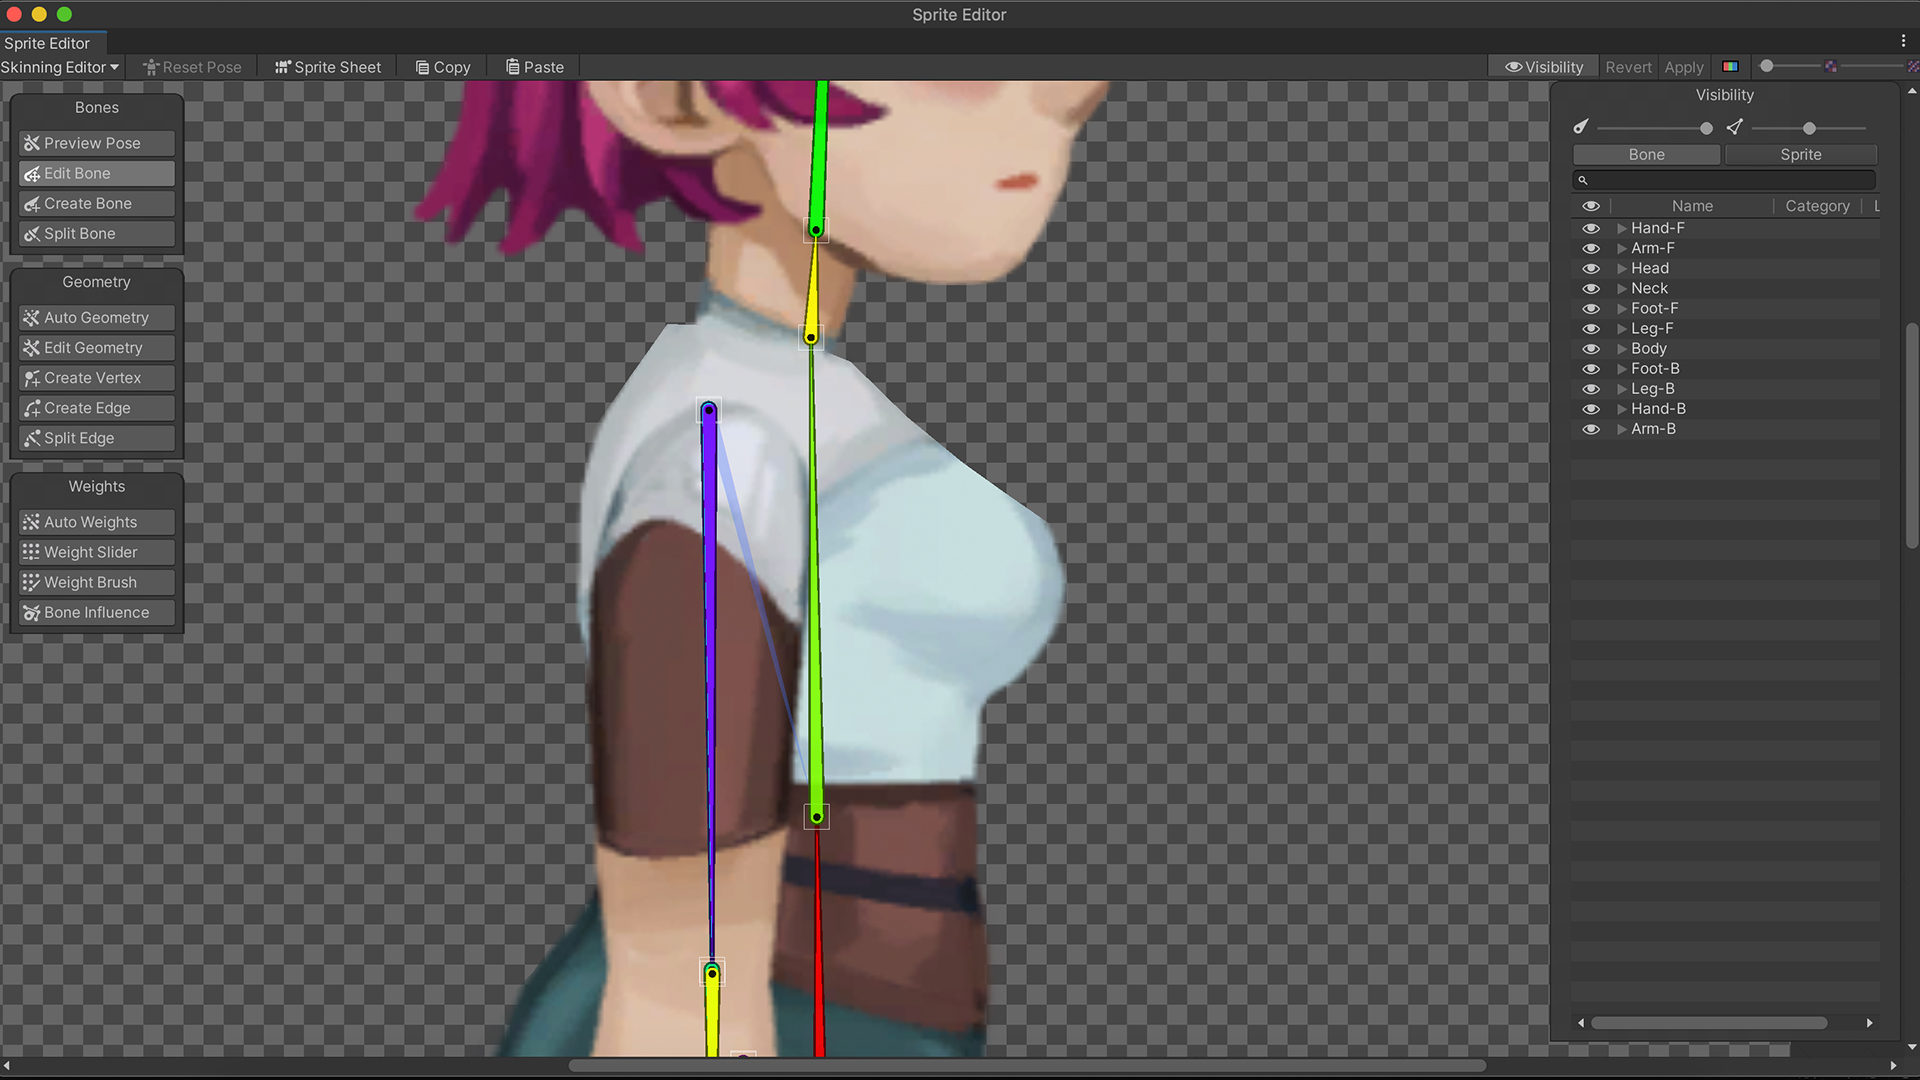
We open the Sprite Editor from the Inspector and change to the skinning editor. We can view the constructed character or view the sprite–sheet version by switching to the sprite-sheet mode.
We draw bones over our character by selecting Create Bone and click to place a bone. By clicking once and moving our mouse, we can control the bone’s lengths and engle. A second click will complete the current bone and begin creating the next one. And with a right-click, we end the bones’ chain.
If we want to edit an existing bone’s position or length, we can either use the Edit Bone button or click on the bone’s anchor to move the bone as we like.
Regretting creating a bone? You can delete it by pressing Delete on Windows or Command + Backspace on Mac.
When creating a rigged character, it is important to pay attention to the bones hierarchy.
A parent bone is the origin of the other connected bones. When we move it, it will drag the child bones with it.
With this character, we want the arms and head to follow as we move the torso bones, and for that, we will need to make the torso bone their parent.
With Unity, once we place a bone, the second one is automatically set as its child, but we can change that; clicking on a bone will mark it as the parent of the next bone we will create.
This faint line represents their connection, and you can double-check your bone layout at any time.
Want to change a bone’s parent? We can do that at the Visibility tab. Here we can control our bone’s order, names, and depth. Choose the bone you want to change and drag it under any other bone.
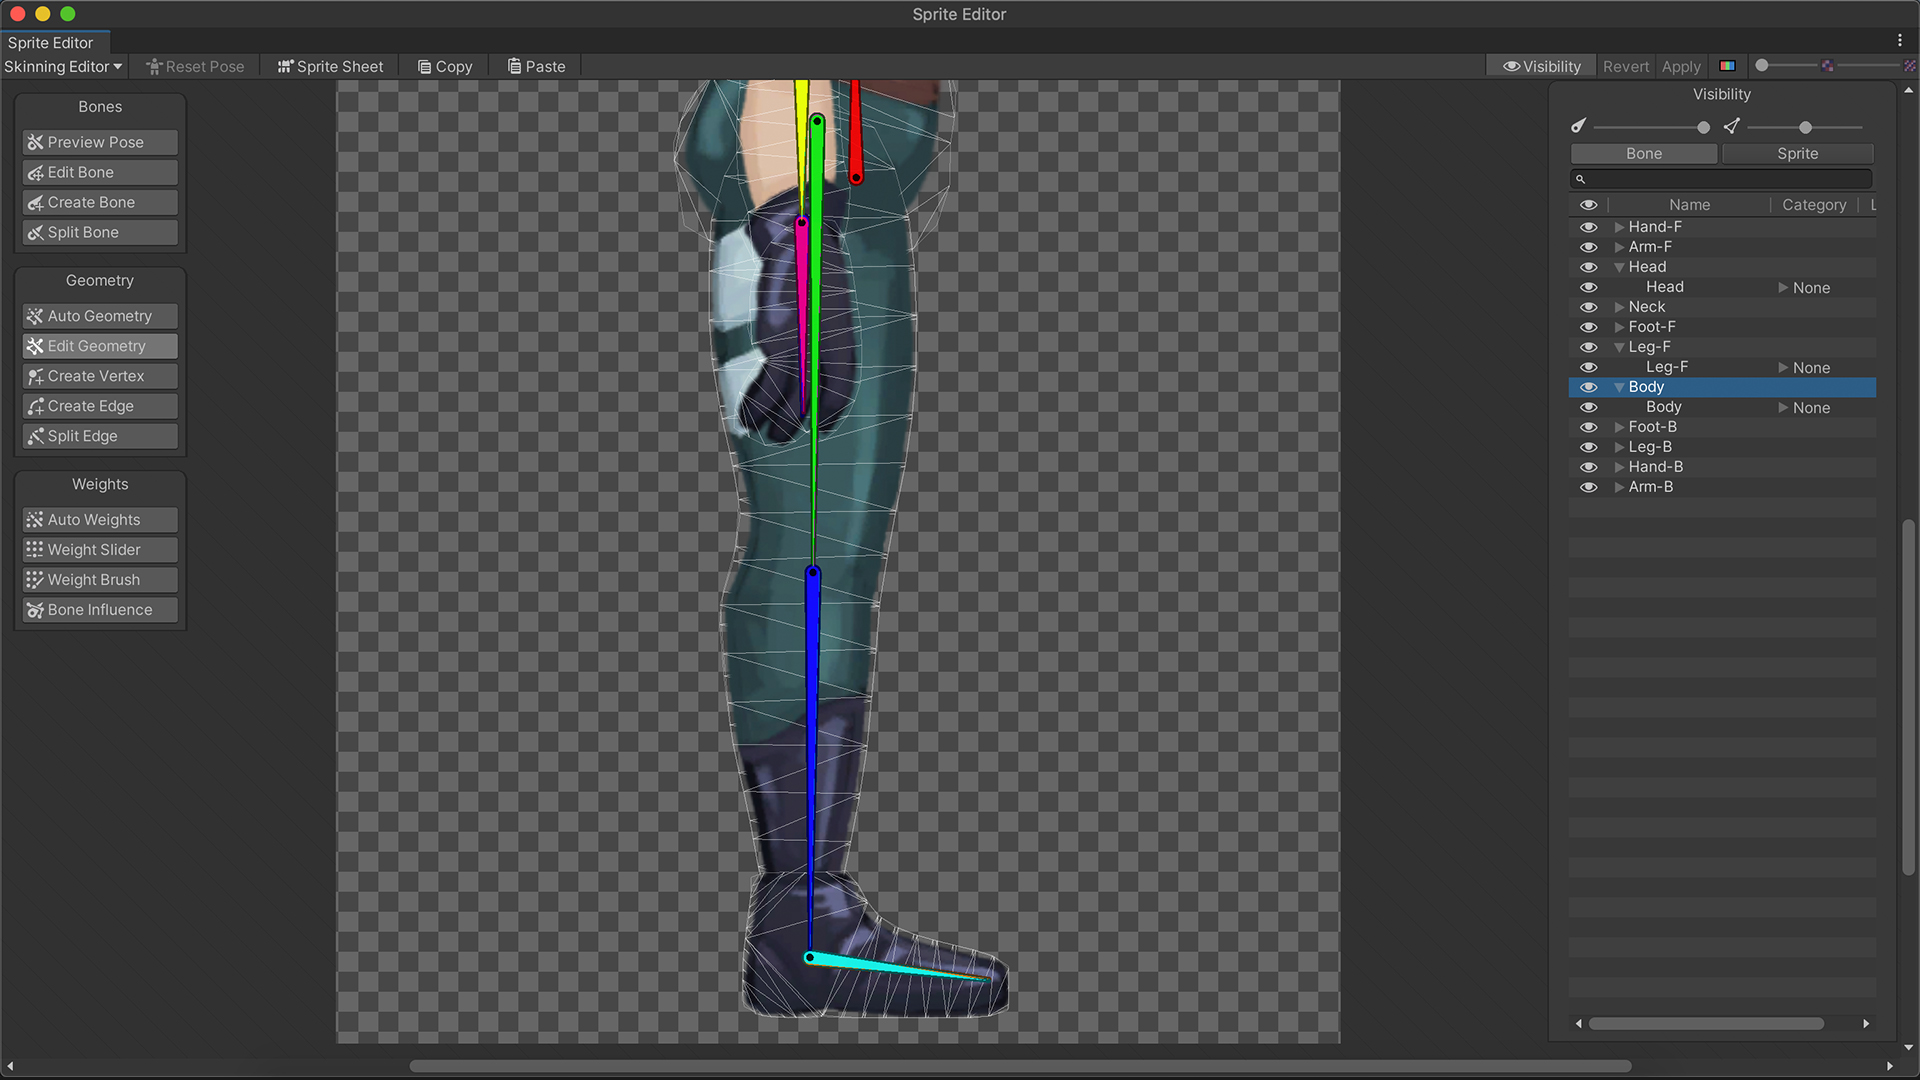
I went ahead and fully rigged the character.
For some bones, I used the Split Bone option to split them into two. A great way to make sure two bones have the same angle.
Since the character’s body occludes an arm and a leg, I made sure to treat them with the bones they deserve.
At the Visibility window, you can see the bones’ names and hierarchy. I filled in different depth numbers. Higher numbers for bones near us, like the front arm and leg, and lower numbers for bones distant from us, like the back arm and leg.
Now it’s time to connect our bones to the sprite.
First, we will need to add Geometry to the sprites. Geometry, also known as meshes, allows a polygon to be defined inside an image, creating vertices to manipulate bending and deform the sprite.
The simplest way to add Geometry is by the Auto Geometry option. We can go to each sprite and rearrange, add or reduce the vertices. Keep in mind that complex meshes can reduce performance; ideally, we would want to use as few vertices as possible.
We are moving on to connecting bones.
With the Bone Influence option, we can select a sprite and add bones to influence it. Select a sprite in the Visibility window and attach to it a marked bone.
Of course, one sprite can have as many bones as you like.
Though the same as before, the fewer the bones in one character, the better for your game’s performance. While Unity Jobs helps, we should always keep an eye on the performance.
To make the bones influence the sprite vertices, we need to add Weights. Weights allow transformed bones to deform the mesh automatically.
The easiest way is to use the Auto Weights option.
We can either generate Weights with or without associate bones. As we connected our bones in the previous step, uncheck it, and generate. We now have lovely gradients representing the weights’ division.
With the Weight Brush option, we can use a brush to adjust the weights.
The mode ‘Add And Subtract’ adds the influence of a new bone, while the mode ‘Grow and Shrink’ changes the weight balance between bones already influenced by the selected bone. The Smooth mode gently smoothes the gradient between bones’ weights.
Once finished adjusting, click Apply.
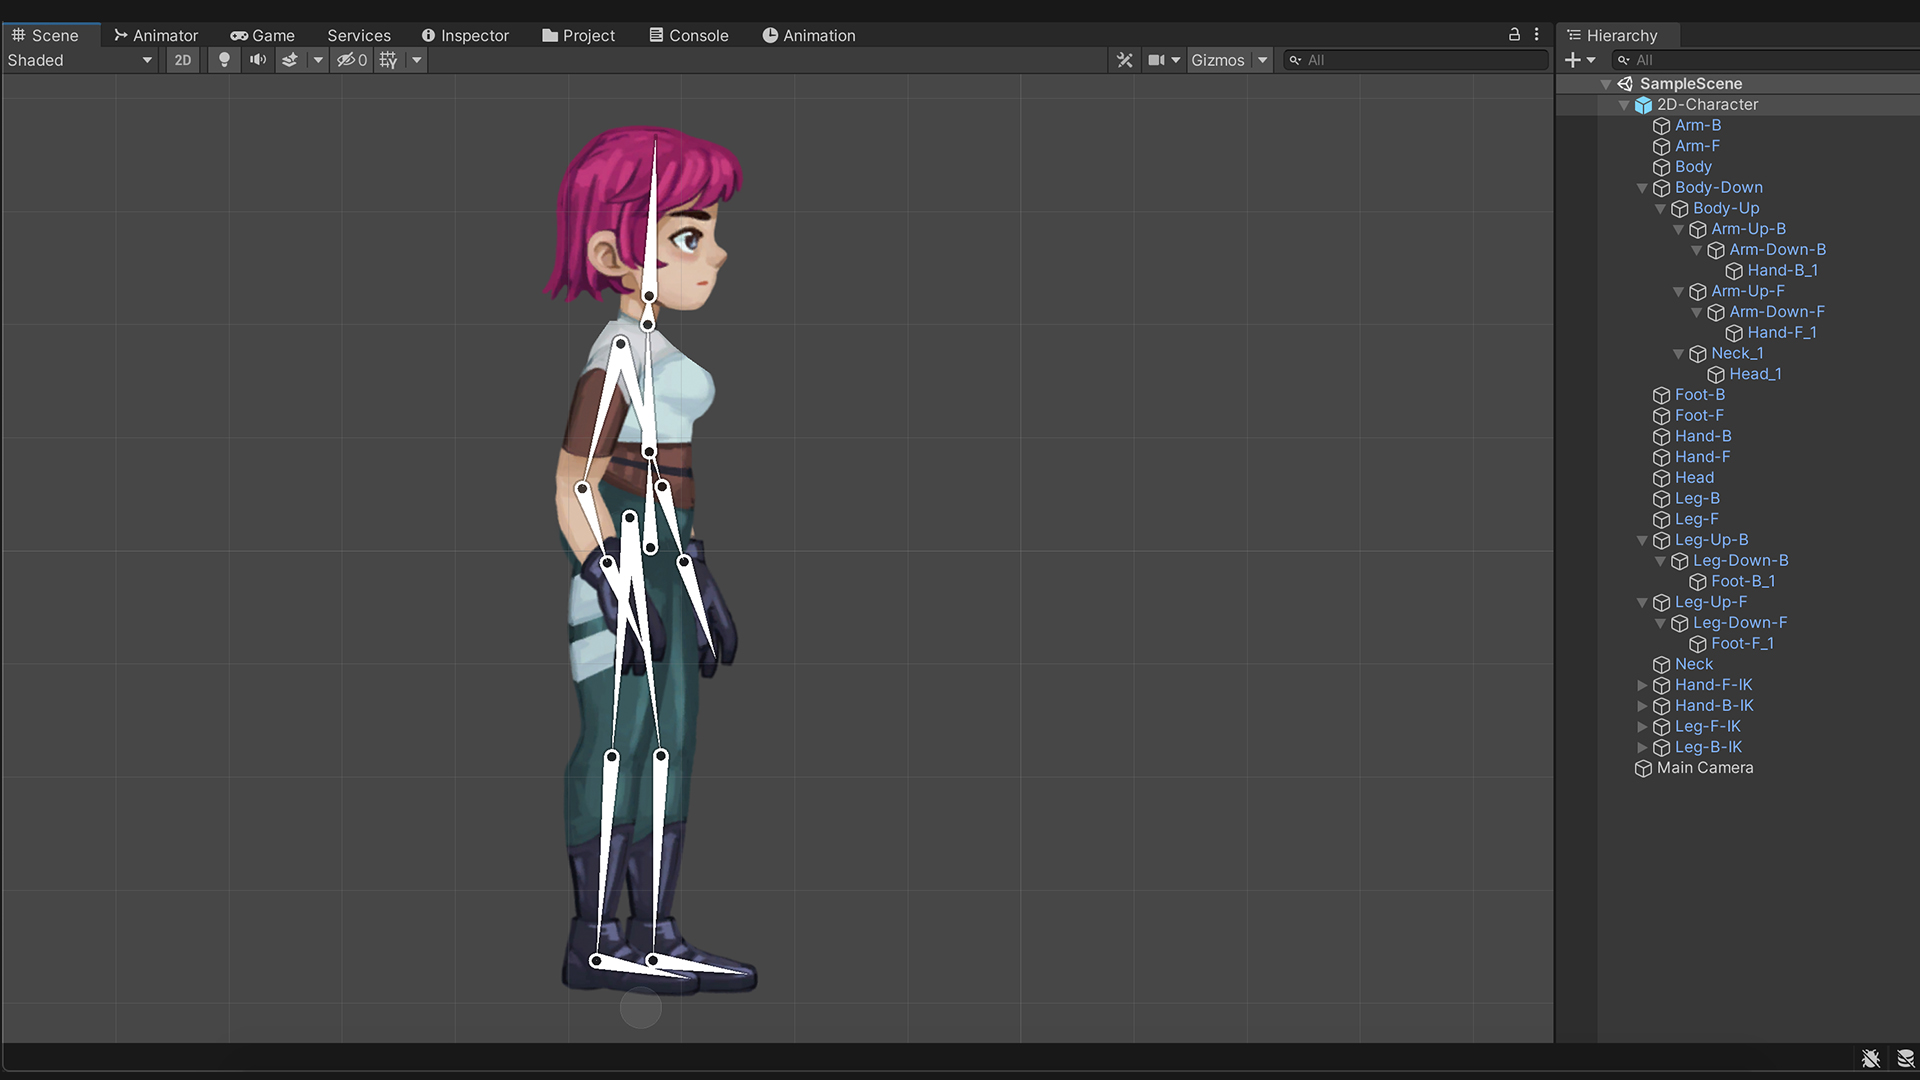
Dragging the character to the scene, we can see the bones we just created and the sprites.
Inverse Kinematics (IK)
Our last step before starting to animate is to add IKs.
With IK, we can add inverse kinematics to our character, making the animation process much more comfortable.
For this type of character, the IK will work best on the legs and arms.
We start by selecting the character’s root object and adding an IK Manager component. With this component, we create and control our IK. Clicking ‘add to list’ presents 3 IK solver options, each using a different algorithm to calculate bones’ position.
For this character, we will use the Limb IK solver – a standard two bone Solver that is ideal for posing joints such as arms and legs.
Selecting this IK solver will create a new game object. I renamed it to Hand-F-IK, as I want it to control the Front arm bones. We drag the Front hand bone to the Effector field.
The Effector is the bone that the rest of the bones be calculated based on its position.
Clicking on Create Target will create our IK.
The Target is what we use to animate the IK – the Solver will try to reposition the Effector where the Target is.
The arm bends in the wrong direction. We can change that by checking the Flip checkbox. Since the hand bone is used as an Effector, we can’t rotate it as long as the Constrain Rotation box is checked. Once unchecked, we can adjust the hand rotation to match the arm’s movement.
We repeat the same process for the other arm and legs.
By attaching an animator controller with a new animation, we are now ready to animate!
Don’t forget to enable keyframe recording before starting animating.
In the next part, we will add a new skin to the character, making a swappable rig that uses the same bones and animation keyframes.