Thank you for taking part in the NotSlot journey!
We invite you to join us in our next chapter:


Unity 2D Animation Part 2: Skin Swapping
Skeletal Rigs offer many advantages, but swappable rigs, also known as skins, is probably one of its best.
With skins, we can apply the same rig and animations on different characters. Either for creating a new character, or changing the looks of an exiting one.
By the end of this tutorial, we will have various characters reusing the existing bones and meshes we created in the previous part.
PSB and Rigging
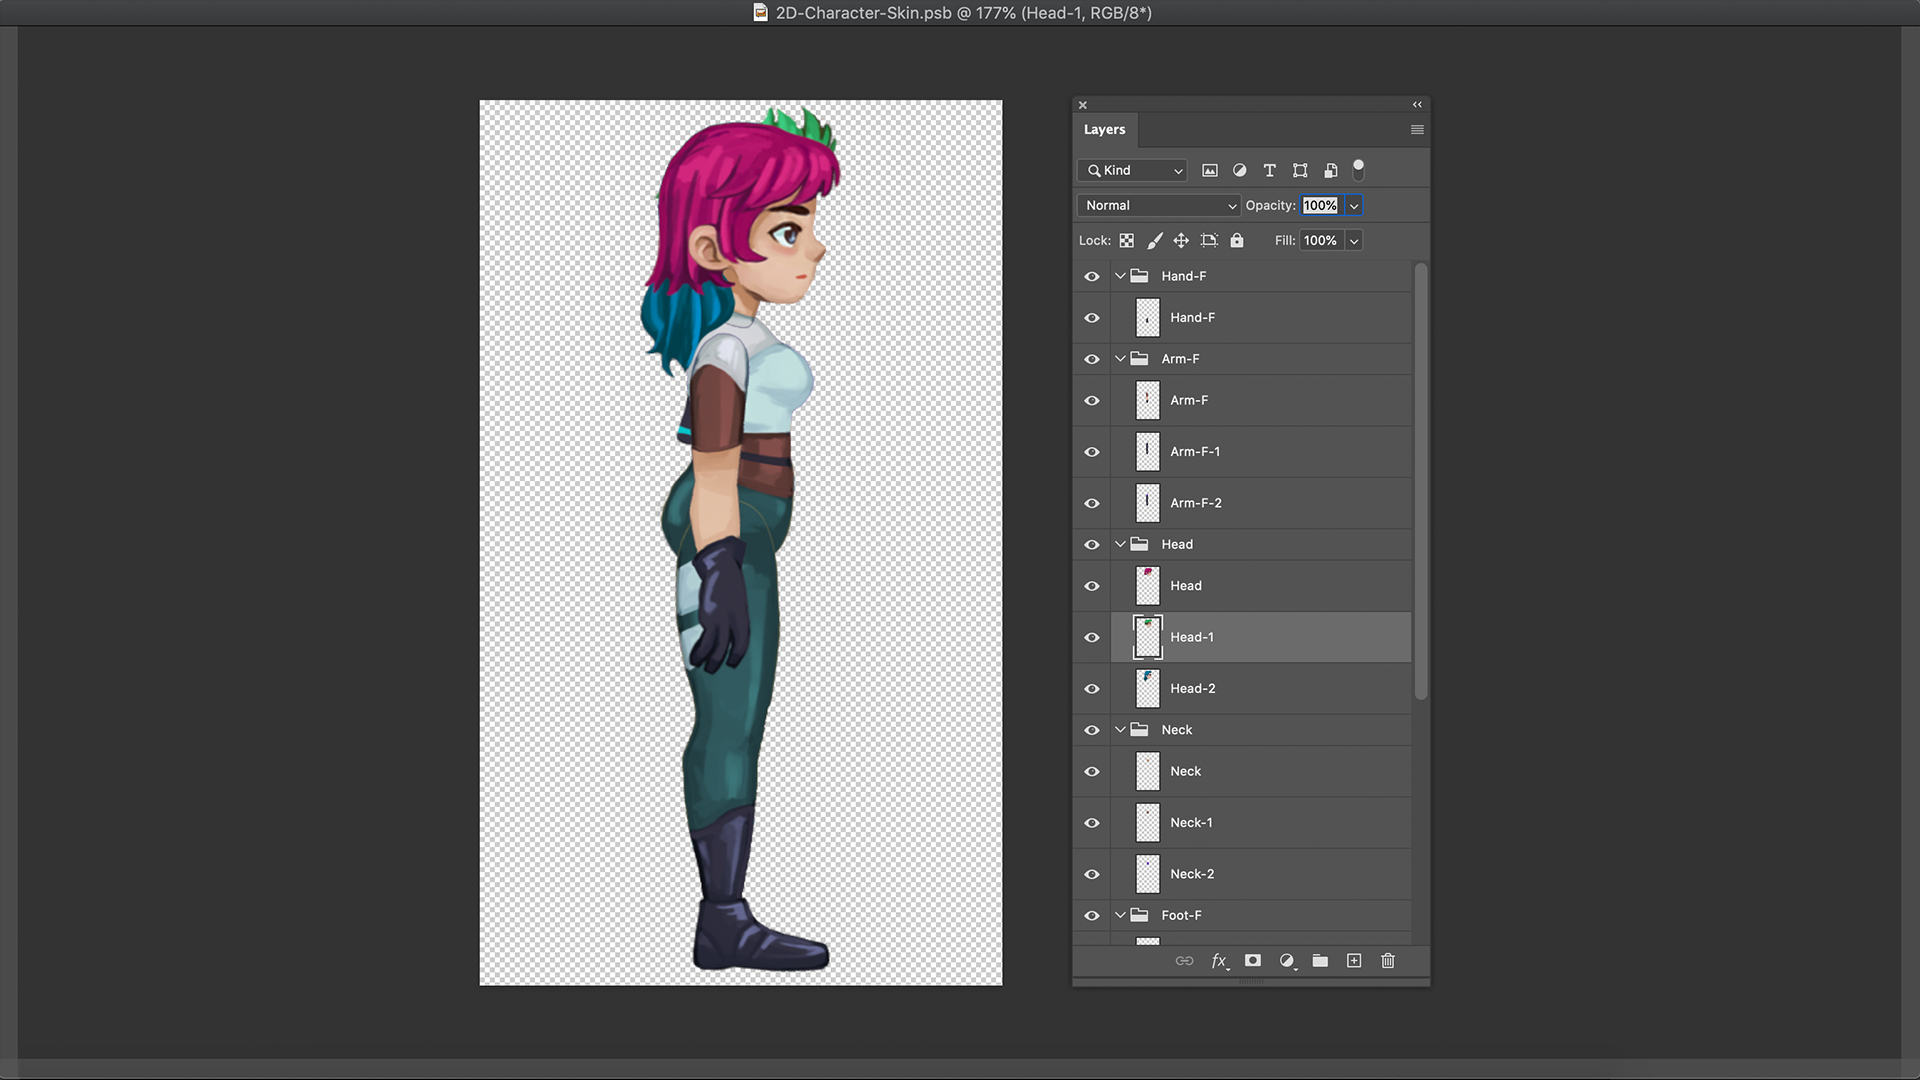
To create our sprite-sheet, I recommend using the PSB format to automates processes that otherwise we had to do manually.
For example, when using a PSB file, we can place all swappable sprites under the same file, creating a pool of accessible sprites.
We place the same body parts from different skins under one group. As I will explain ahead, the groups will have a crucial role as soon as we convert them into Categories.
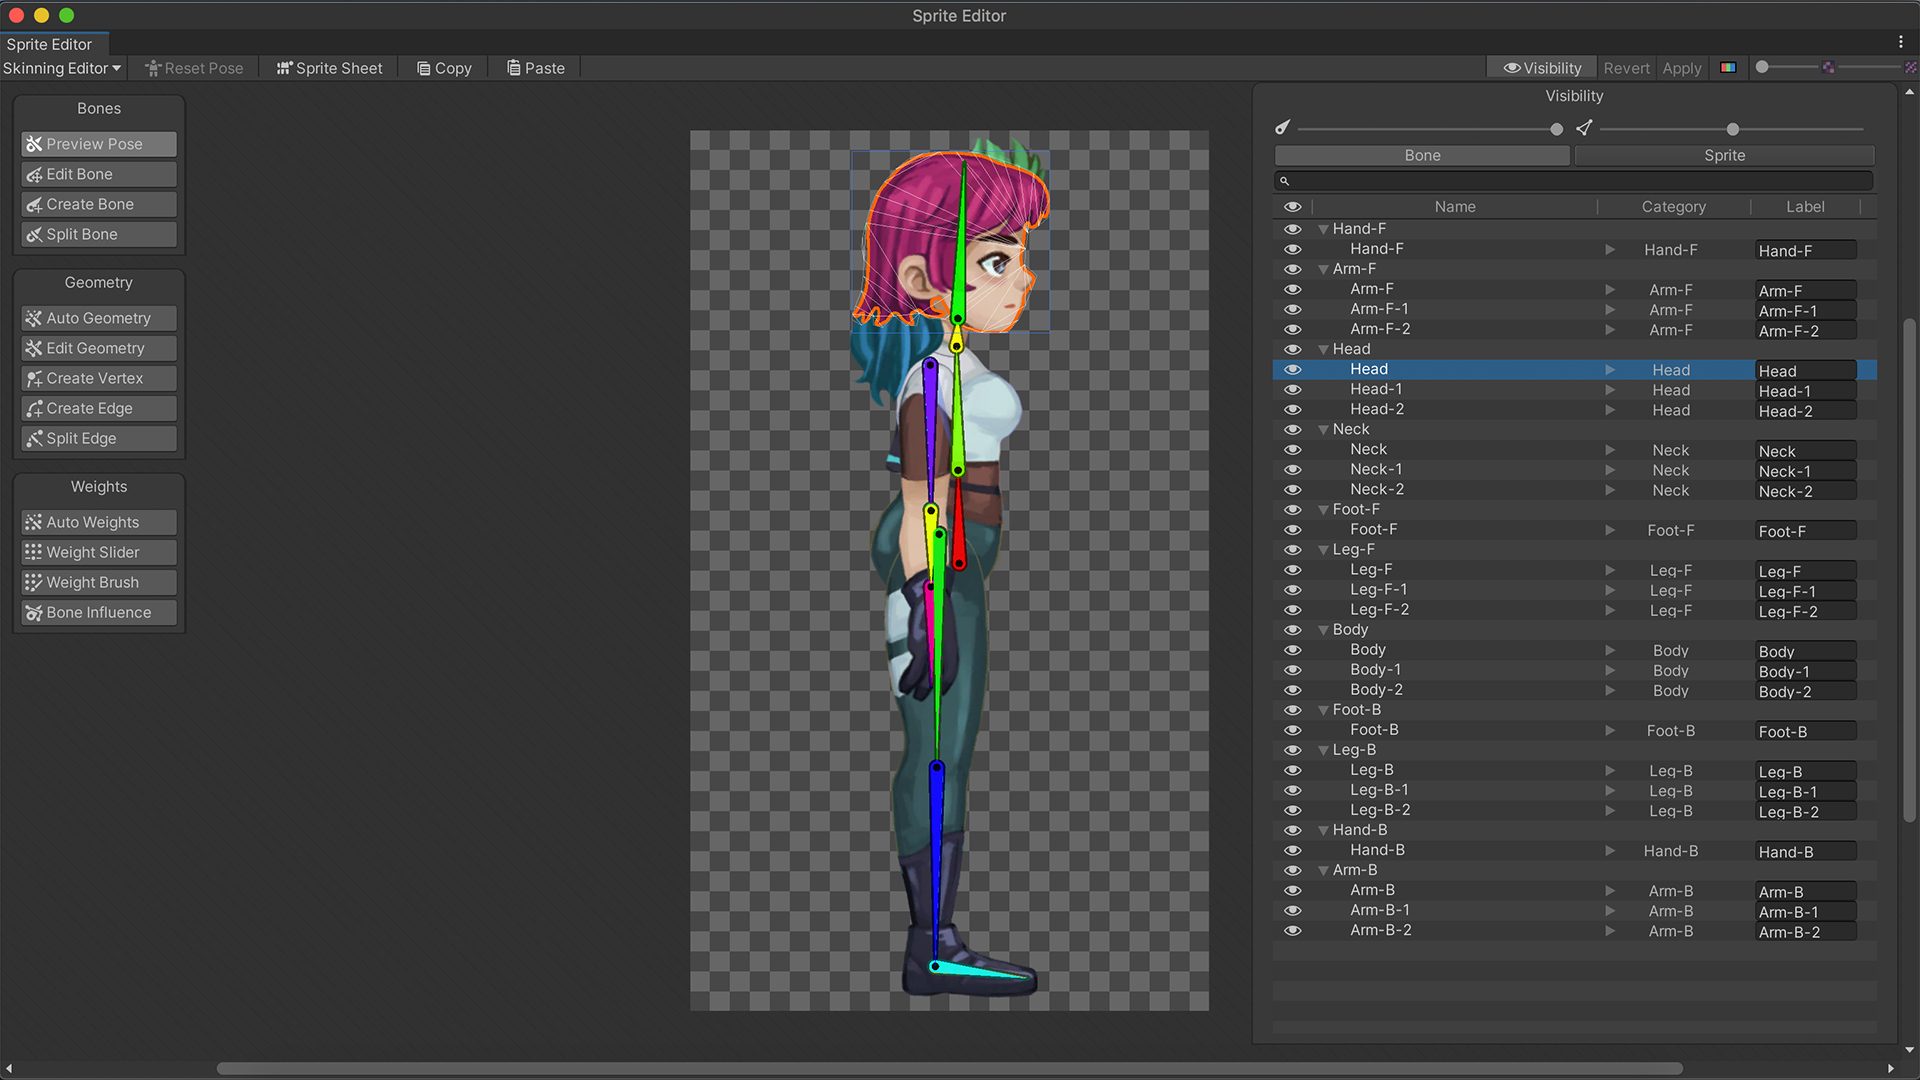
After placing the file in our project, we go to the Skinning Editor and use the rig we created in the previous video. We can easily duplicate rigs from one sprite-sheet to another using the Copy and Paste options.
The bones won’t influence our new sprites until we explicitly connect them. Going to the Sprite tab at the Visibility window, we can select the new sprites and attach them to their bones.
We must also add the Geometry and Weights manually. Use the Auto Geometry option and make sure to tick the Weights checkbox.
Categories and Labels
We want Unity to recognize the different skins, and for that, we need to create Categories and Labels at the Visibility window.
A Category is a placeholder for a sprite. We can choose which Label, and therefore Sprite, is active for a Category in a given moment.
By placing our layers under groups in our PSB file, we can easily convert them into Categories and Labels.
Select all groups, right-click on Category and use the ‘Convert Group to Category.’
You can see how it added a Lable section next to the sprites. We need to define a Label for any sprite we intend to use. This way, we could swap them by code during runtime.
Once we finish, click apply and add our character to the scene. Add an IK to the limbs, as we did in the previous video.
Using the PSB file to create the Categories and Labels generates components for the character automatically.
At the character’s root, we have the Sprite Library component – which contains the Categories and Labels of the character.
If you use a PNG instead of PSB, you should manually create a Sprite Library Asset from the menu Assets > Create > 2D > Sprite Library Asset.
At the character’s sprites, we have the Sprite Resolver component.
This component pulls information from the Sprite Library Asset and visually represents to us our Labels. Here we can select the desired Lable to render.
We can also switch the displayed Sprite on each frame at run time with frame-by-frame animation.
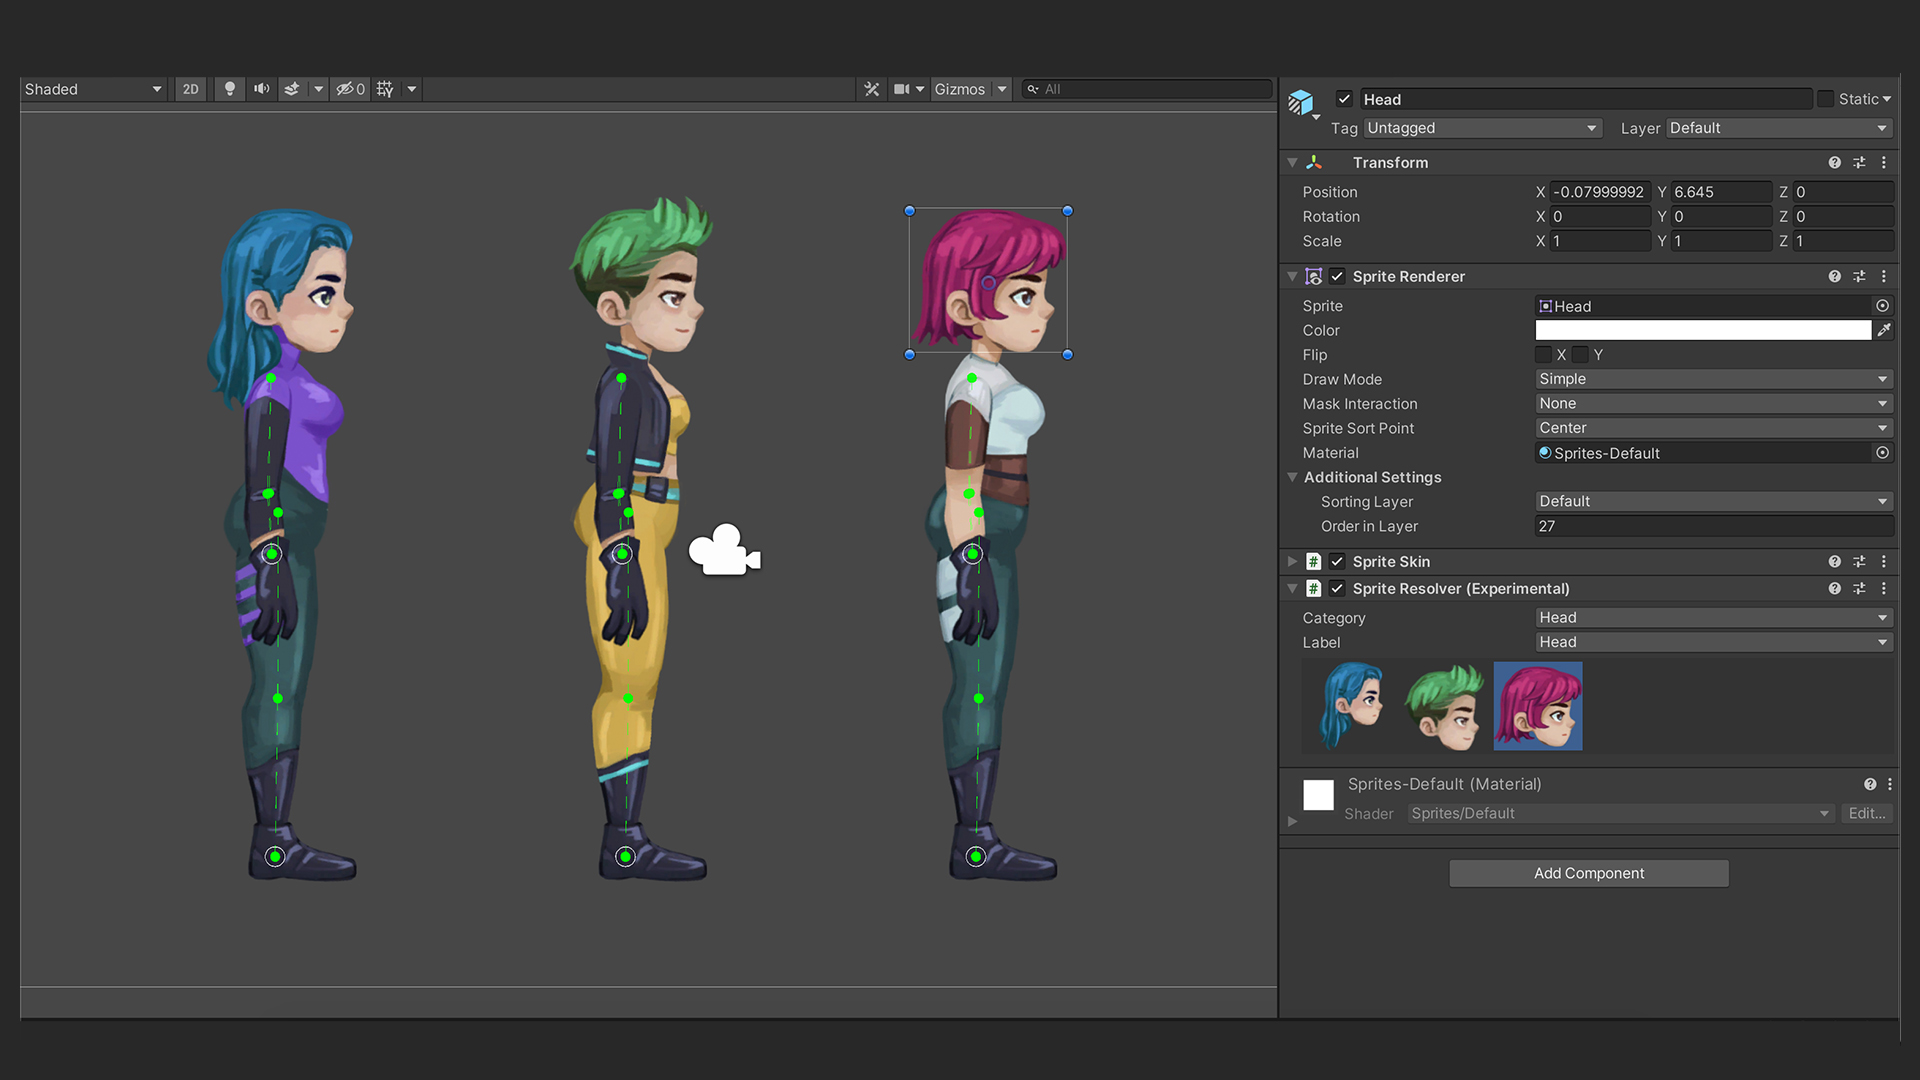
I created a prefab with the base skin and made variants from it for each skin.
And here it is! Three characters with different skins, using the same rig and animations.
In the next part, we will create scripts to swap sprites, inject custom sprites, replace skins as a whole, and finally create a mixer to create various characters.