Thank you for taking part in the NotSlot journey!
We invite you to join us in our next chapter:


Visual Scripting Components Part 3: Timing
In this article, we’ll learn how to utilize timing in Unity Visual Scripting; We will explore all the nodes Unity offers for working with time.
Waiting
In some cases, we may want to suspend the execution of the rest of the graph flow. For example, we may wish to delay the appearance of a Game Object to give it the dramatic entrance it deserves.
To create such a delay, we can use one of the Wait nodes. A delay can be a given number of seconds or a condition that must be fulfilled before moving on.
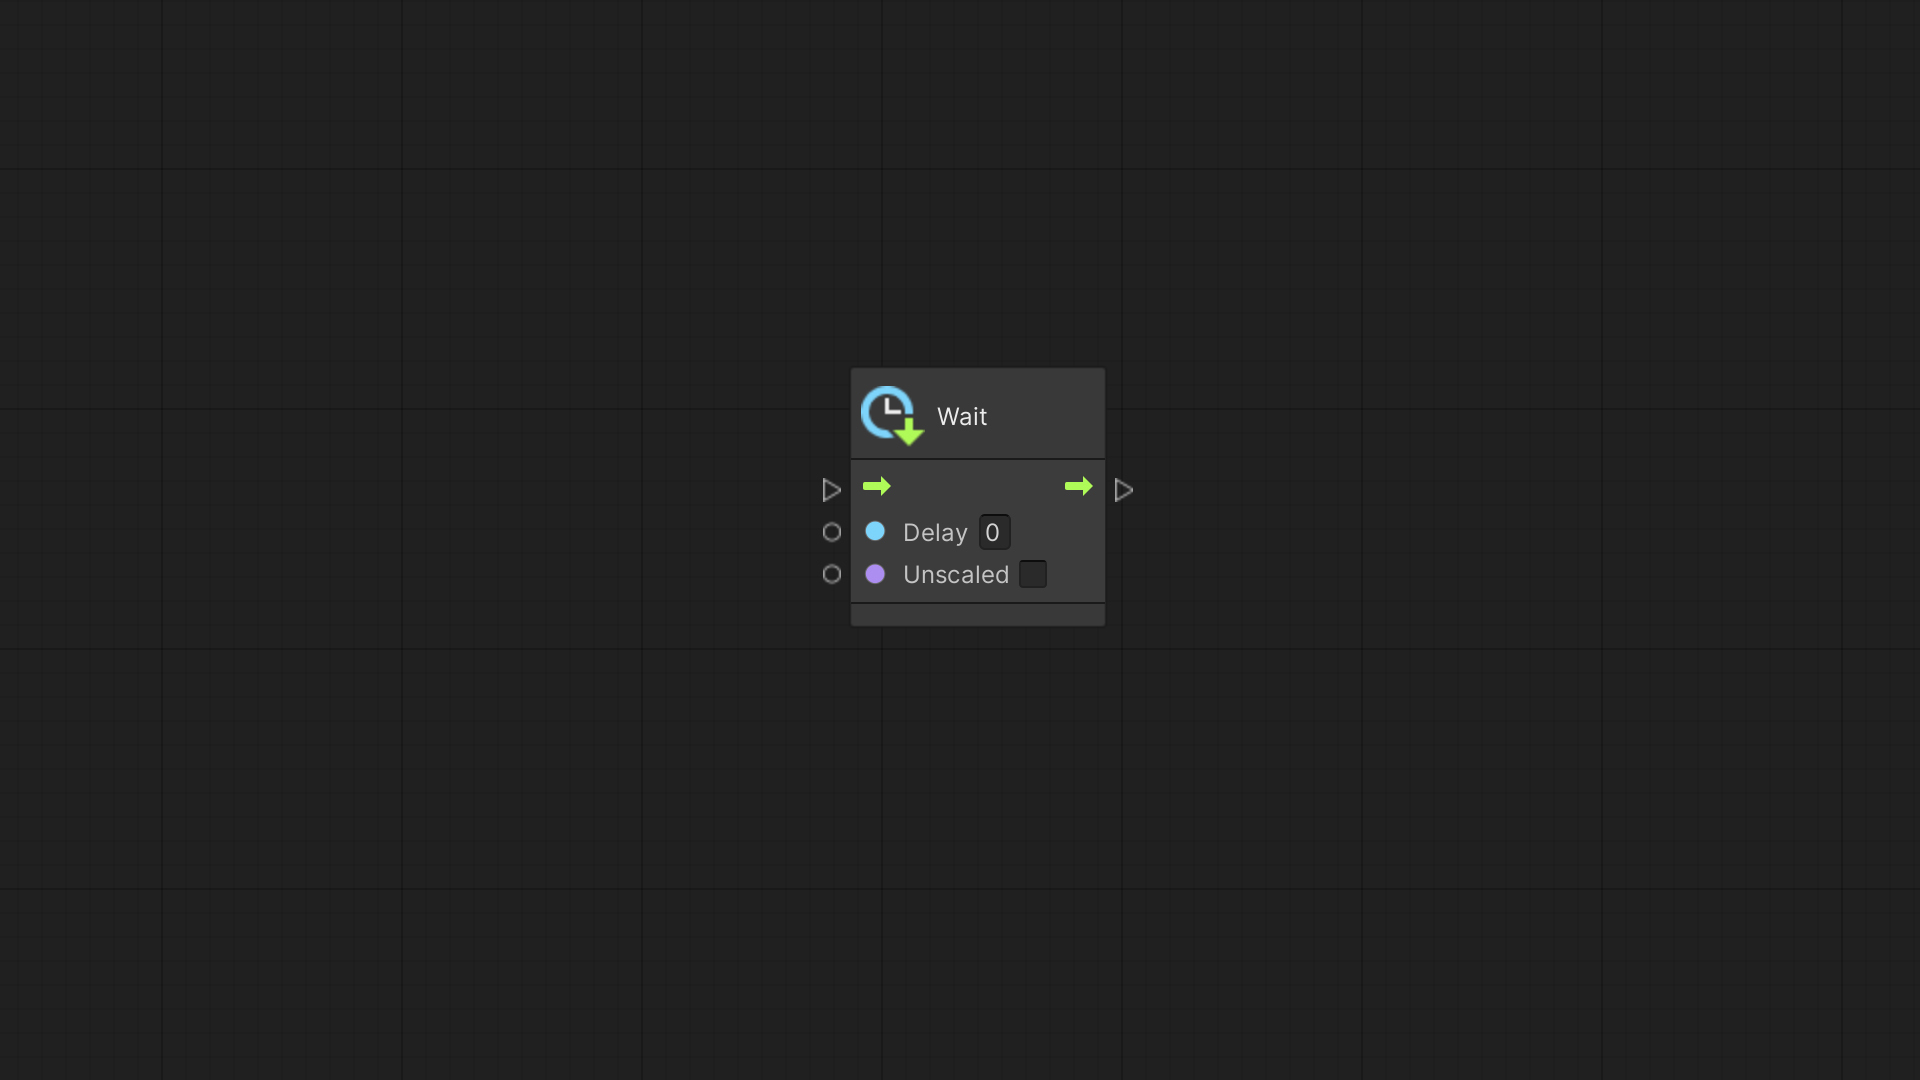
Wait For Seconds is a straightforward wait node and probably the most common. With this node, we can set the delay time by a number of seconds.
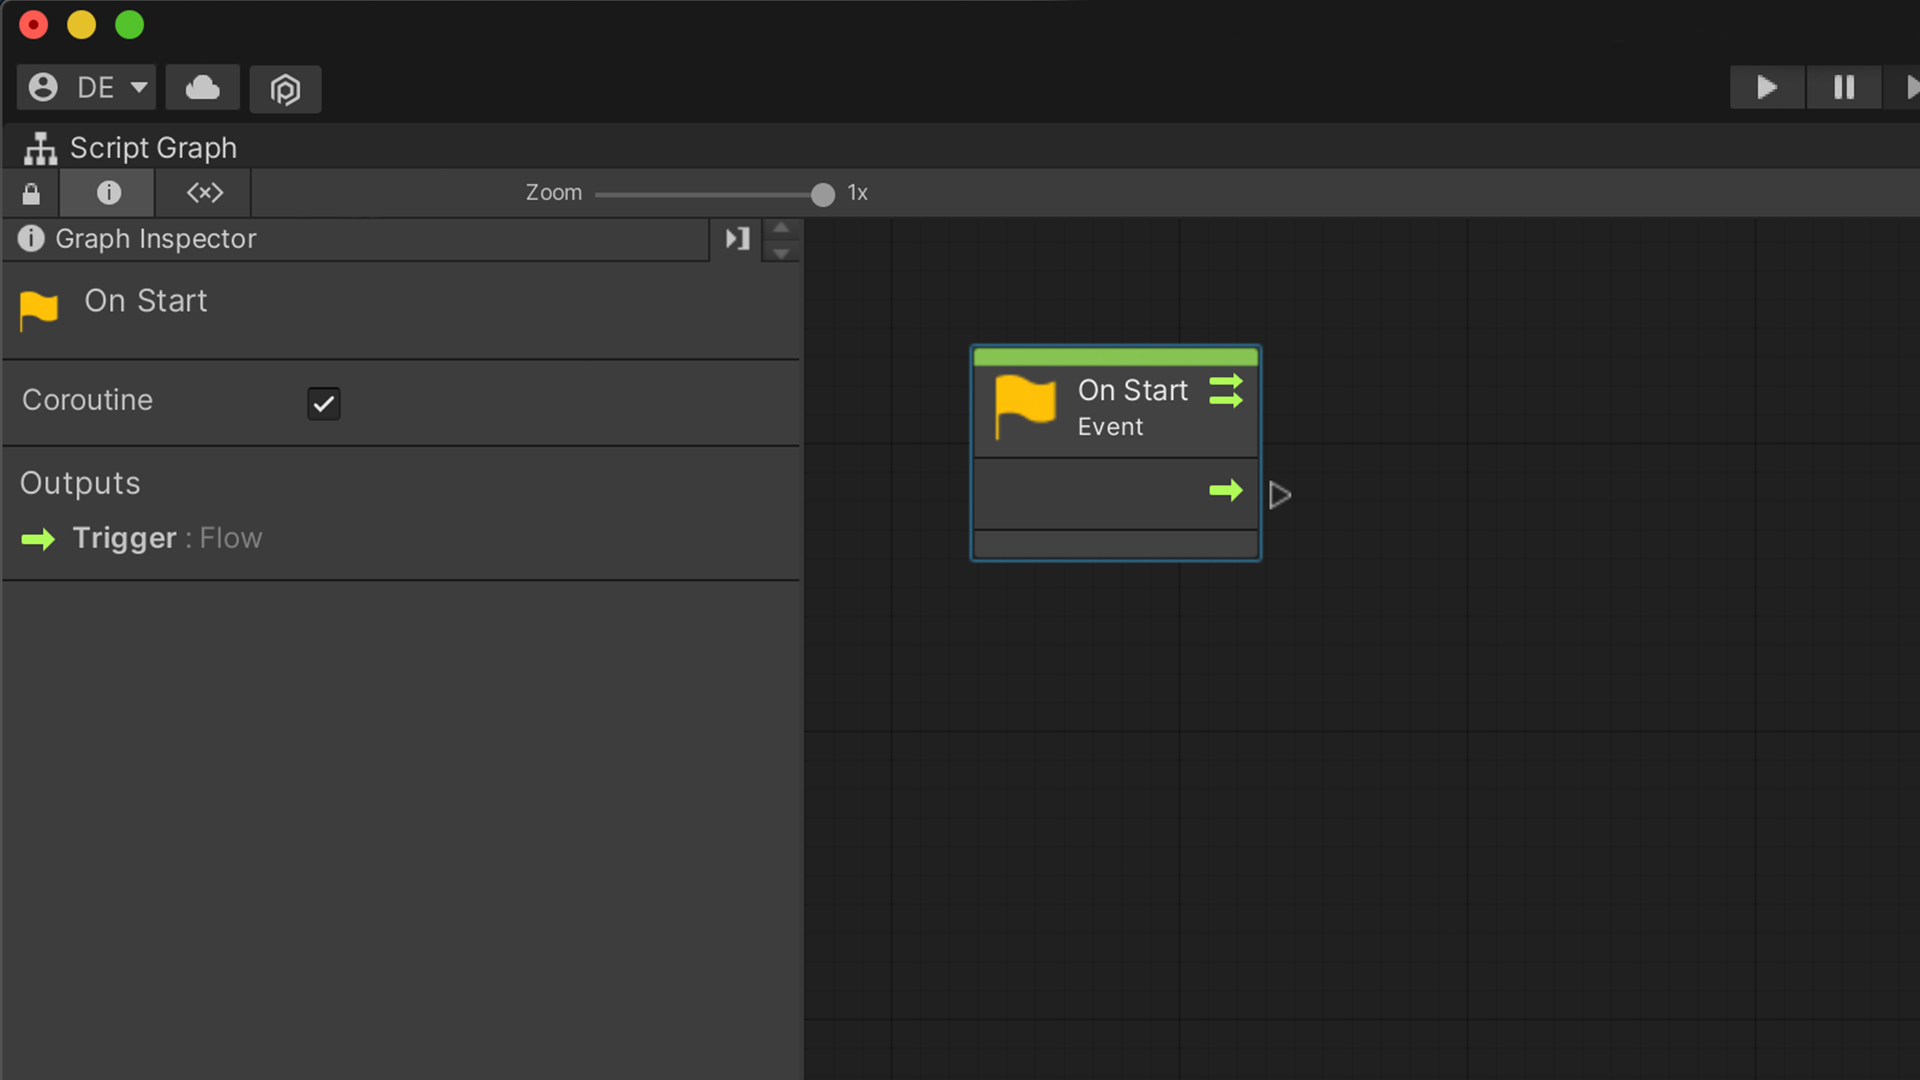
When using a Wait node, it is essential to mark the initial event that starts the flow as a Coroutine.
With a Coroutine, we can run an iteration over multiple frames instead of completing the task immediately. Without this setting, our script won’t support the Wait node.
We mark the event as a Coroutine by selecting it and enabling the Coroutine checkbox. Notice how a small dual-arrow icon appears on the event, indicating that it runs as a Coroutine.
Progression
Timer
The Timer node allows us to delay the main action and run another action with each frame tick until the timer completes.
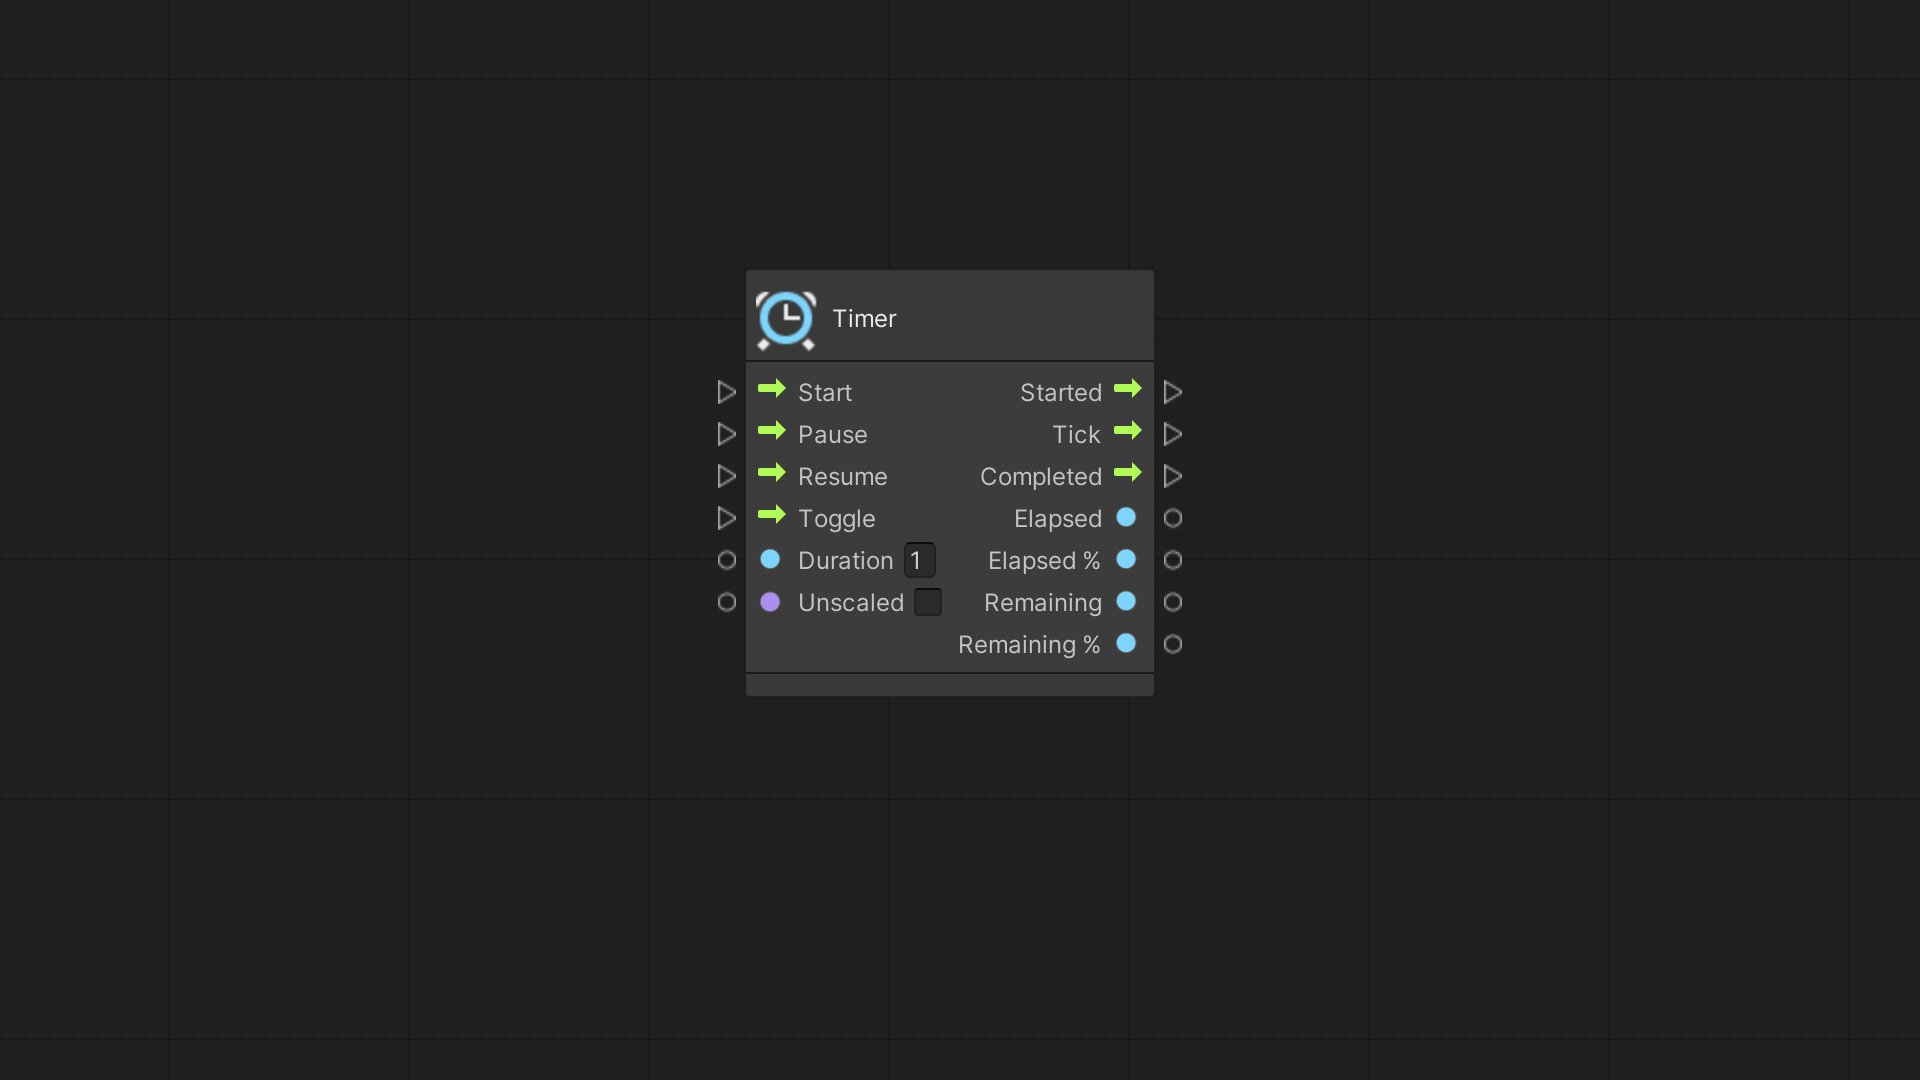
We set the timer’s duration at the duration input.
The timer will start its counting when the Start input is called by a flow, which in turn triggers the Started output flow.
The Tick output flow will get called at every frame while a timer is active. And finally, when the timer is completed, it will call the Completed output flow once.
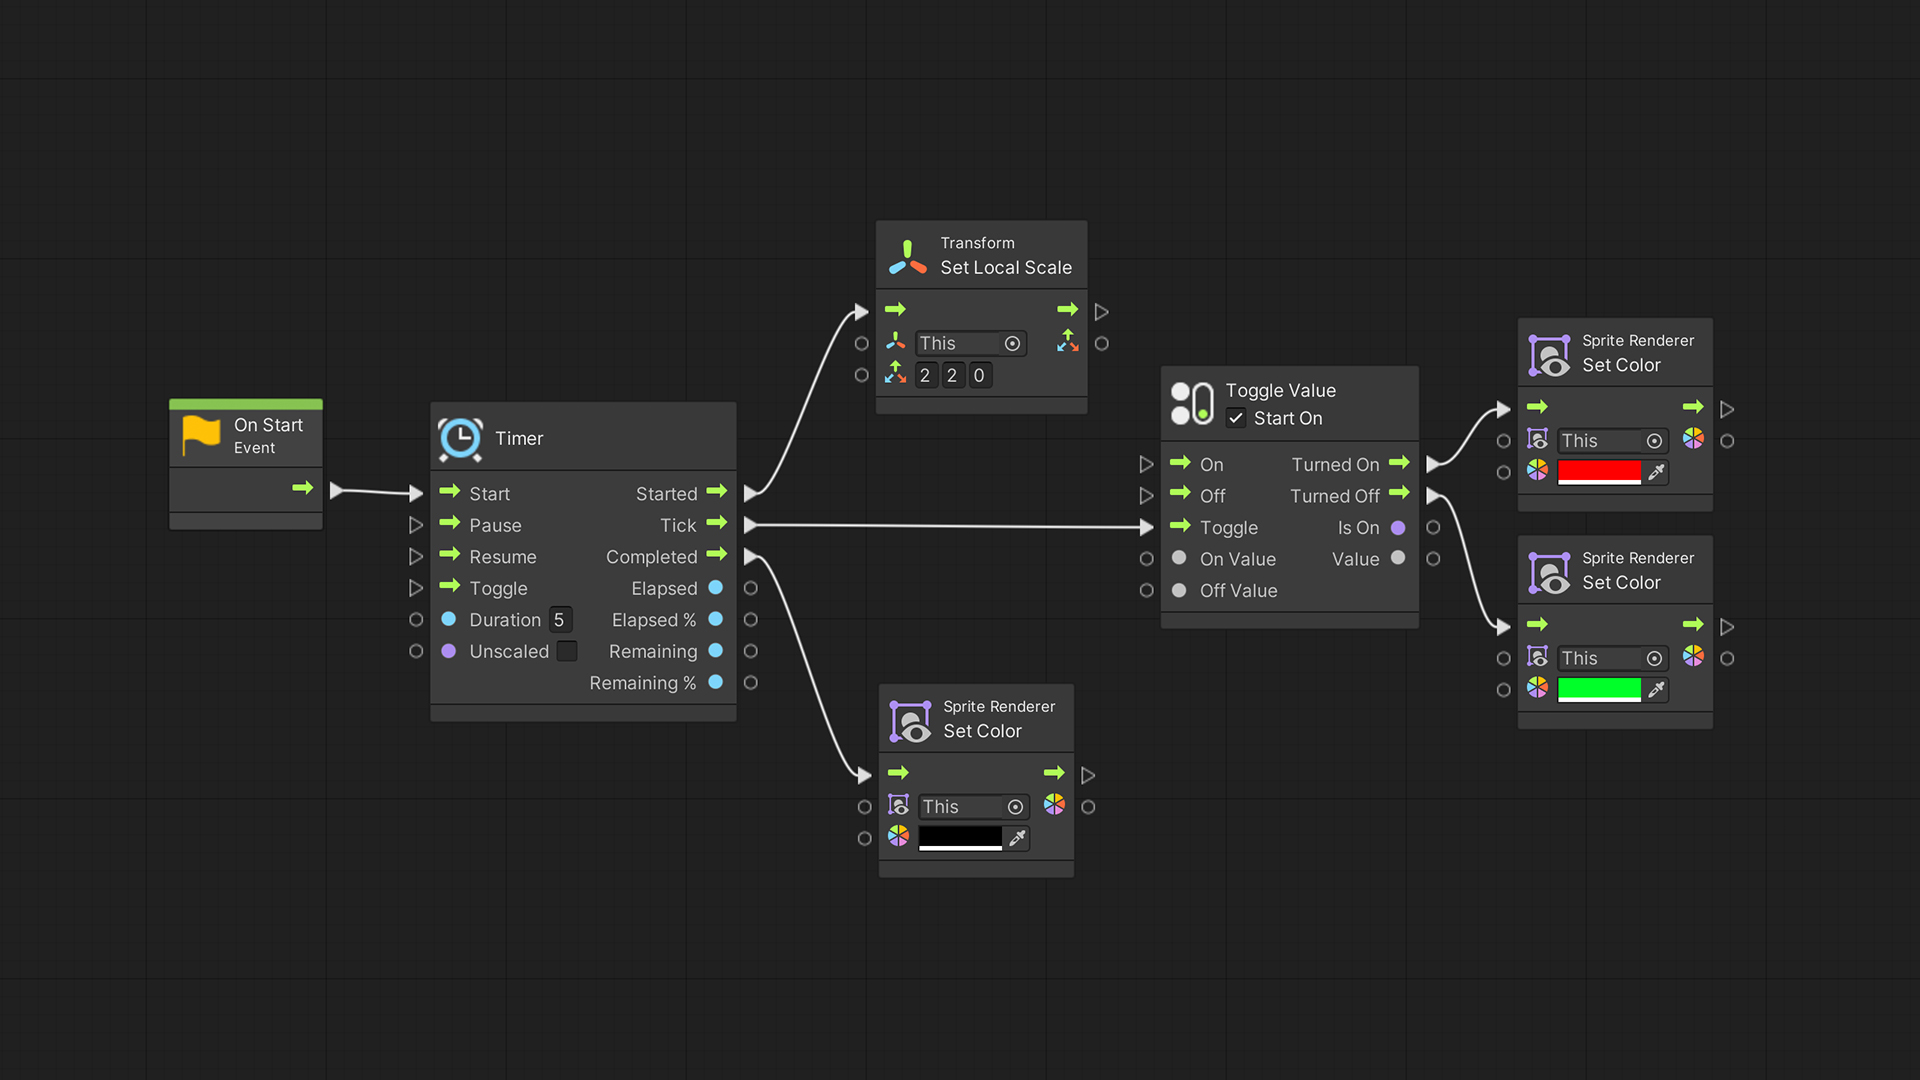
In the example below, we have a Start event connected to the Start input of the timer. The Started output flow is connected to a Set Local Scale node with a value of 2 at both the X and Y, which will double the Game Object’s size.
The Completed output flow is connected to a Sprite Renderer Set Color node, which tints the sprite black.
As for the Tick output flow, it’s connected to the Toggle Value node, and with each toggle, it will switch between the red and green colors.
At Play Mode, the Game Object’s sprite will increase in size, recolor from white to flickering red and green, and finally, settle with black.
A Timer node also features the Pause and Resume input flows, which halts the duration countdown and resumes it, while the Toggle input flow alternates between the Pause and Resume behavior.
In the following example, we pause and resume the timer by pressing the Space button.
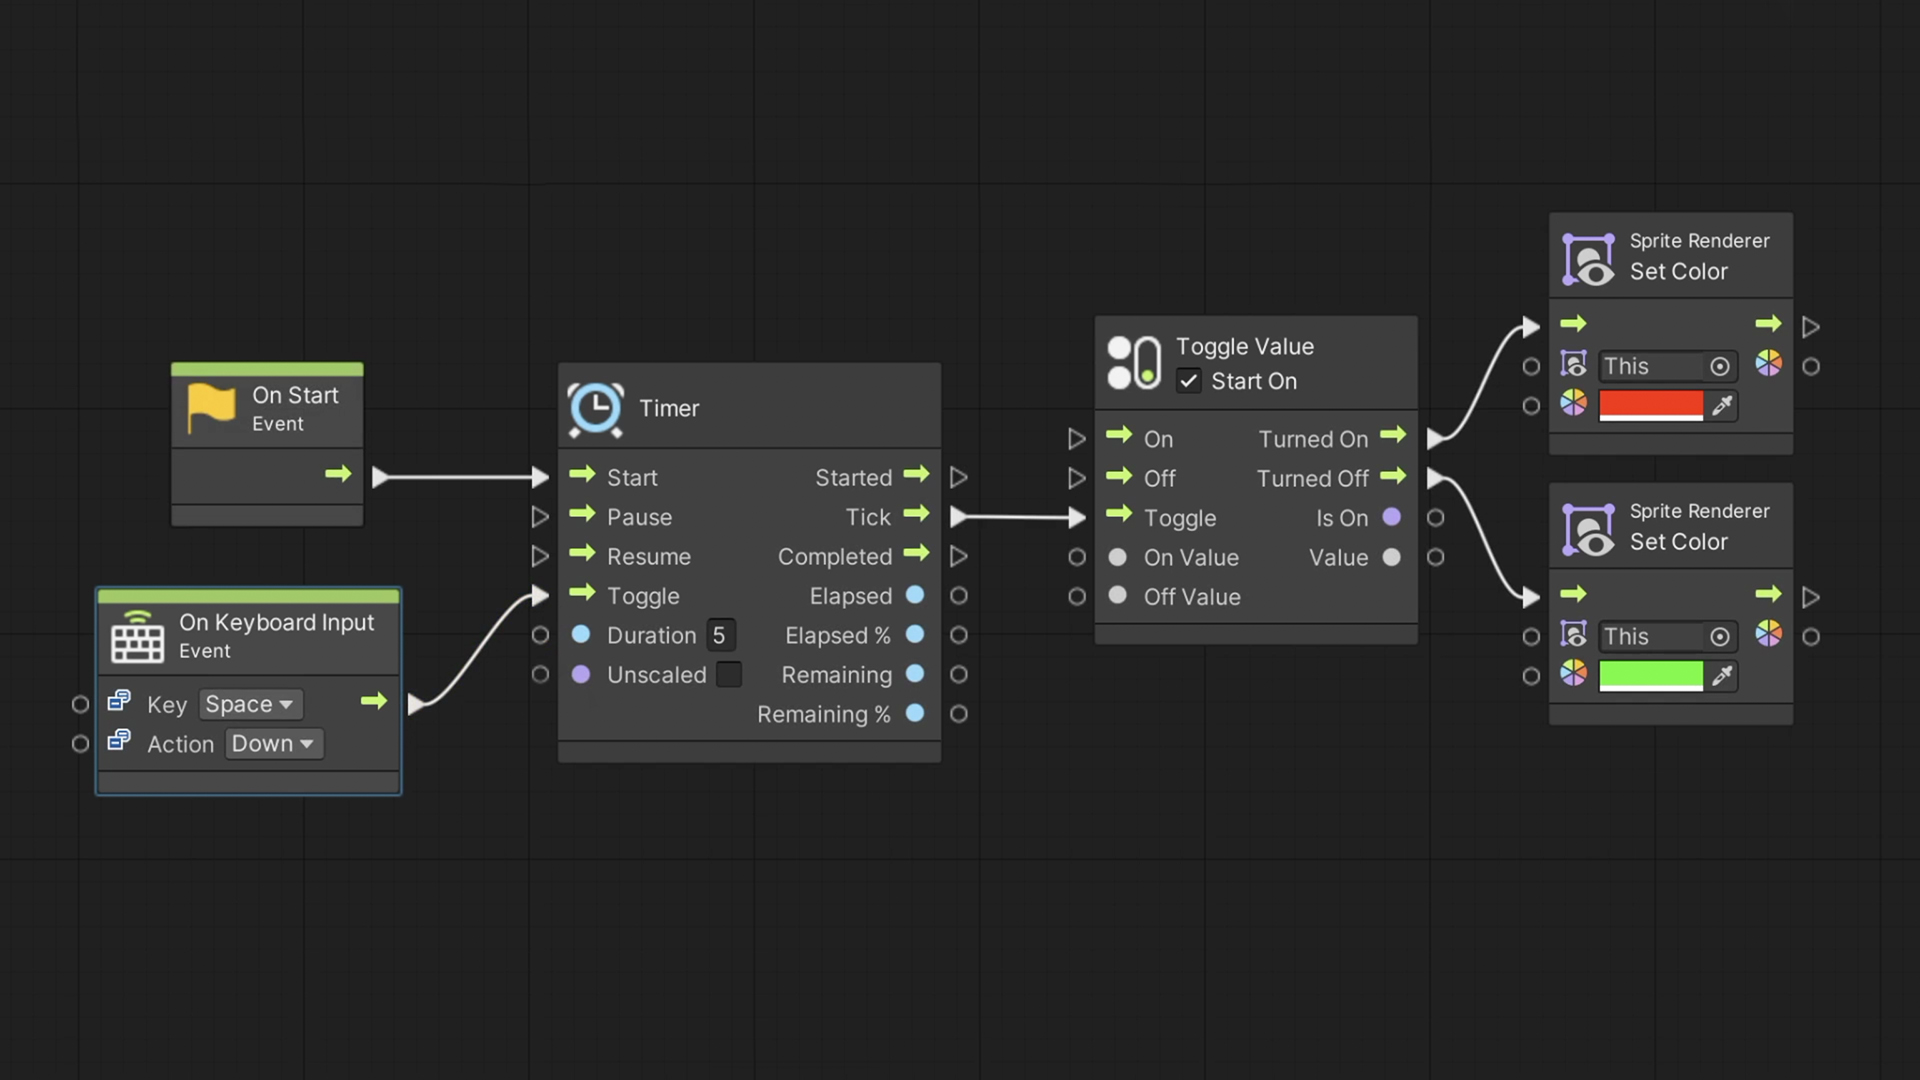
To retrieve the time passed since the timer has started counting, we use the Elapsed output, and to receive the time remaining till the timer completes, we use the Remaining output.
We can get both of these values in a number of seconds or in percents, which will return a float between 0 and 1.
Cooldown
A similar node we have is the Cooldown node. With it, we can limit an action to happen at most once every few seconds. It can be used to restrict the number of gunshots in a given time frame or enforce a sufficient delay from one jump to another.
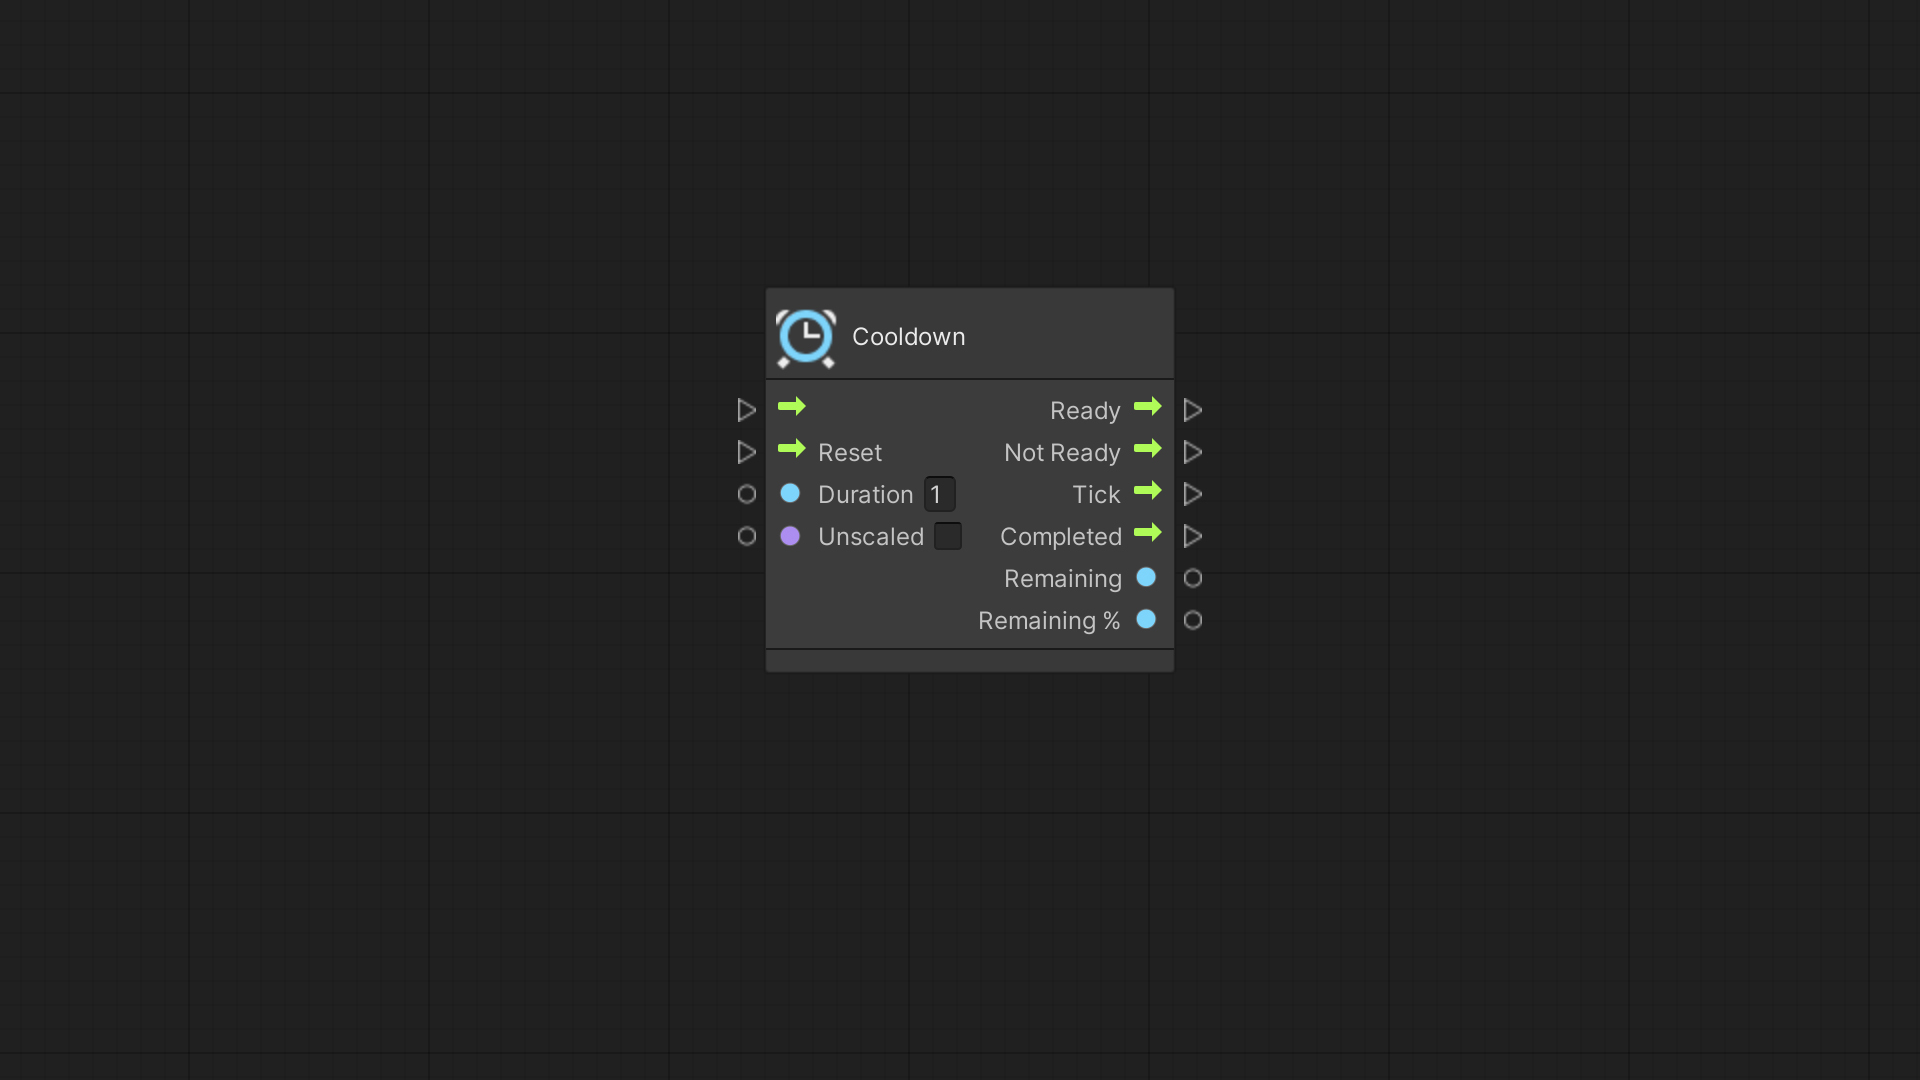
In this node, the duration number sets the time it takes for the cooldown to be completed.
When the cooldown is completed, it will trigger the Completed output flow. Till completion, the Tick flow will run every frame.
When we trigger the main input flow, the node will invoke either the Ready or Not Ready output flows, depending on whether or not the cooldown timer is over.
Current Time
Delta Time
Get Delta Time node provides us the time in seconds that passed since the previous frame – usually, it will be a fraction of a second.
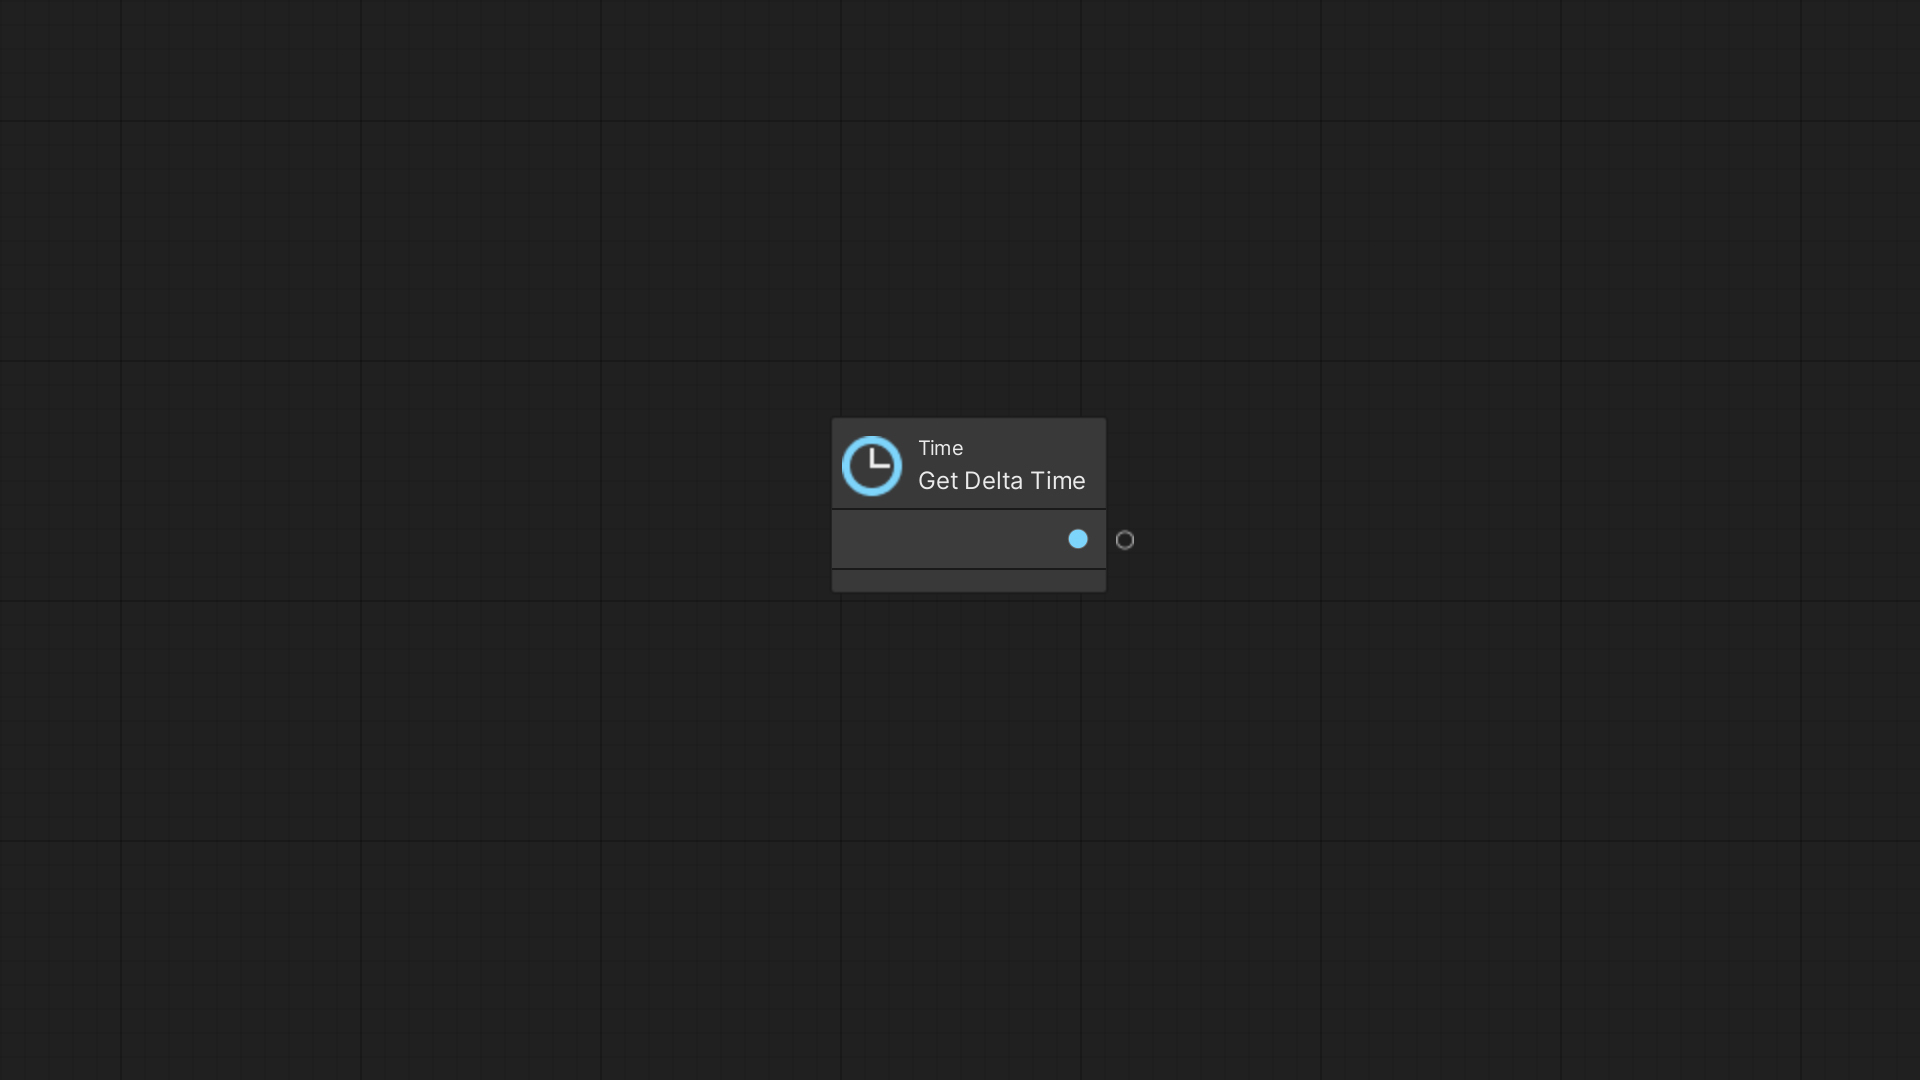
It’s a critical node that we’ll use to make our game smooth and independent of the frame rate.
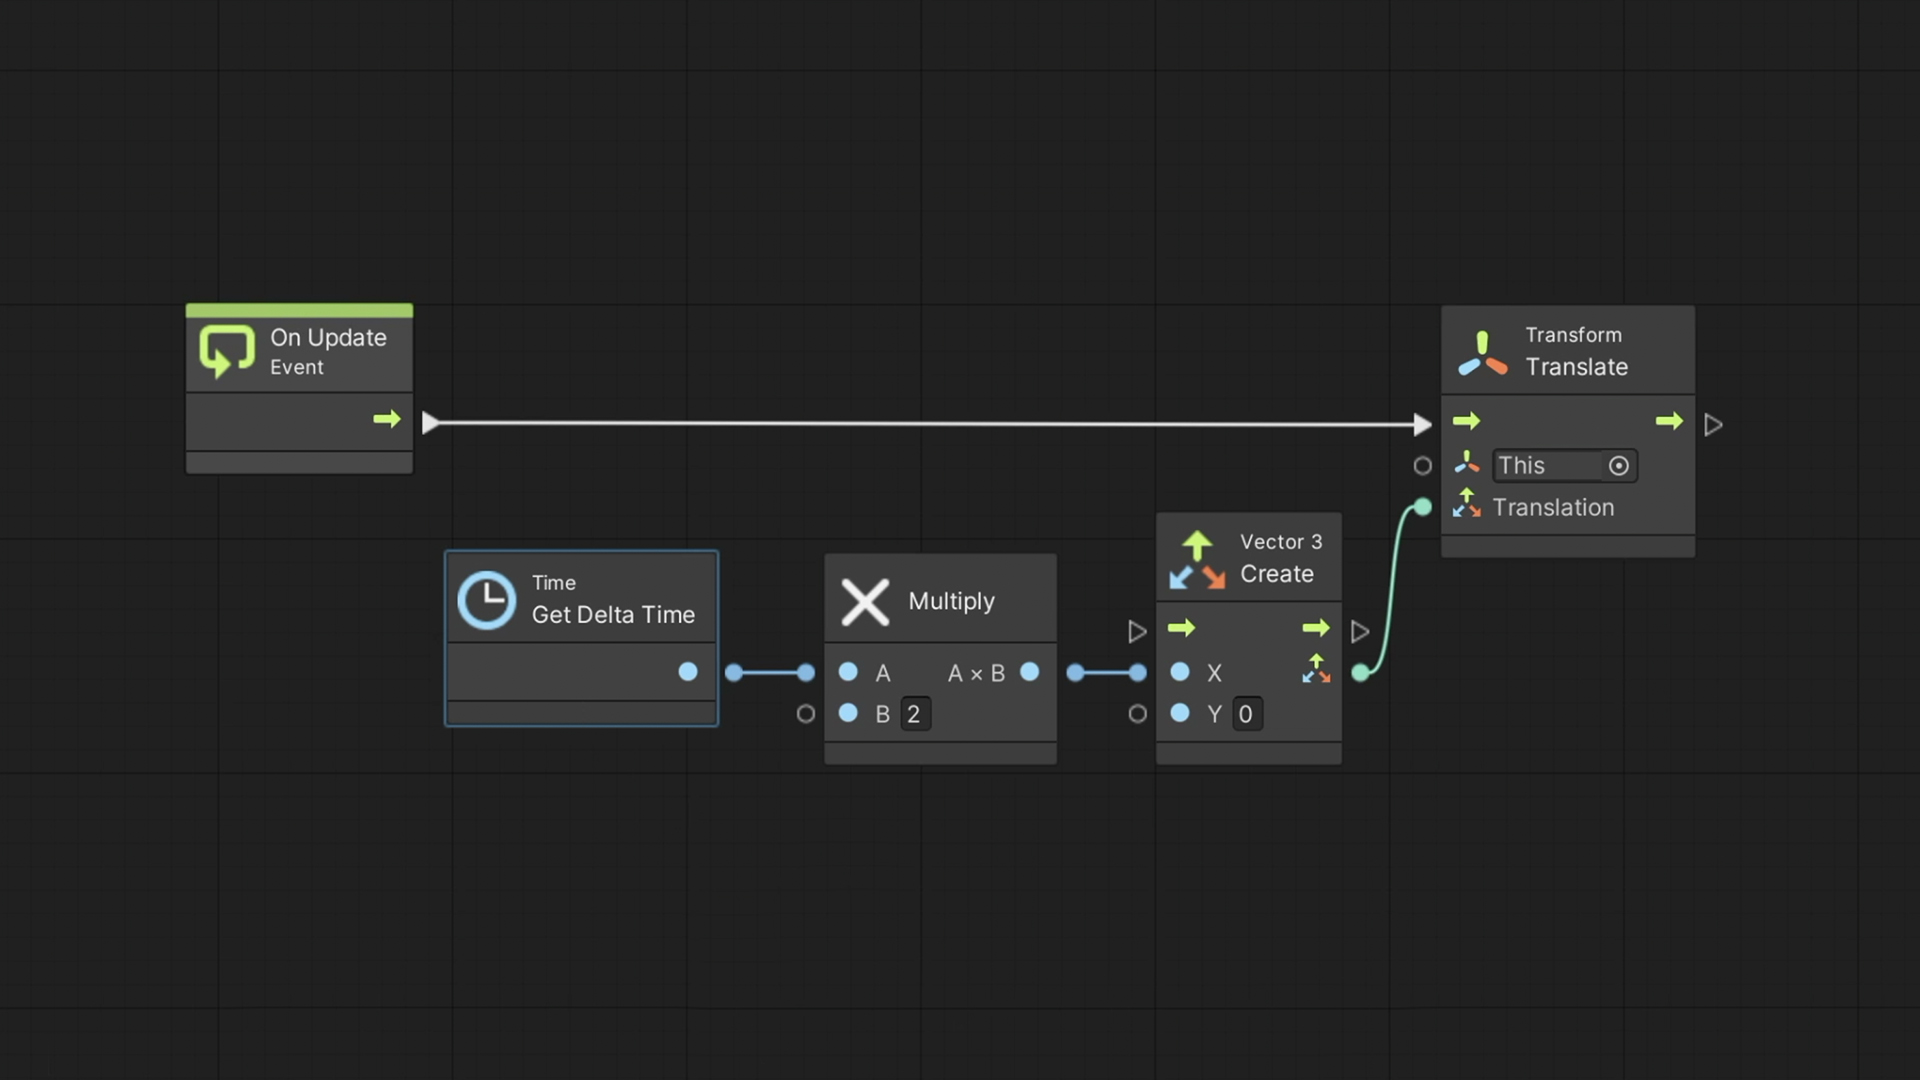
For example, in the following graph, we got an Update event node connected to a Translate node, which will move a Game Object on the X-axis 2 units per frame. Multiplying the 2 by Time Delta Time will move the Game Object on the X-axis 2 units per second. This way, we can guaranty constant motion throughout the game’s lifetime.
Counters
Two utility nodes we should know are Get Time and Get Frame Count.
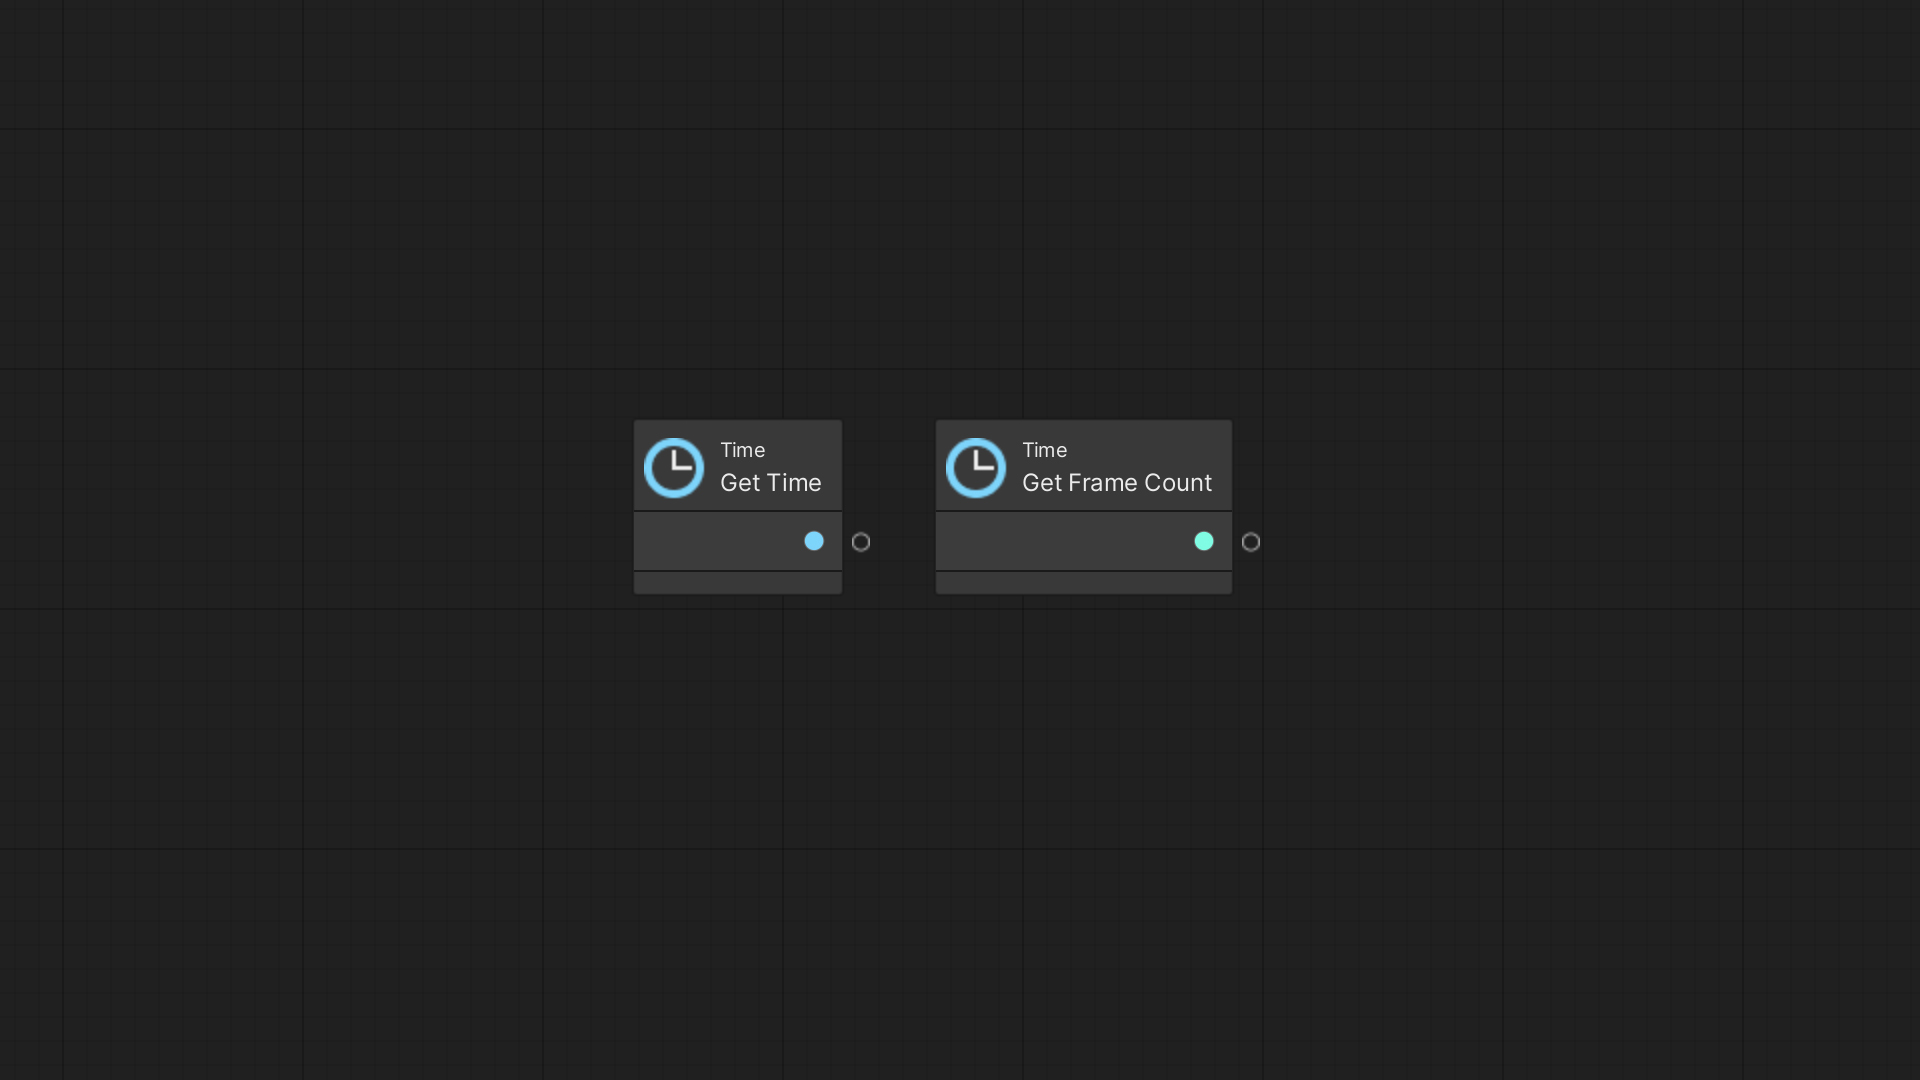
The Get Time node provides the time the game has run in total.
Get Frame Count node is the number of frames passed since the start of the game. It starts with zero and increases by 1 with each frame.
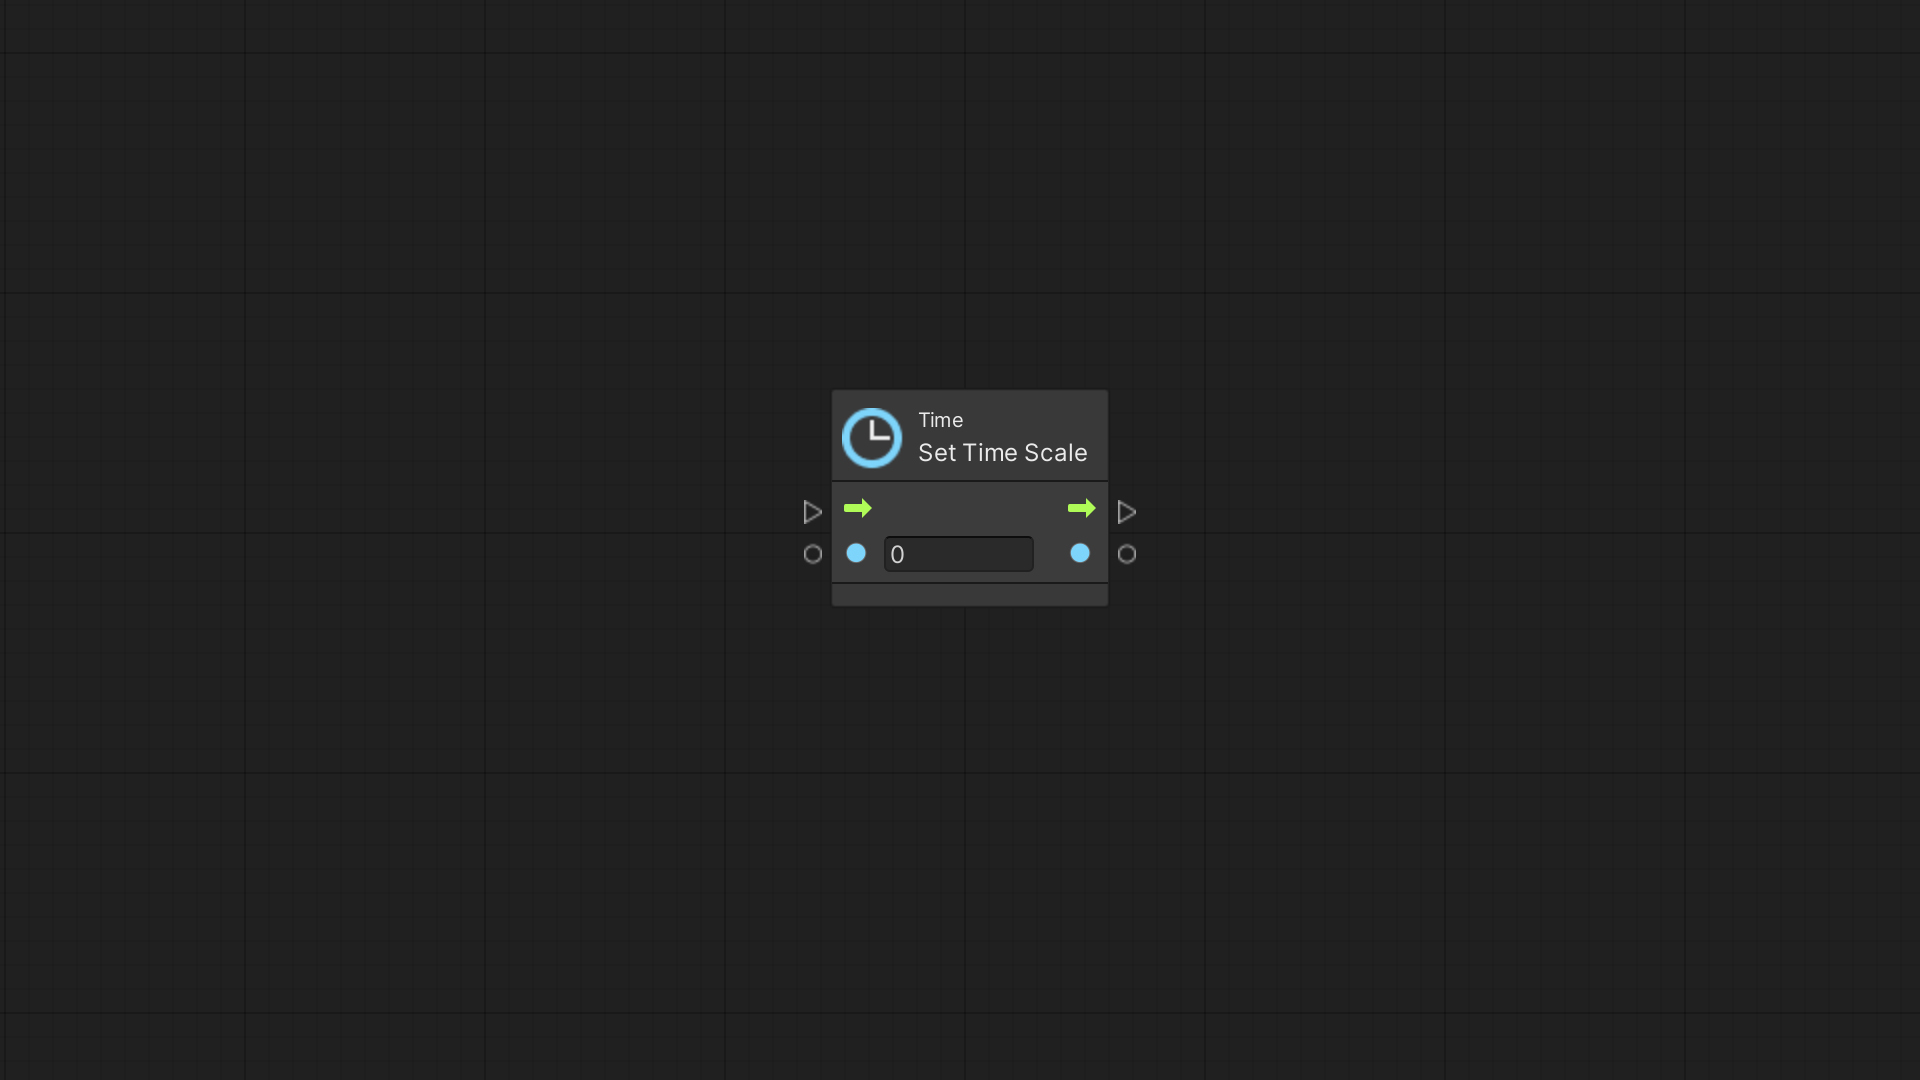
Time Scale
The Set Time Scale node allows us to change the rate at which time progress in the game. We can use it for slow-motion effects or speed up. By default, the Time Scale is set to 1, which means the time passes by just like in real life.
You may have noticed that some of the nodes covered in this artice have the Unscaled input. Enabling this option will make the node’s time pass in real-time, even if we change the Time Scale.
The last nodes for this article are the Get Unscaled Delta Time and the Get Realtime Since Startup nodes.
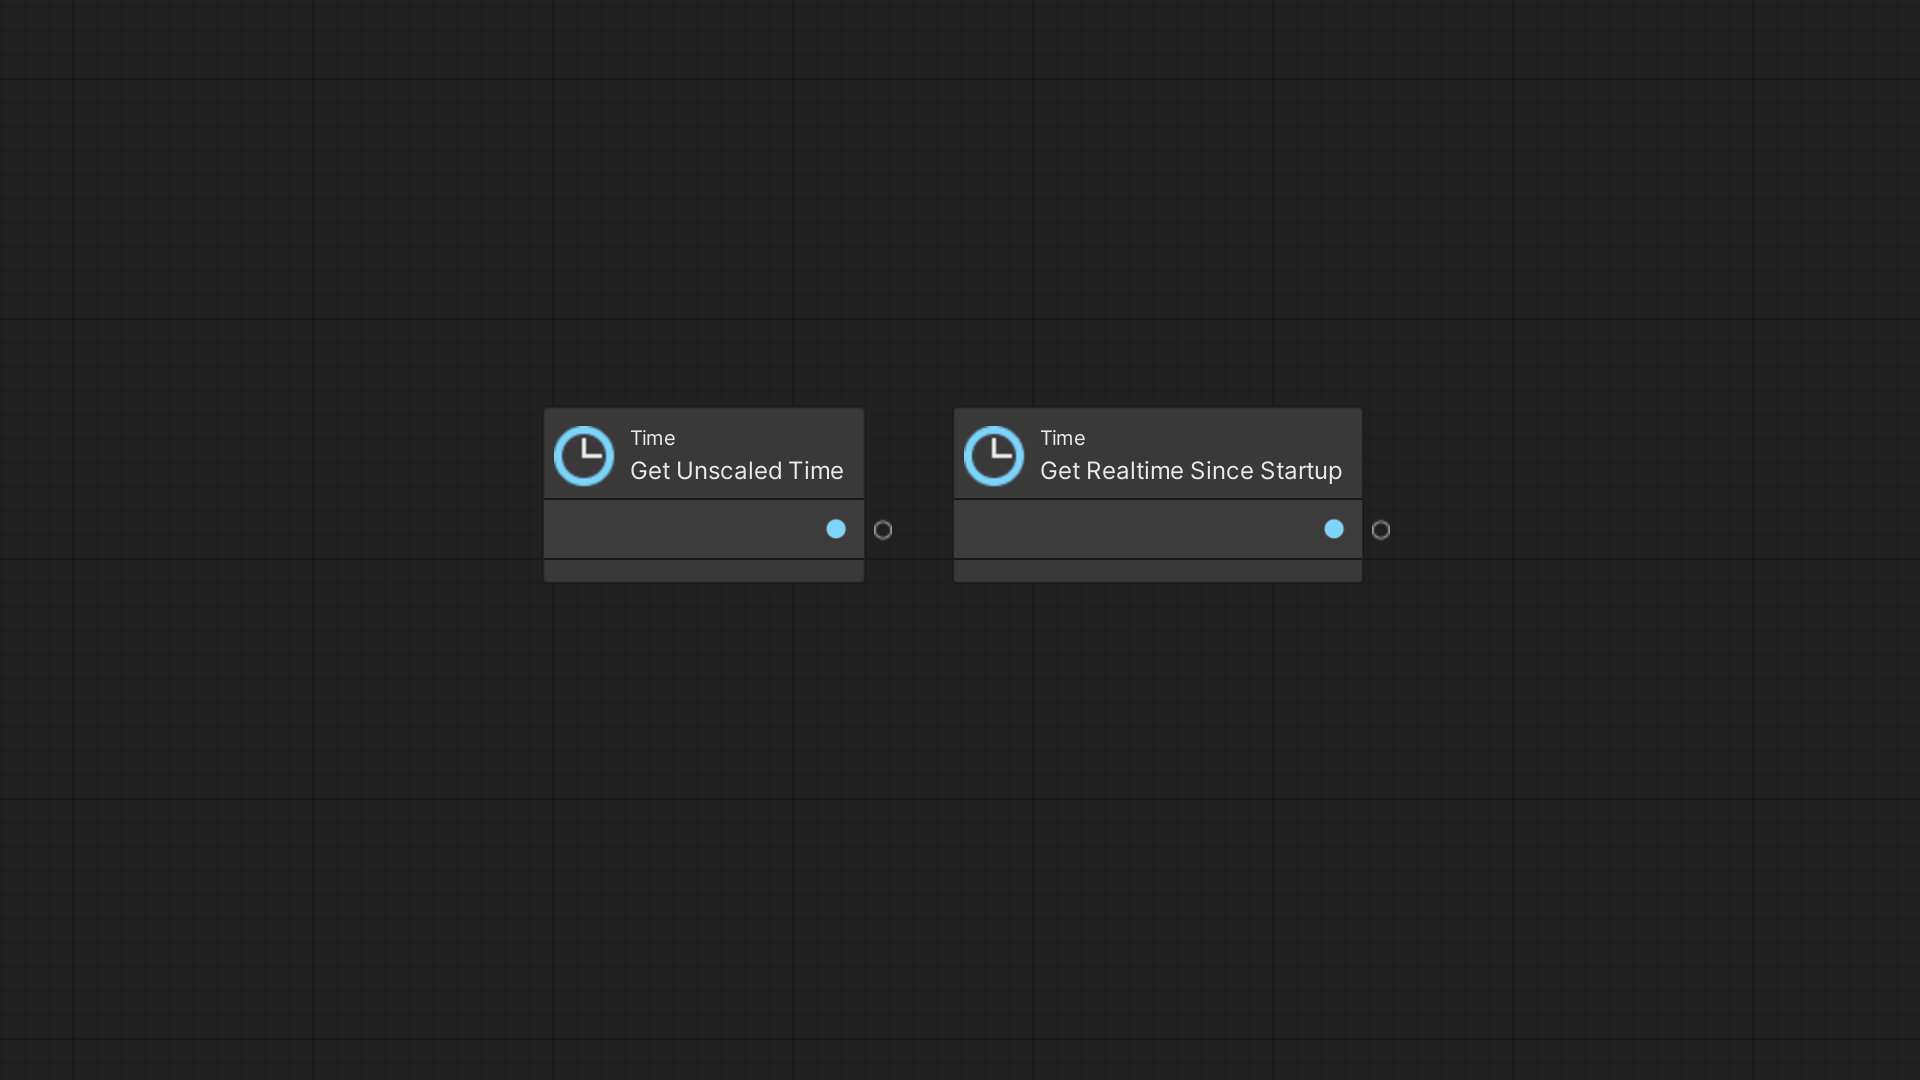
The Get Unscaled Delta Time node is like the Get Delta Time node, but it’s unaffected by Time Scale changes.
The Get Realtime Since Startup node is the real-time seconds since the game started, ignoring the time scale.
Thanks for following along!